The 'Plan Sheets' screen is your central hub for accessing and managing all construction drawings. The screen allows you to view every plan sheet you have uploaded, as well as those shared with you by team members and project stakeholders.
Beyond simply viewing plans, this screen allows you to actively collaborate. You can share and download sheets, compare different versions side-by-side, and work extensively with markups.
Understanding Markups
Markups are essential visual tools used to highlight proposed alterations, call out specific action items, or pin notes to exact locations on the construction plan. They can include text notes, photo attachments, and drawn shapes.
Markups can be applied across web and mobile platforms in two primary ways:
- Directly on Plans: Team members can add personal markups for their own reference or share specific markups with selected collaborators.
- Through Project Documents: You can link plan sheets directly to project documents—such as Submittals, RFIs, Change Orders (COs), and Punch Lists. This allows you to visually pinpoint the exact area on the plan that the document references.
Explore the topics below to learn how to navigate, manage, and collaborate using Plan Sheets.
You can select and download the plan sheets as image files directly to your device as local copies. See Download Plan Sheets for more details.
The Plan Sheets Screen
- Click the Main Menu button in the top-left corner.
- Under the 'Documentation' section in the drop-down pane, select 'Plan Sheets.' (The Plan Sheets screen will open by default.)
- Note: If you are already working within the Plans module, click 'Plan Sheets' on the left-hand menu.
Use the options at the top-right to choose your preferred view:
| - | Grid View | |
| - | List View |
Grid View
The Grid View is shown by default when you open the 'Plan Sheets' screen. The plan sheets are shown as thumbnails.
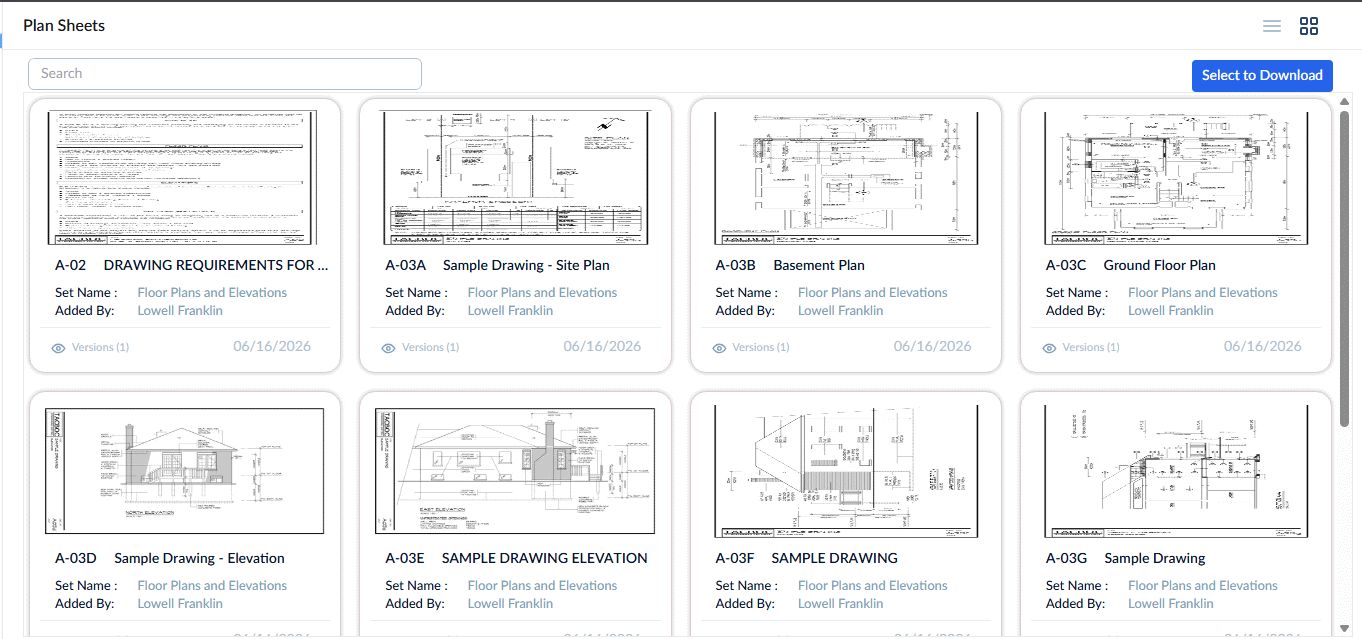
Search and Filter Options:
- Use the 'Search' box at the top-left to search for a specific plan sheet using sheet name or sheet number as your search criteria
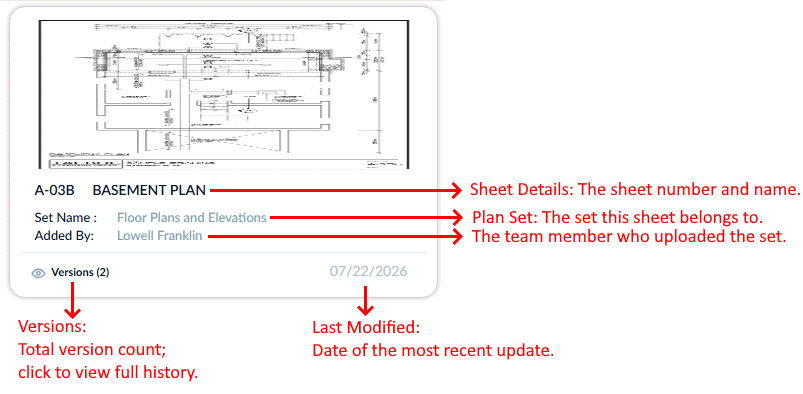
Each thumbnail previews sheet details with a version history shortcut at the bottom.
- Click a thumbnail to view the drawing.
An example is shown below:
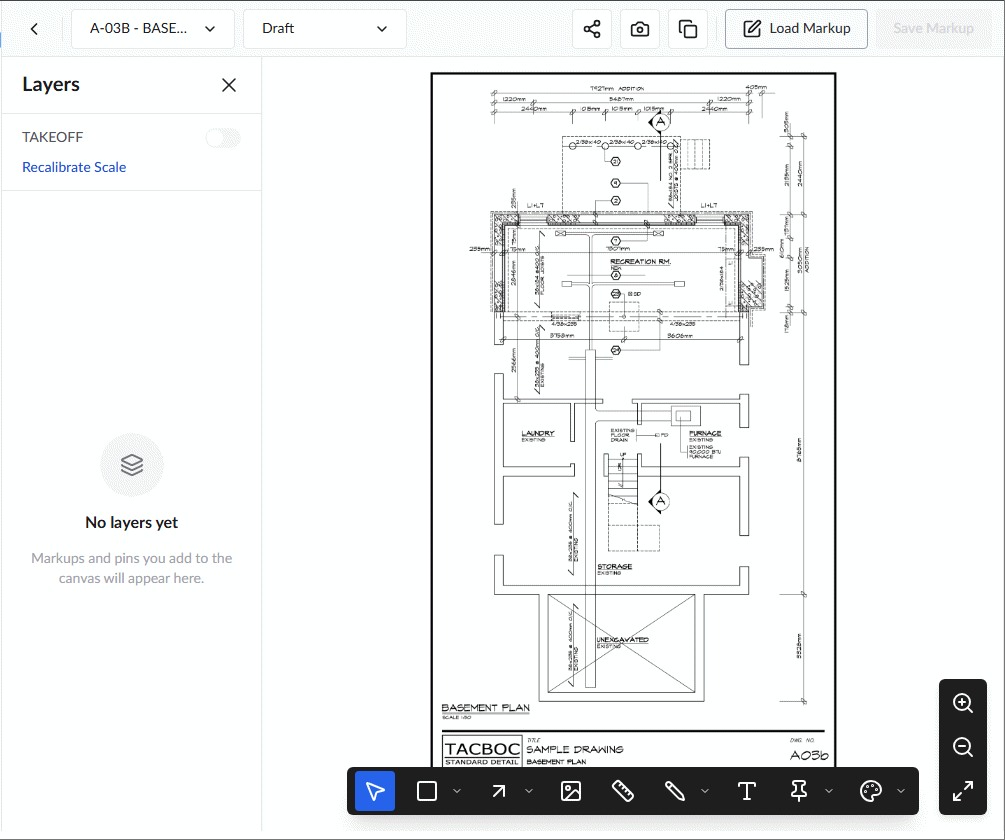
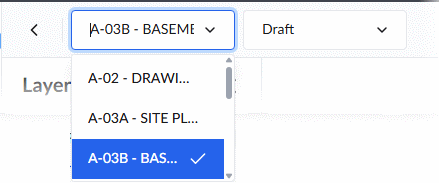
The drawing opens the latest version as a draft sheet, ready to create any markups. You can switch to a different sheet at anytime without leaving the module, using the first drop-down at the top-left:
From the sheet view, you can perform the following actions:
Navigation & Viewing
Zoom-In and Out - Use the mangification tools at the bottom right to zoom-in and zoom-out. You can also use the following keyboard shortcuts:
- Press the '+' button on your keyboard repeatedly to zoom-in
- Press the '-' button on your keyboard repeatedly to zoom-out
- Press 'Enter' to reset
Working with Markups
Open with a Selected Markup: Use the second drop-down menu at the top-left to load the sheet with a specific existing markup displayed.

Load Existing Markups: Use the Load Markup tool to superimpose selected markups over your current view of the sheet. See View Markups for more guidance
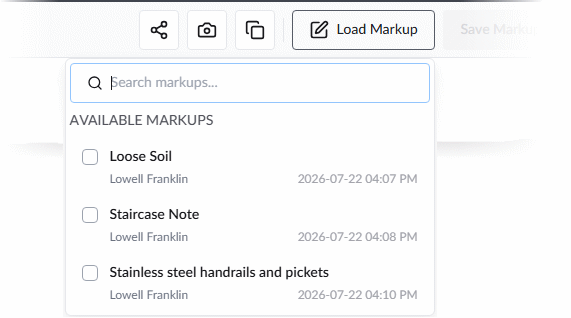
Annotate: Use the markup toolbar at the bottom of the screen to create new markups. See Create and manage new markups to learn more.
Advanced Actions
Compare Sheets: Click  to select a sheet and view an overlay comparison. See Compare Plan Sheets and Revisions for guidance.
Download Sheet with Markups: Click  to save a local copy of the plan sheet (as an image or PDF) with the currently viewed markups included. See Download Plan Sheet Markups to learn more.
Share the plan sheet - Click  to configure visibility and assign access levels to team members and other project stakeholders. See Share a Plan Sheet for guidance.
View the Version History of a Drawing
- Click the 'Versions' link at the bottom left of a thumbnail in the grid view of the plan sheets screen.
The version history of the drawing is shown:
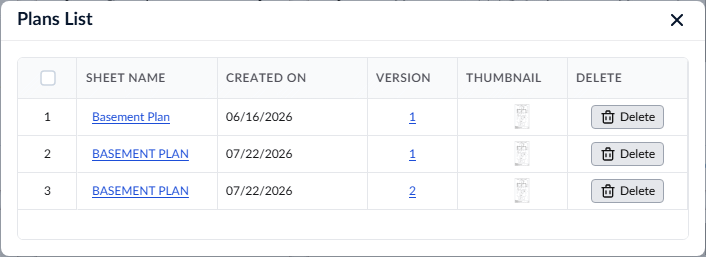
- Sheet Name - The specific label assigned to this version of the drawing. Click the name to open that version of the drawing.
- Created on - The date the specific version was uploaded to the system.
- Version - The revision number of the plan drawing. Click the version number to opan that version of the drawing
- Thumbnail - Click a thumbnail to open and view that specific version of the plan sheet.
- Actions - Use the 'Delete' button to remove a version. Note: Versions with markups cannot be deleted. You must remove all markups before the sheet version can be removed. See Manage Plan Markups to learn about deleting markups.
List View
- Click the list view button
 to switch to the list view
The list shows all plans pertaining to the project with their details.
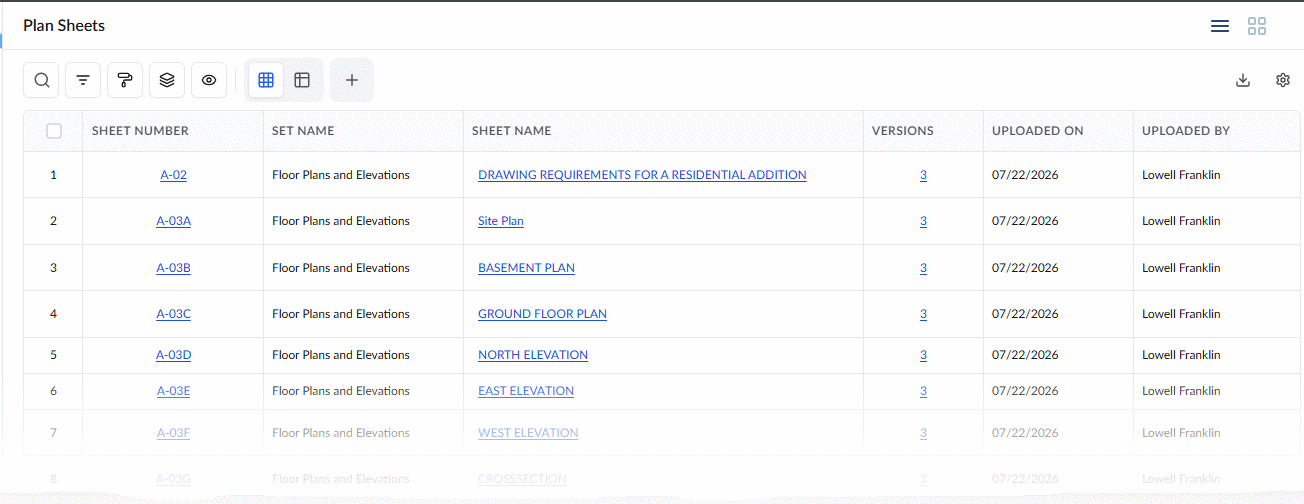
The details of the plan sheets are shown in a table.
- Sheet Number - The identification number of the plan sheet. Click the sheet number to open the latest version of the plan sheet.
- Set Name - A descriptive name for the set that the plan sheet pertains to.
- Sheet Name - The label assigned to the plan sheet. Click the sheet name to open the latest version of the plan sheet.
- Version - The number of plan sheet revisions available in the system. Click the number to open the revision history.
- Uploaded On - The date of the upload of the sheet
- Uploaded By - The name of the project manager who uploaded the sheet
- Discipline - The division of work to which the plan sheet pertains
- Sheet Thumbnail - Click a thumbnail to open the latest version of the sheet.
Search, Filter, and Sorting Options
- Click the magnifier icon and use the 'Search' box located at the top left to find an entry using any value from the table as search criteria
- Click any column header to sort the rows in ascending or descending order based on that column's data.
- Click the cog wheel icon at the top right to adjust the display density and customize the display and order of the columns
- The options at the top left allow you to filter the entries, create nested groups of entries, highlight cells and manage personalized and customized views of the table. Use the links below to learn more:
Was this article helpful?
That’s Great!
Thank you for your feedback
Sorry! We couldn't be helpful
Thank you for your feedback
Feedback sent
We appreciate your effort and will try to fix the article