To streamline master schedule development, Linarc helps you by offering an optional feature that can automatically transform your project master budget line items into an initial draft of scheduled tasks and deliverables. While you are always free to build your master timeline entirely from scratch, using this optional auto-generated draft gives you a solid head start-ensuring all project deliverables remain directly aligned with funded budget items and your approved scope of work.
Note: This auto-generated draft schedule can only be imported from the locked budget if the project's billing method is set to 'Schedule Progress-Based,' in accordance with your governing contract. If a different billing method applies to your project, budget-to-schedule generation will not be available, as those billing workflows operate independently of the project schedule
Using this draft as your master schedule foundation, you can easily structure and coordinate project execution across all trades by:
- Defining the Master Schedule: Establish high-level schedule items—such as project phases, deliverables, and trade scopes—imported directly from budget lines with one-to-one mapping.
- Building Out the WBS: Subdivide high-level schedule items into granular sub-tasks, deliverables, and field activities across any tier of the Work Breakdown Structure (WBS).
- Delegating Subcontractor Work: Assign specific WBS work lines and sub-tasks directly to awarded trade contractors for detailed execution planning.
- Establishing Timelines & Dependencies: Set precise start and end dates and establish logical dependency relationships (such as Finish-to-Start) to synchronize multi-trade workflows and avoid site overlaps.
- Allocating Task Budgets: Map funds directly from source budget line items to scheduled tasks. This links your budget and SOV to the project schedule, enabling automated progress-based monthly billings and accurate financial tracking against your baseline.
Prerequisite: A foundational budget must be set up and locked as the project baseline.
To import the project schedule from the budget
- Click the main menu icon at the top-left of your screen.
- Select 'Contract' under the 'Finance & Controls' section in the drop-down menu.
Tip: Press and hold the 'Cmd' (Mac) or 'Ctrl' (Windows) key on your keyboard while clicking to open the module in a new browser tab.
- Select 'Budget' on the left
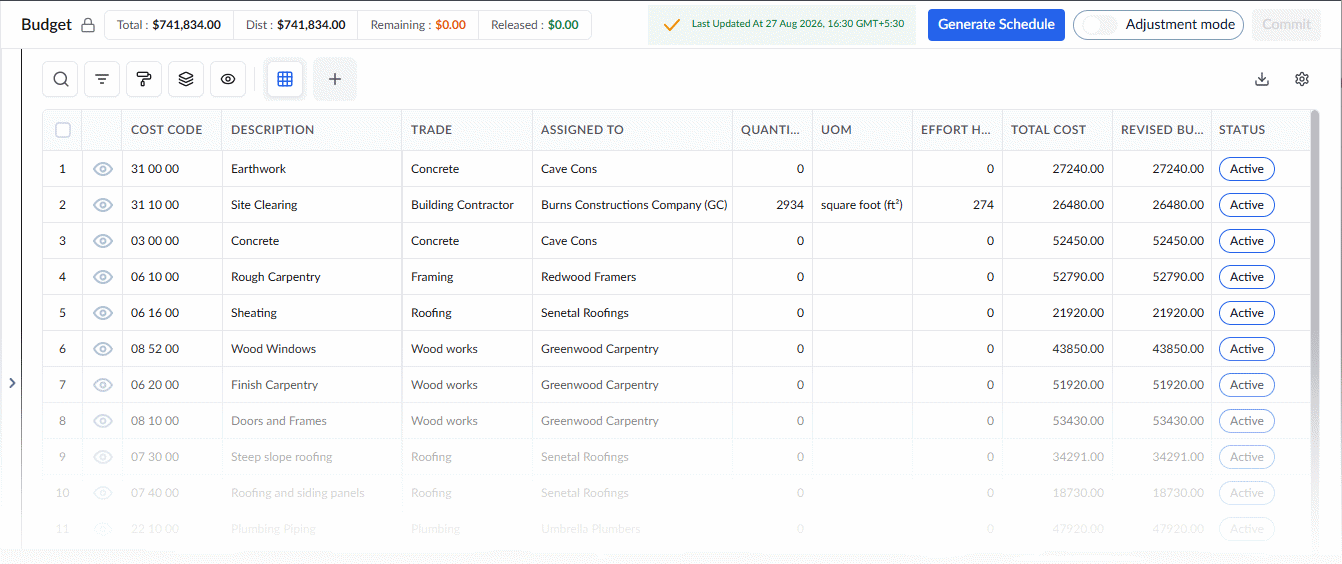
- Click 'Generate Schedule' on the top-right
Reminder - The 'Generate Schedule' feature becomes visible only after the project budget has been locked.
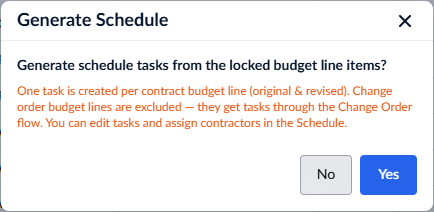
- Confirm your choice by clicking 'Yes.'
The draft schedule is created instantly.
To access the auto-generated schedule
- Click the main menu icon at the top-left of your screen.
- Select 'Schedule' under the 'Scheduler' section in the drop-down menu.
The scheduler opens in the grid view by default.
- Click 'Schedule' at the top and select 'Grid' on the left if you are on a different screen in the 'Scheduler' module.
The schedule grid automatically populates with all budget line items as default schedule items. Planned start and end dates are initially set to the current date with a one-day duration. Each item is automatically assigned to the contractor designated on the corresponding budget line.
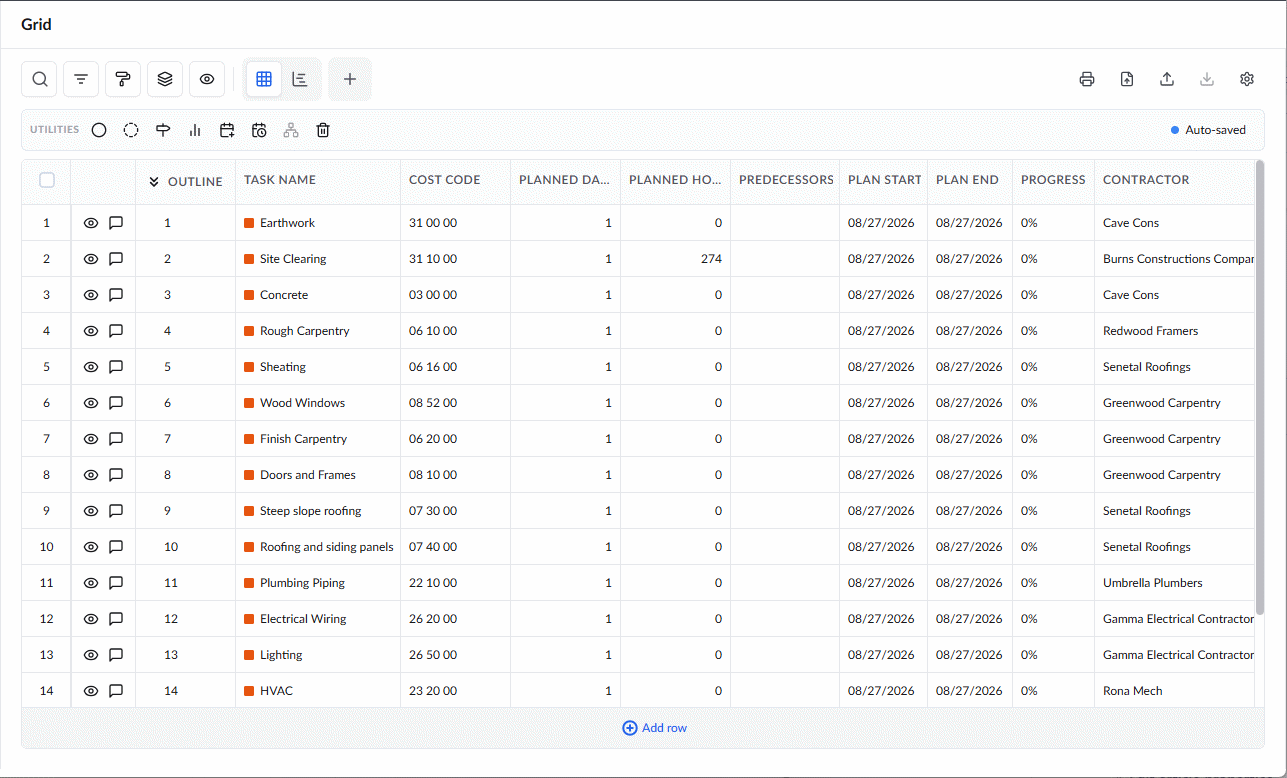
From this draft schedule, you can:
Add new tasks
- Click 'Add row' at the bottom to add new parent level items
Add subtasks
Right-click on a task item, then choose 'Add' > 'Subtask' to insert a child task under it.
Repeat this process to build out successive levels of the WBS hierarchy. See Add subtasks for more details.
Define details for lowest-level items
For work packages or deliverables at the lowest level, specify:
- Task dependencies and relationships
- Duration (planned days)
- Labor or manhours
- Planned quantity of work
- Planned start date
Once dependencies and predecessors are set, the start dates of dependent tasks are auto-populated. You can override them manually if required.
- The end date is auto-calculated.
- See Add WBS Elements and Task Items for more details.
Parent-level task roll-up - Duration, manhours, and start/end dates of parent tasks are automatically calculated from their child items.
Critical path - The scheduler dynamically recalculates the critical path as you add tasks and define dependencies.
Add events
- To insert a milestone, inspection, or checkpoint event, right-click on the relevant item, hover over 'Add,' and select the desired event type.
Once you you have added the schedule items publish them to record them and push to the field.
See the following sections to know more:
- Specify Constraints For Scheduled Tasks
- Apply Formatting to Rows and Cells
- Apply Gantt Chart Color
- Add subtasks
- Add a checkpoint
- Add an inspection event
- Add a milestone
- Add dependencies
- Remove a task
- Publish a task
- Update task progress
To read about the schedule management in Linarc, see the 'Scheduler' section of this knowledge base.
Was this article helpful?
That’s Great!
Thank you for your feedback
Sorry! We couldn't be helpful
Thank you for your feedback
Feedback sent
We appreciate your effort and will try to fix the article