Checkpoints serve as a platform to analyze, evaluate and determine whether the project proceeds as planned and take necessary corrective actions. Every project phase should pass through the checkpoints at successive stages to ensure that the goals and deliverables are realized on time. This also helps identify potential issues and problems on time before they accumulate and create a major obstacle.
Stakeholders inspect the work done with a personal site visit or by gathering the details from the foremen at the checkpoints. They generate reports that detail the work packages/deliverables realized at that point in time and issues encountered. If required, they can introduce corrective actions and alter the plan/schedule for the successive stages accordingly.
The project dashboards also use the checkpoints to provide a heads-up on the upcoming checkpoint and the remaining number of days for the manager to observe the tasks' progress.
To add a checkpoint to a schedule
- Navigate to the schedule page of the project
- Identify the row containing the schedule item after which you want to insert a checkpoint
- Right-click on the row and choose 'Add' > 'Checkpoint'
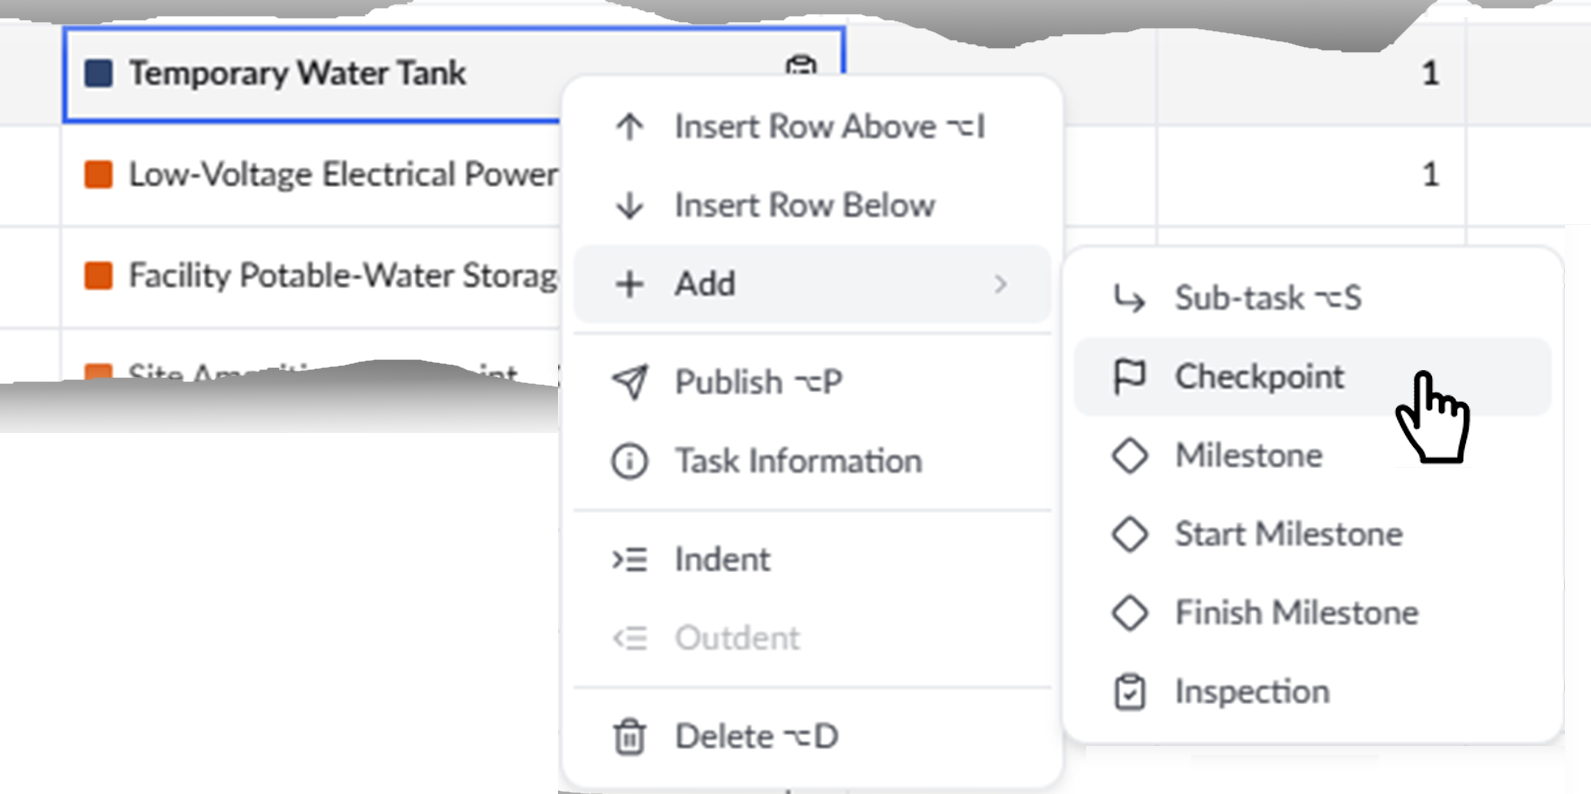
A new checkpoint row gets added at the same outline level as the row under which you created the event and is indicated with the icon :
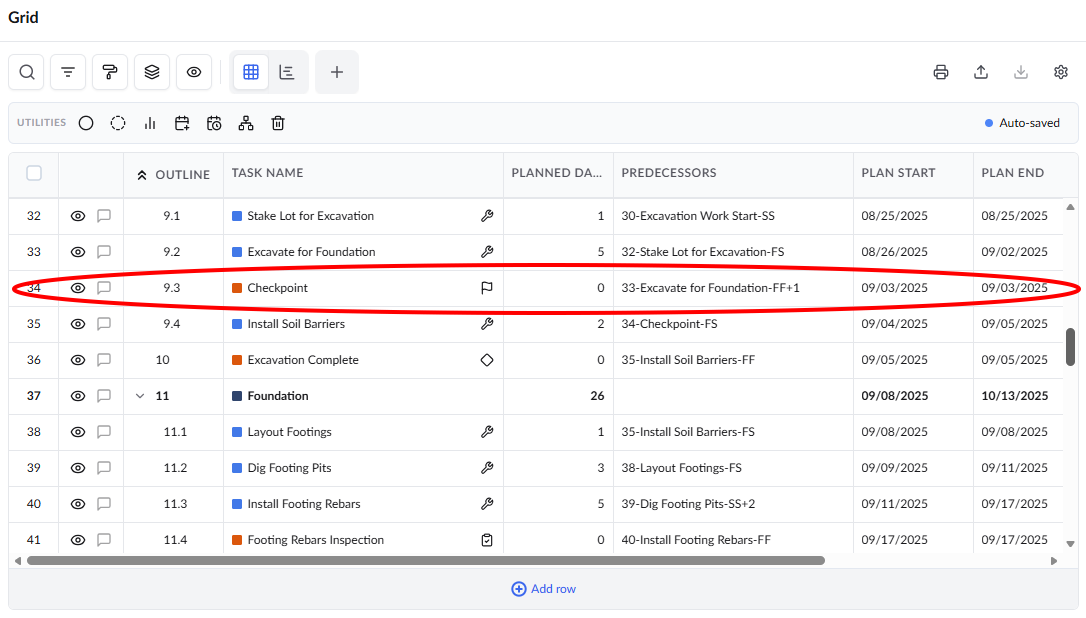
By default, checkpoints have a zero duration and inherit the end date of the preceding task under which they are added. They are typically self-assigned and cannot be assigned to other contractors.
- Double-click inside the 'Task Name' cell and enter a label for the checkpoint
- Set the dependency for the checkpoint. The date is automatically set to the next day to the end date of the predecessor task. See Add Dependencies for more details.
- Change the date for the checkpoint if required.
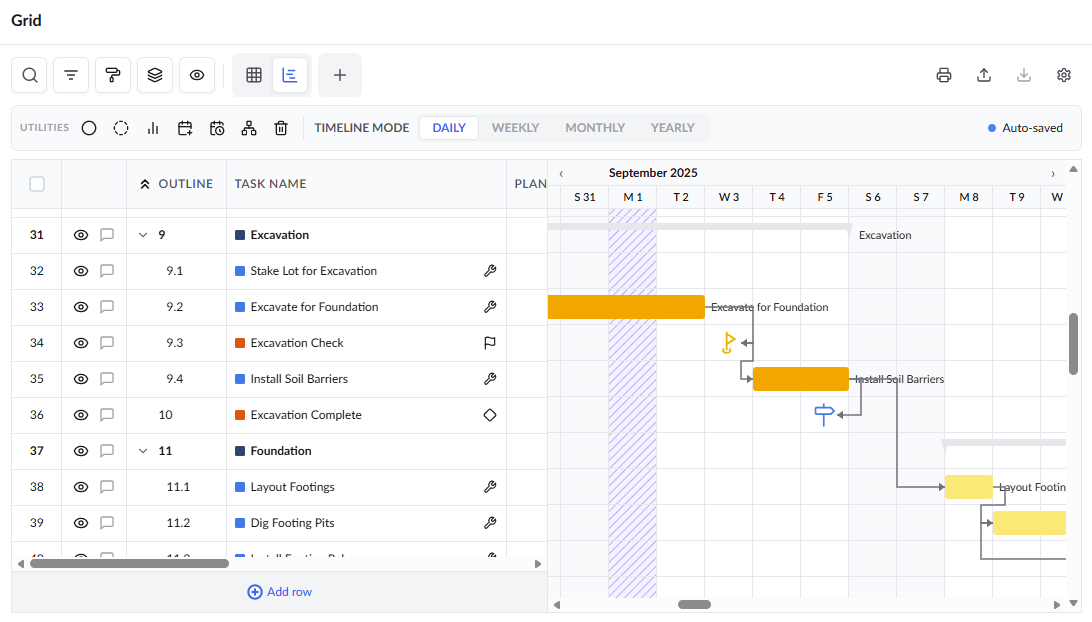
The checkpoints are also shown in the Gantt chart view of the project schedule.
To remove a checkpoint from the schedule
- Navigate to the schedule page of the project
- Identify the row containing the checkpoint.
- Right-click on the item and click 'Delete'.
The checkpoint is removed from the schedule.
To set the hierarchy level of an item
You can use the indent options to move an item to the parent level or child level in the WBS structure
- Right-click on the item to be moved to open the context-sensitive menu
- Use the indent buttons to move an item to the required hierarchy level in the parent-child relationship.
- Move right to make the task a child to the previous task
- Move left to move the task to one step higher in the hierarchy level
Was this article helpful?
That’s Great!
Thank you for your feedback
Sorry! We couldn't be helpful
Thank you for your feedback
Feedback sent
We appreciate your effort and will try to fix the article