You can add sub-tasks to parents at any level in the hierarchy of the WBS-based schedule and set their timelines in alignment with the respective parents. The subtasks are numbered with the next outline level of the parent task.
Note:
- If you manage a standalone project and have its budget locked, Linarc automatically populates the schedule grid with those budget line items to form an initial Work Breakdown Structure (WBS).
- You can use this auto-generated list as a foundation and simply edit them, add sub-tasks, or new items to complete your project timeline.
To add a sub-task
- Navigate to the schedule interface. The 'Grid' view opens by default.
- Click 'Grid' on the left to return to the grid view if you are on some other screen in the schedule menu.
The example shown below is the master schedule accessed by the GC. The subcontractors access the contractor schedule interface.
- Right-click on the parent task and choose 'Add' > 'Add Sub Task'
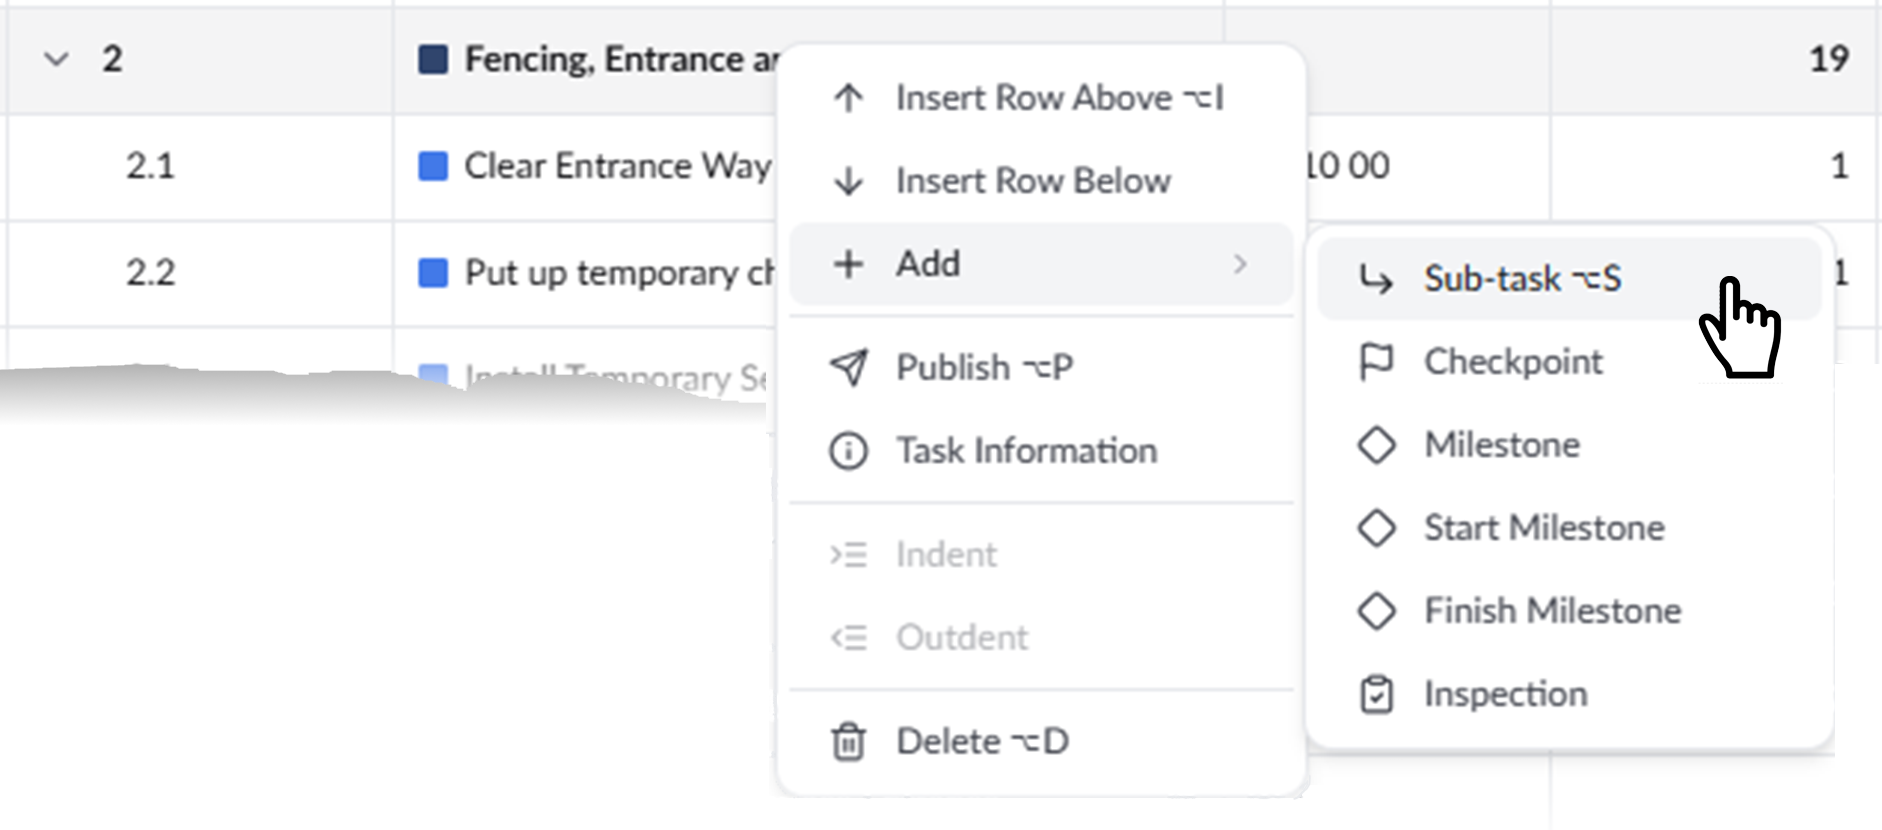
A new row gets added at one level lower than the parent task.
- Enter the details for the subtask. See Add or Edit WBS elements and task items to learn more.
- Repeat the process to add more subtasks.
Enter the values for each item as shown below:
Task Name - The label of the task/schedule item.
Cost Code - A unique identifier assigned to a specific cost item or activity, used to track expenses and performance at a granular level. This field auto-populates from the budget.
Planned Days - The number of days estimated to complete the task. You can enter the values in days. Alternatively, the Planned Days auto-populates if you enter the planned start/end dates manually.
Planned Hours - The effort hours required to complete the task. Autopopulates if the task is added from the budget. You can change the value manually as required.
Predecessors - The dependency of the task item on its predecessor. You can manually set the dependency. See Add Dependencies for more details on this.
Plan Start - The scheduled commencement date of the task. The planned start date auto-populates for dependent tasks based on the relationship with the predecessor task.
Plan End - The completion date of the task. Auto-calculated from the Plan Start date and the Planned Days. You can also manually enter the planned end date so that the planned days gets auto-populated.
Delays - The number of days that the task is behind or in advance of the schedule. This is calculated from the planned end and the predicted end. If the task is behind schedule, the number of days delayed is denoted in red. If the task is estimated to be completed in advance, the number of days is denoted in green.
Progress- The current completion percentage of the task.
- Field-level tasks - Fetched from the reports from the foreman. The project managers can also manually update the progress.
- Parent-level tasks - Auto-calculated from the progress of the children.
- Assigned Tasks - The subcontractor shares the tasks' progress with the general contractor.
Planned Quantity - The total amount of work done/deliverables planned for the task.
Actual Quantity - The amount of work done/deliverables realized with the current progress state. Fetched from the progress reports of the last-level child tasks.
Unit of Work - The unit by which the work quantity/deliverable is measured.
Contractor - The contractor company to whom the task item is allotted.
Location - The spot on the site where the task is executed. This is optional and can be entered manually.
Note:Once a task is published, you cannot directly modify its planned start or end date. To adapt to evolving project requirements, you must initiate a formal Reschedule process. For step-by-step guidance, see Reschedule Specific Tasks.
Set the hierarchy level of an item
You can use the indent options to move an item to the parent level or child level in the WBS structure
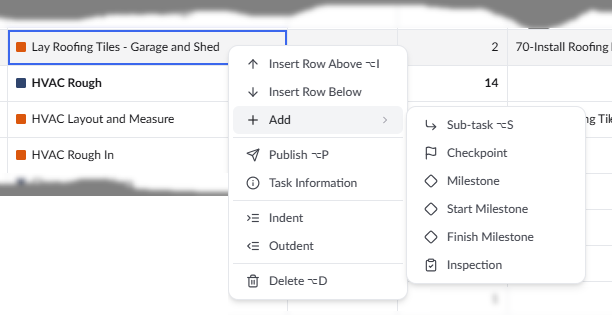
- Right-click on the item to be moved to open the context-sensitive menu
- Use the indent buttons to move an item to the required hierarchy level in the parent-child relationship.
- Move right to make the task a child of the previous task
- Move left to move the task to one step higher in the hierarchy level
Was this article helpful?
That’s Great!
Thank you for your feedback
Sorry! We couldn't be helpful
Thank you for your feedback
Feedback sent
We appreciate your effort and will try to fix the article