This article explains how to create a master schedule from scratch directly in the Linarc Scheduler. The dynamic scheduler enables you to progressively add schedule items and refine the plan throughout the project’s lifecycle.
Note:
- If you manage standalone project and have its budget locked, Linarc automatically populates the schedule grid with those budget line items to form an initial Work Breakdown Structure (WBS).
- You can use this auto-generated list as a foundation and simply edit them, add sub-tasks, or new items to complete your project timeline.
To create the master schedule from scratch
- Ensure that you are on the Grid view of the scheduler. If not:
- Click the main menu on the top-left
- Click 'Schedule' under the 'Scheduler'
The scheduler grid opens with default columns:
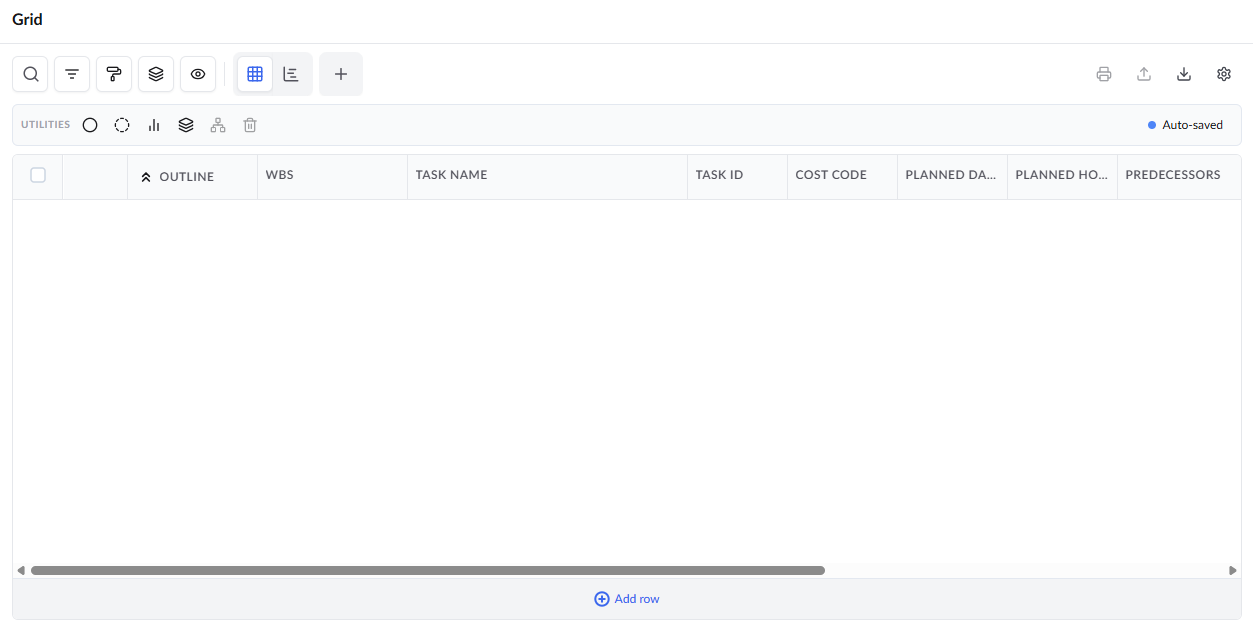
You can add or remove columns as required. This is optional.
Column Selection
- Click the
 icon at the top right
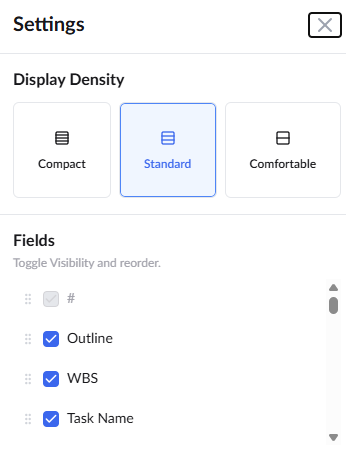
- Select the rows to be shown on the grid
The available columns are:
Outline - The serial number of the line item in the outline numbering system, as per the WBS hierarchy.
WBS - The alphanumeric WBS serial number of the task/schedule item indicating the hierarchical branch path.
Task Name - The label of the task/schedule item.
Task Id - The system-generated alphanumeric code for the task used internally by various modules in the platform
Cost Code - The unique code to identify the task in various schedule features like look ahead schedule.
Planned Days - The number of days estimated to complete the task. You can enter the values in days.
Planned Hours - The effort hours required to complete the task.
Predecessors - The dependency of the task item with its predecessor. You can manually set the dependency. See Add Dependencies for more details on this.
Planned Start – The scheduled commencement date of the task. For dependent tasks, this date is auto-populated based on the relationship with their predecessor task.
Planned End – The scheduled completion date of the task. This date is automatically calculated from the Planned Start date and the Planned Duration (days), or from task dependencies. Alternatively, you can manually enter the Planned End date, in which case the Planned Duration is auto-populated.
- Both Planned Start and Planned End dates are influenced by any constraints applied to the task.
Progress- The current completion percentage of the task.
- Field-level tasks - Fetched from the reports from the foreman. The project managers can also manually update the progress. See Update Task Progress for more details.
- Parent-level tasks - Auto-calculated from the progress of the children.
- Assigned Tasks - The subcontractor shares the tasks' progress with the general contractor.
Contractor - The contractor company to whom the task item is allotted.
1st Constraint Type and 1st Constraint Date - The primary condition applied to start/end days of the task, overriding the planned days and task dependencies.
2nd Constraint Type and 2nd Constraint Date - The secondary condition applied to start/end days of the task, overriding the planned days and task dependencies.
Planned Quantity - The total amount of work done/deliverables planned for the task.
Actual Quantity - The amount of work done/deliverables realized with the current progress state. Fetched from the progress reports of the last-level child tasks.
Unit of Work - The unit by which the work quantity/deliverable is measured.
Assignee - The team member responsible for tracking the task from the contractor company. You can select the member from the drop-down.
Actual Start - The real commencement date of the task item.
- For self-assigned last-tier items, the Actual Start is the date when the first progress update is reported, either from the field or the office.
- For subcontractor-assigned last-tier items, the Actual Start is the date when a foreman logs progress on the task or is specified by the project manager while manually entering the first progress
- For parent-level items, the Actual Start is automatically derived from the earliest Actual Start among its child items—that is, the date on which the first child task begins.
Actual End - Auto-populates once the task reaches 100% completion.
- For self-assigned last-tier items, the Actual End is the date when the final progress update reflects 100% completion.
- For subcontractor-assigned last-tier items, the Actual End is the date when the subcontractor reports the task as completed with 100% as completion percentage.
- For parent-level items, the Actual End is automatically derived from the latest Actual End among its child items—that is, the date on which the last child task finishes.
Actual Effort - Total man-hours expended for that task.
Location - The spot on the site where the task is executed. This is optional and can be entered from a predefined list available as a drop-down in the cell itself.
Hours to finish - The number of hours required to complete the task. The remaining hours are entered by the foreman while updating the completion percentage of each leaf-level task every time. The hours required for the parent-level tasks are aggregated from their children.
Task Type – Indicates the classification or source of the task. The available types are:
- Normal Task – Typically a parent-level task used for structuring and grouping work.
- Budget Task – A last-level task linked to a budget line item, with an amount allocated from the budget. Commonly, subcontractor-assigned work.
- Estimate Task – A last-level task linked to the project estimate, with an amount allocated from the estimate line item. Commonly, self-performed work.
- Change Order Task – A task created as a result of adding approved change order work to the schedule.
- Inspection – Represents an inspection event.
- Checkpoint – Represents a checkpoint event used to track intermediate progress or reviews.
- Milestone – Represents a significant milestone or project delivery point.
Task Status - The current state of the task, whether it is in 'Draft' (unpublished), 'In progress', 'Scheduled', or 'Completed' state.
In addition to these, if any custom fields are added to the scheduler, those will also be listed on the left pane.
The right pane shows the selected columns.
- After enabling the required columns, arrange the columns in the right pane by dragging and dropping them to establish the desired order for their appearance in the table.
- Click 'Apply' for your selection to take effect
The following values are auto-calculated from the task dependencies, their relationships, constraints, budget integration and the critical path:
Budgeted Cost Code -A unique code that auto-populates from the budget line item funding the task. This code is essential for financial calculations such as job cost tracking, and other related financial processes.
Budgeted Quantity - The planned number of units or items that auto-populates from the budget line item.
Budgeted Effort Hours -The planned work hours that auto-populate from the budget line item funding the task.
Start Delay - The difference in number of days between the planned start and the actual start days of the task.
End Delay - The difference in number of days between the planned end and the actual end days of the task. Applies only to fully completed tasks
Predicted Start - Auto-calculated from the planned start date, the current progress of the predecessor tasks, and the dependency relationships.
Predicted End - Auto-calculated from the planned start date and the current progress.
Predicted Days - The estimated total duration of the task. This is auto-calculated based on the current progress and actual days spent, rather than the original planned days..
Remaining Plan Days - The number of days left to complete the task strictly according to the original baseline schedule and planned duration.
Remaining Predicted Days - The estimated number of days needed to finish the task. This is auto-calculated based on the current progress and Critical Path Assessment (CPA) logic.
Early Start - The earliest date at which the task can be started.
Early Finish- The earliest date at which the task can be completed.
Late Start- The latest date at which the task can be commenced.
Late Finish- The latest date at which the task can be completed.
Slack- The permissible number of days the task can be started after the planned start date without affecting the overall schedule.
Updated on - Auto-populates and indicates the date at which the last progress update was made or auto-calculated.
Critical - Indicates whether the task is critical based on the current critical path calculation. You can recalculate the critical path of the schedule at any time. Critical tasks are also indicated with the icon in the grid.
Has Successor - Indicates whether the task has any dependent tasks following it in the schedule workflow.
Has Predecessor - Indicates whether the task relies on the completion or commencement of any prior tasks before it can begin.
Add Schedule Line Items
Add top-level tasks (phases)
- Click Add New Row at the bottom to insert your first phase-level WBS element.
- Enter a name by clicking inside the Task Name field.
- Continue clicking Add New Row to create additional top-level tasks (e.g., project phases).
Add subtasks
- Right-click on a task item, then choose Add > Subtask to insert a child task under it.
- Repeat this process to build out successive levels of the WBS hierarchy.
Define details for lowest-level items
For work packages or deliverables at the lowest level, specify:
- Task dependencies and relationships
- Duration (planned days)
- Labor or manhours
- Planned quantity of work
- Planned start date
Once dependencies and predecessors are set, the start dates of dependent tasks are auto-populated. You can override them manually if required.
- The end date is auto-calculated.
- See Add WBS Elements and Task Items for more details.
Edit dates in the Gantt view
- Adjust task dates visually by dragging and dropping the task bar to the desired date range.
- Extend or reduce task duration by dragging the left or right edges of the bar.
Parent-level task roll-ups
- Duration, manhours, and start/end dates of parent tasks are automatically calculated from their child items.
Critical path
- The scheduler dynamically recalculates the critical path as you add tasks and define dependencies.
Add events
- To insert a milestone, inspection, or checkpoint event, right-click on the relevant item, hover over Add, and select the desired event type.
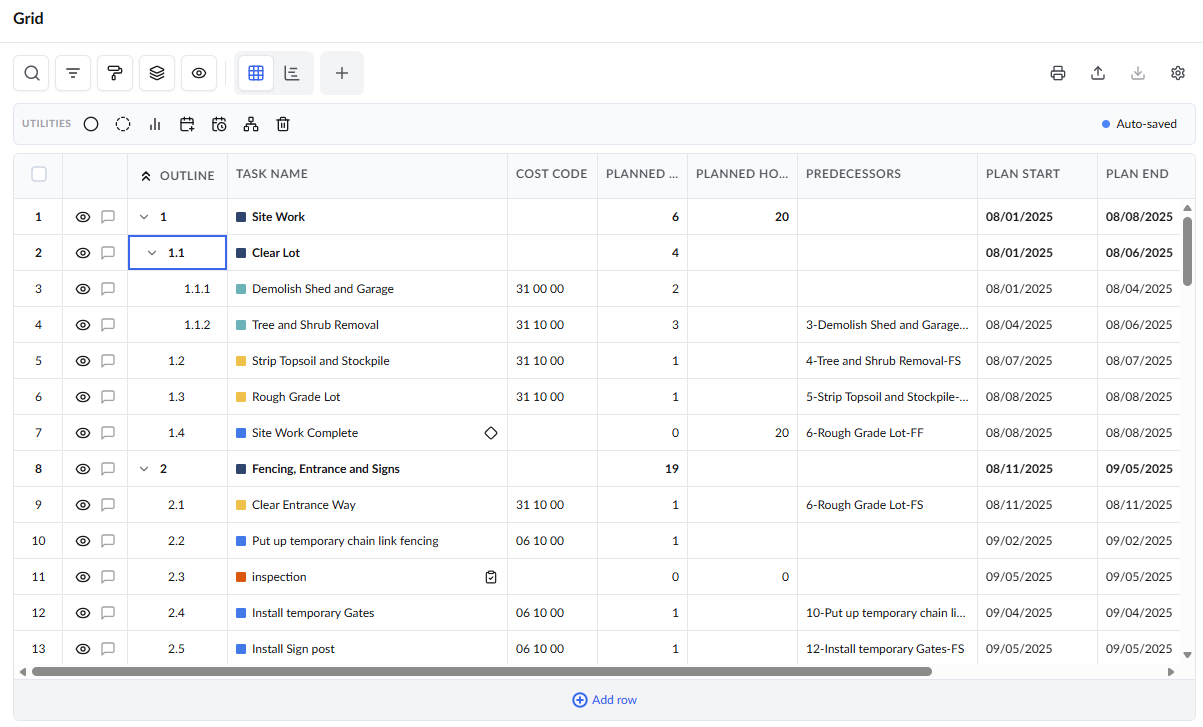
See the following sections to know more:
- Add WBS elements and task items
- Specify Constraints For Scheduled Tasks
- Clone Rows and WBS branches
- Add subtasks
- Add a checkpoint
- Add an inspection event
- Add a milestone
- Add dependencies
- Add planned quantities of work
- Assign subcontractors
- Add a change order
- View task details
- Remove a task
- Publish a task
- Update task progress
- Export and Print Schedule Snapshot as PDF
Was this article helpful?
That’s Great!
Thank you for your feedback
Sorry! We couldn't be helpful
Thank you for your feedback
Feedback sent
We appreciate your effort and will try to fix the article