The Look Ahead Schedule feature allows Project Managers in the office to review short-term tasks for the project, monitor progress, and track upcoming work without needing to be on site. It provides a clear overview of active schedules and their associated tasks for effective planning and coordination. You can:
View all published and in-progress tasks within the selected Look Ahead period for effective short-term planning.
Monitor progress updates submitted from the field, including task status, issues, and crew assignments.
Check resource load and task allocation to ensure workloads are balanced and achievable.
Access and review draft, active, and closed Look Ahead schedules to compare planned versus actual work.
To view the look-ahead schedule
- Click 'Look Ahead' on the left of the project's 'Schedule' module.
The current active look-ahead schedule opens by default. If no look-ahead schedule is created, you can create one. See Create a Look Ahead Schedule for more details.
- The blue tag at the top center displays the current status of the Look Ahead.
- To view completed, expired, or cancelled Look Aheads, open the date range drop-down at the top left and select the desired period.
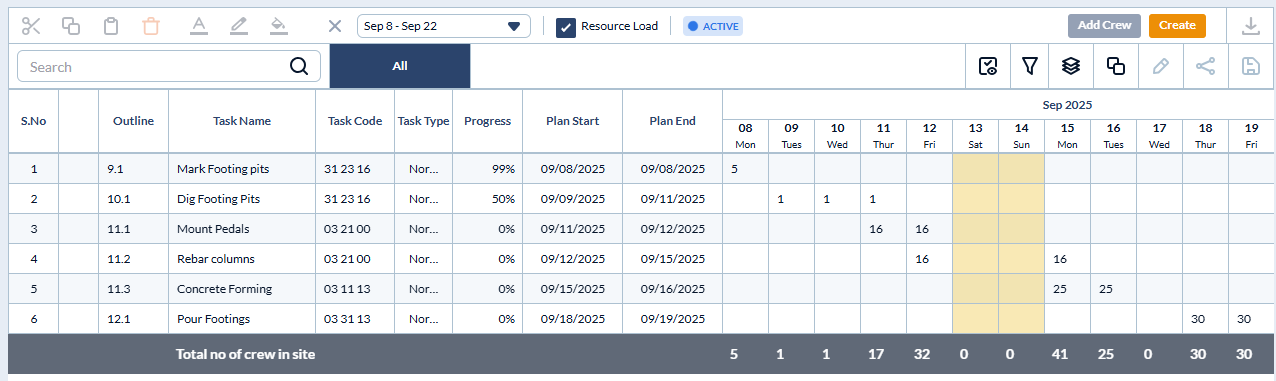
The 'Default View' shows all columns in the table. You can remove the columns you do not want to see from the table. For example, if you want to see only certain dates in the table, right-click on the column header and deselect the dates you don't want to view in the table.
- Task Name - The label of the task, deliverable, or activity.
- Task Code - The cost code of the item.
- Task Type - Indicates the classification of the work item, such as a regular task, change order task, inspection, etc..
- Progress - The current completion percentage of the task.
- Contractor - The contractor to whom the task item is assigned. Subcontractors and standalone contractors can view only the tasks assigned to them.
- Planned Start - The scheduled commencement date of the task. The planned start date auto-populates for dependent tasks based on the relationship with the predecessor task.
- Planned End - The completion date of the task. Auto-calculated from the Plan Start date and the Planned Days. You can also manually enter the planned end date so that the planned days gets auto-populated.
- Select the 'Resource Load' checkbox at the top to view the crew resource requirements for each day for each task.
You can also add crew members directly from the office to selected tasks. See Assign Crew to Tasks in the Look Ahead for more details.
Was this article helpful?
That’s Great!
Thank you for your feedback
Sorry! We couldn't be helpful
Thank you for your feedback
Feedback sent
We appreciate your effort and will try to fix the article