Linarc enables you to generate a professional PDF snapshot of your project schedule at any stage of execution. These static records capture critical details like task completion and timeline predictions, making them ideal for archival, stakeholder reporting, or hard-copy distribution.
With the export tool, you can:
- Choose between Grid view, Gantt chart, or a combined side-by-side display to visualize the data exactly how you need it.
- Filter specific data points (such as a 3-week look-ahead) and adjust the WBS hierarchy to control the depth of information included.
- Generate print-ready copies for on-site display boards or archive snapshots to compare schedule variations and track deviations over time.
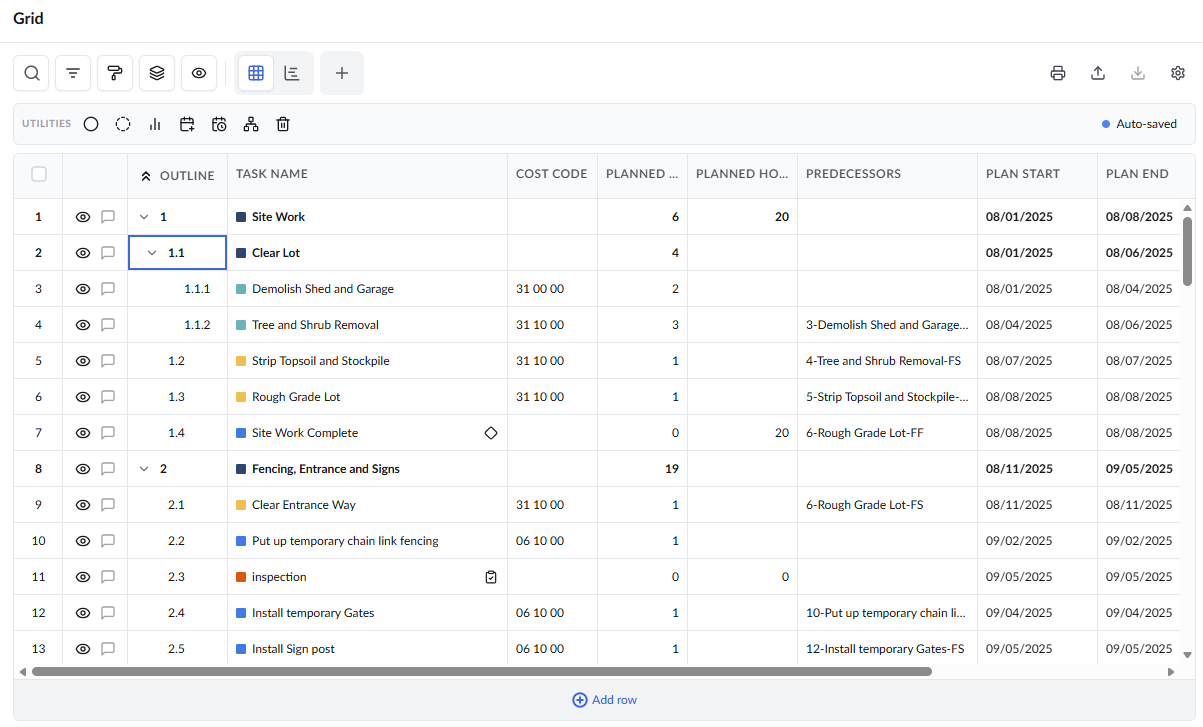
Print Schedule as PDF
- Navigate to the schedule interface. The project schedule opens in 'Grid' view by default
- Click 'Grid' on the left to return to the grid view if you are on some other screen in the schedule menu
From this screen, you can structure and refine the schedule to achieve the desired layout and level of detail before downloading it as a PDF.
The first step is to configure the layout and data exactly as you want them to appear in the PDF.
- Select a Layout: Choose your preferred layout from the top drop-down menu. Options include Grid View, Gantt View, or a combined Grid + Gantt View.
- Customize Columns: Manually select the columns you wish to include to ensure they fit within the page width. Alternatively, load a Preset View to instantly apply a pre-configured set of columns, filters, and groupings.
- Apply Filters: Refine the data using filters. For instance, apply a date range to generate a specific 3-week lookahead schedule.
Tip: As an alternative to manual column selection and filter settings, you can leverage Custom Views to determine the data included in the PDF. (Applies only to the Grid layout.)
See Manage Custom Grid Views for more information.
- Set WBS Depth: Use the Level drop-down to determine how deeply the schedule hierarchy should expand (e.g., show only high-level phases or drill down to all sub-tasks).
Once you are satisfied with the on-screen display, you are ready to export the file.
- Click the
 icon on the top right.

- Print Preferences: Configure your paper size, orientation (Portrait/Landscape), and margins.
- Scaling - Define the percentage by which column widths should be scaled (shrunk or enlarged) to fit the printable area
- Fit Columns: Select this option to automatically scale column widths so they fit within the page width.
- File Name: Enter a custom name for the PDF file.
- Click 'Download' to save the PDF file to your preferred location.
Was this article helpful?
That’s Great!
Thank you for your feedback
Sorry! We couldn't be helpful
Thank you for your feedback
Feedback sent
We appreciate your effort and will try to fix the article