The location identifier pin tool lets you place predefined icons on the plan drawing to highlight important locations and convey key site details visually. This helps improve clarity, communication, and alignment among project team members.
- Use categorized pins from Linarc’s library to denote points of interest such as installation spots, logistics zones, utility access points, emergency locations, and more.
- Convey essential site information visually for faster understanding and decision-making.
- Enhance team coordination by ensuring everyone clearly sees and interprets critical spots on the plan.
- Quickly mark recurring or standard elements consistently across multiple drawings.
To add a location identifier
- Click the down arrow beside the pin tool in the toolbar.
- Select the identifier pin you want to place on the plan drawing from the organized library of pins
- Click the spot on the plan where you want to place the pin.
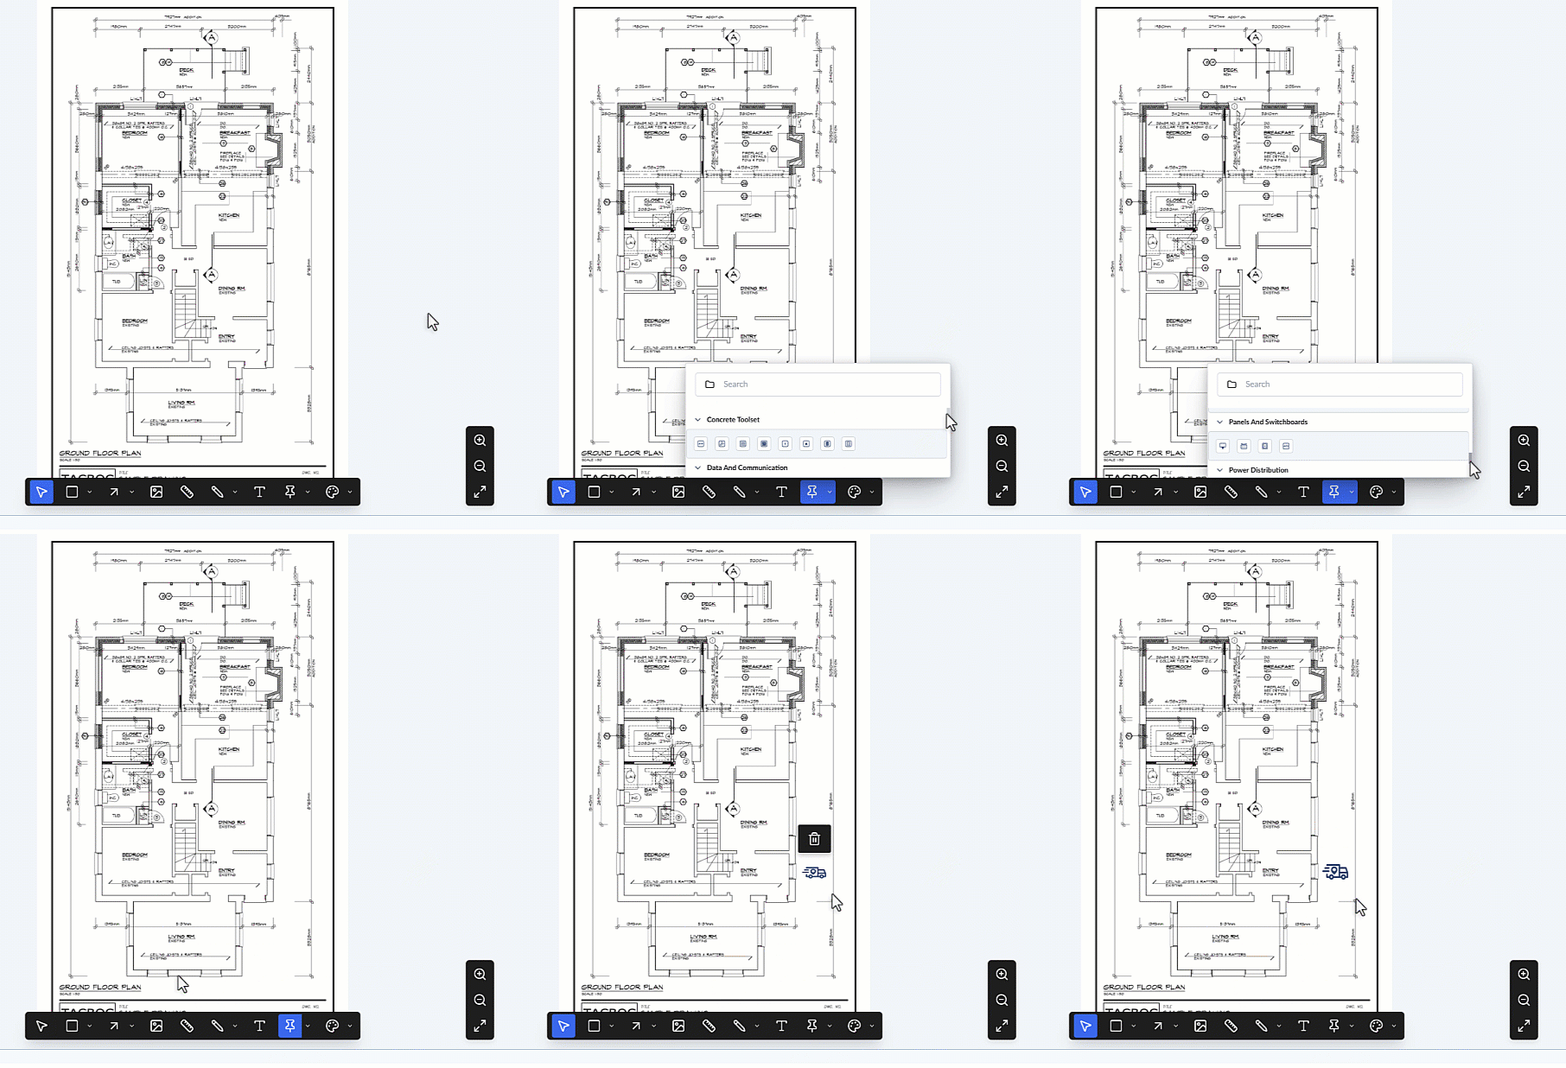
- Click on the pin and drag it to the precise location if needed.
- Drag the corners to resize the pin.
The markup element adds as a layer to the 'Draft' group. It is shown in the layer editor on the left.
You can also clone the markup to mark similar area on a different spot in the drawing. See Clone and Reuse Markups if you need guidance on it.
Every shape you add is automatically saved as a new layer within the "Current Markup" group, which is visible in the layer editor on the left side of your screen. From this editor, you can manage your shapes:
- Rename: Click the element's label in the editor to give it a brief, descriptive name to keep your markups organized.
- Lock: Hover over the element and click the
 icon to prevent accidental edits or deletion.
 - Hide/Show: Hover over the element and click the
 icon to temporarily hide or show the layer on your plan.
 - Delete: Hover over the element and click the
 icon to remove a mistake.
 You can continue selecting tools to add more markup elements as needed. Once you are finished annotating the plan, you must save the layer group. See Publish Markups for detailed instructions on finalizing your work.
Was this article helpful?
That’s Great!
Thank you for your feedback
Sorry! We couldn't be helpful
Thank you for your feedback
Feedback sent
We appreciate your effort and will try to fix the article