When you add or edit markup elements to a plan sheet, whether starting from scratch or drawing over existing markups, they are temporarily saved as draft layers. By default, these drafts are only visible to you during your current session.
As you work, each element you create appears as a separate layer under the 'Current Markup' section in the left-hand layer editor. To permanently save your work and share it with your team, you must publish these layers together as a group.
This article explains how to finalize and publish your markups to ensure they are permanently saved.
To save and publish a markup
- Ensure that you've added/ edited all the markups required in your plan sheet.
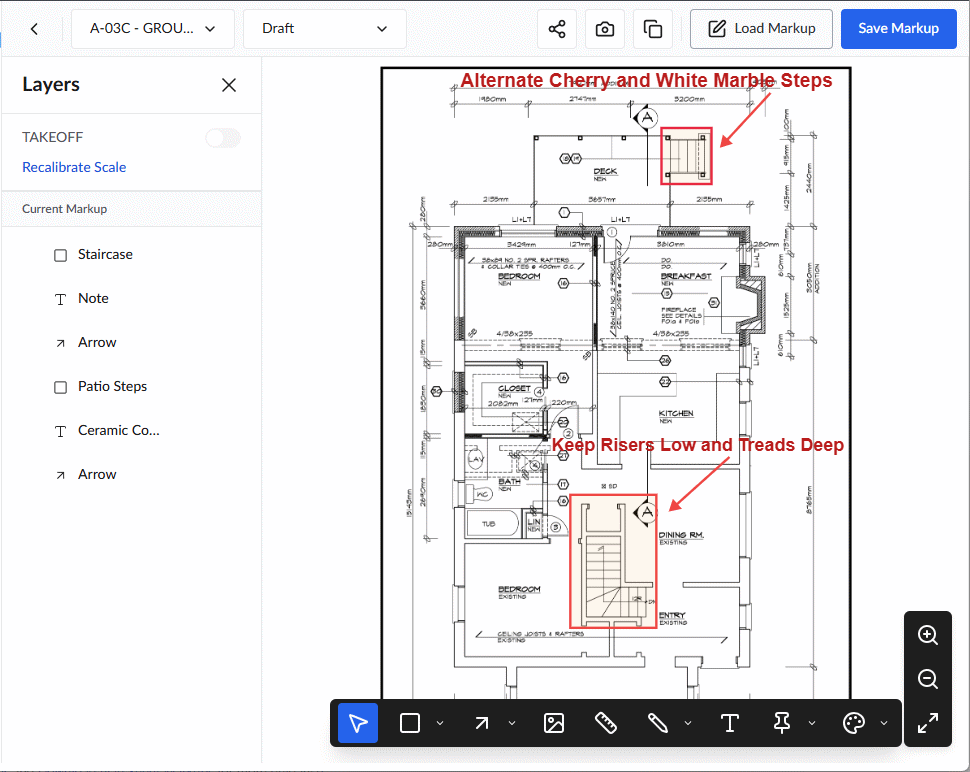
Once you are done with the markup elements, save the layer group as a markup :
- Click on the element label on the layer editor and edit the label if necessary to keep your layers organized
- Click the
 button on the top right.
 - Enter a label for the markup. (By default, the system names the markup with the plan sheet name, followed by date/time stamp suffix. Change it if required.)
- Click 'Save Markup'
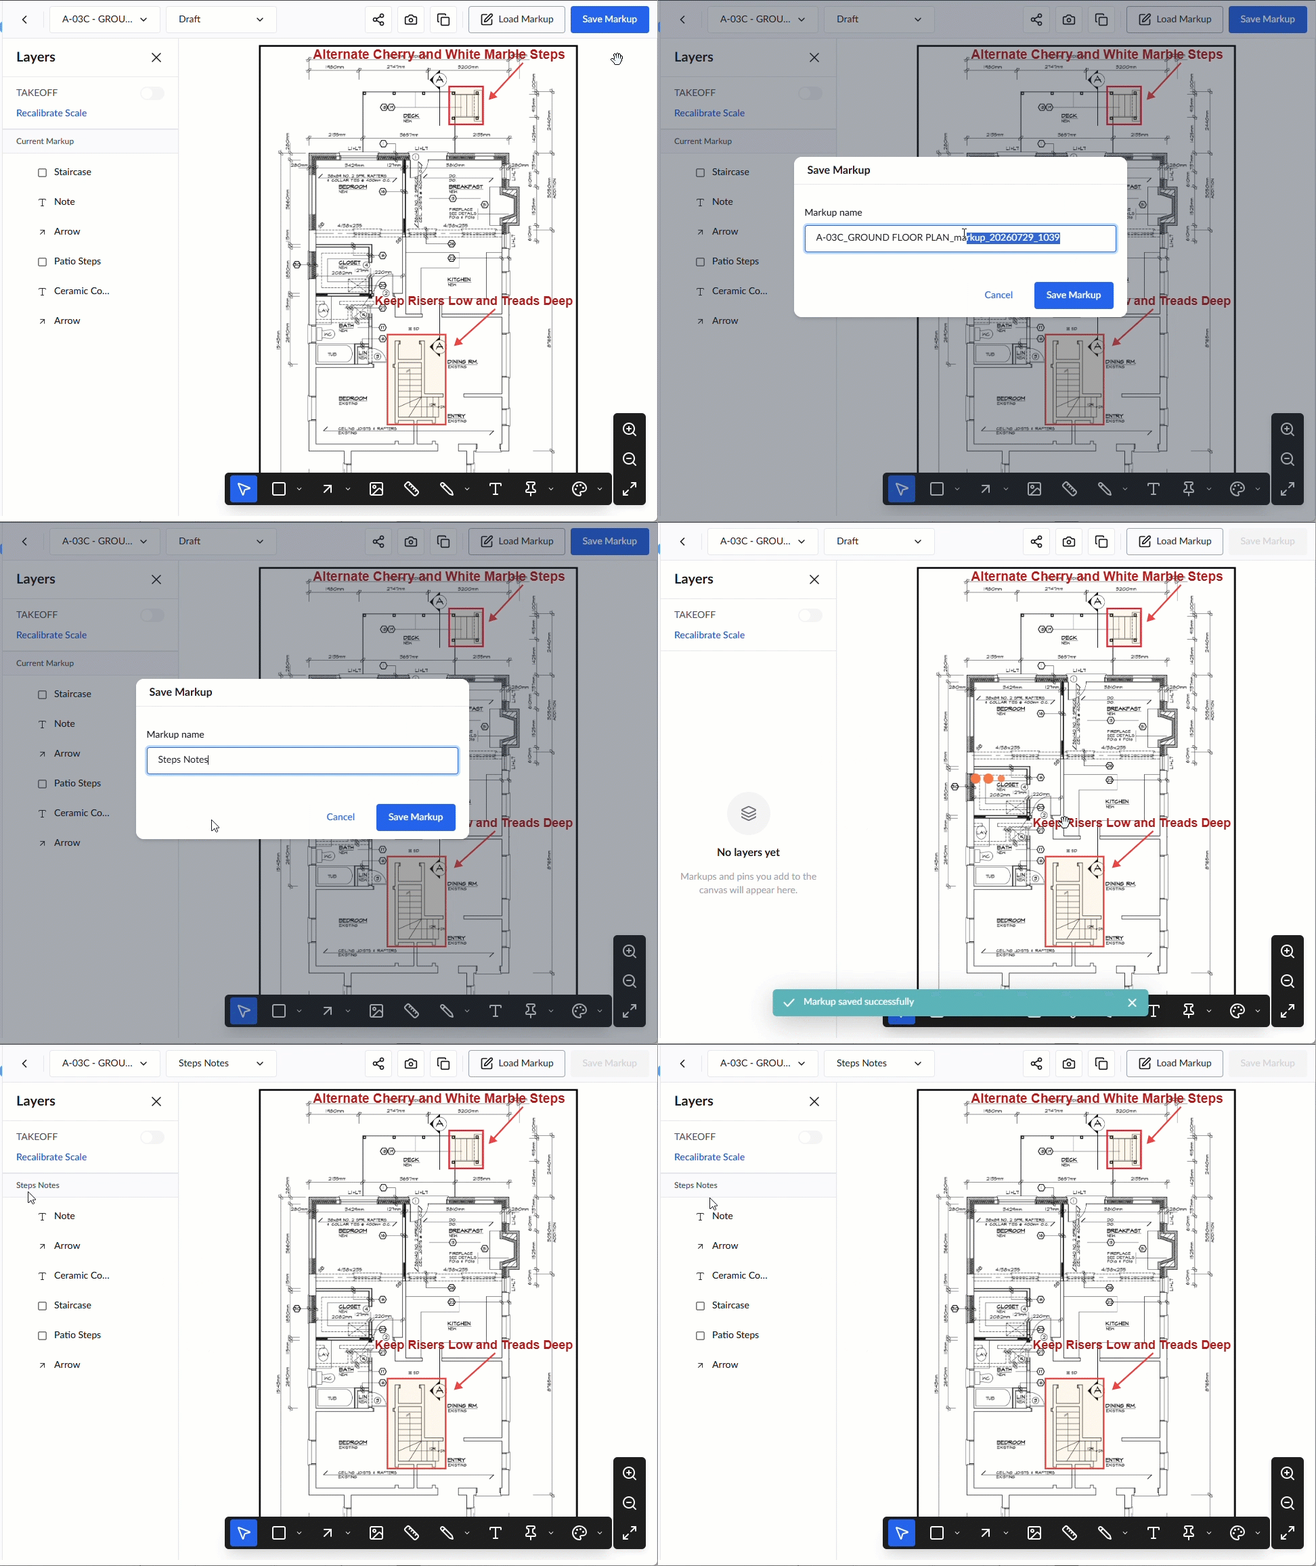
By default, the markup is set as private and visible only to the creator. To provide access to other team members, you need to share the markup.
You can set access restrictions so that the markup is shared only with the persons and companies you specify. See Set Access Rights for Markups and Download Plan Sheet Markups for more guidance.
Was this article helpful?
That’s Great!
Thank you for your feedback
Sorry! We couldn't be helpful
Thank you for your feedback
Feedback sent
We appreciate your effort and will try to fix the article