To connect Linarc to Acumatica, you enter your instance URL, Client ID, and Client Secret in the Linarc Admin Portal. Linarc then takes you to Acumatica, where you sign in and grant permission, and returns you to Linarc with the integration connected.
Prerequisites:
• The Client ID and Client Secret from registering Linarc in Acumatica. See Register Linarc in Acumatica.
• An Acumatica instance that is reachable from the internet.
• Your Acumatica sign-in credentials for the tenant in which you registered Linarc.
Connecting Linarc to Acumatica involves the following steps:
- Step 1 - Find Your Acumatica Instance URL
- Step 2 - Enter the Connection Details in Linarc
- Step 3 - Sign In to Acumatica
- Step 4 - Grant Permission to Linarc
Step 1 - Find Your Acumatica Instance URL
The instance URL is the web address that Linarc uses to reach your Acumatica site.
- Open Acumatica in your browser, on your own computer and not on the Acumatica server.
- Copy the address up to the site, or up to the folder if your address includes one.
- Remove everything from '/Main', '/Frames', or '?' onwards.
- Remove '/t/<tenant>' if it appears.
The instance URL takes one of these forms:
| Hosting Option | Example Instance URL |
|---|---|
| Acumatica hosts it for you | https://yourcompany.acumatica.com |
| Your own server, with a web address | https://erp.yourcompany.com |
| Your own server, in a folder | https://erp.yourcompany.com/AcumaticaERP |
| Your own server, reached by IP address (must be a public IP address) | http://<server-ip>/AcumaticaERP |
Note: Never use 'localhost' or '127.0.0.1'. These addresses work only on the Acumatica server, so Linarc cannot reach them.
Step 2 - Enter the Connection Details in Linarc
- In the Linarc Admin Portal, click 'Integrations' at the top and select 'ERP' on the left.
- Open the Acumatica page.
- Paste your instance URL into the 'Instance URL' field.
- Paste the Client ID into the 'Client ID' field.
- Paste the Client Secret into the 'Client Secret' field.
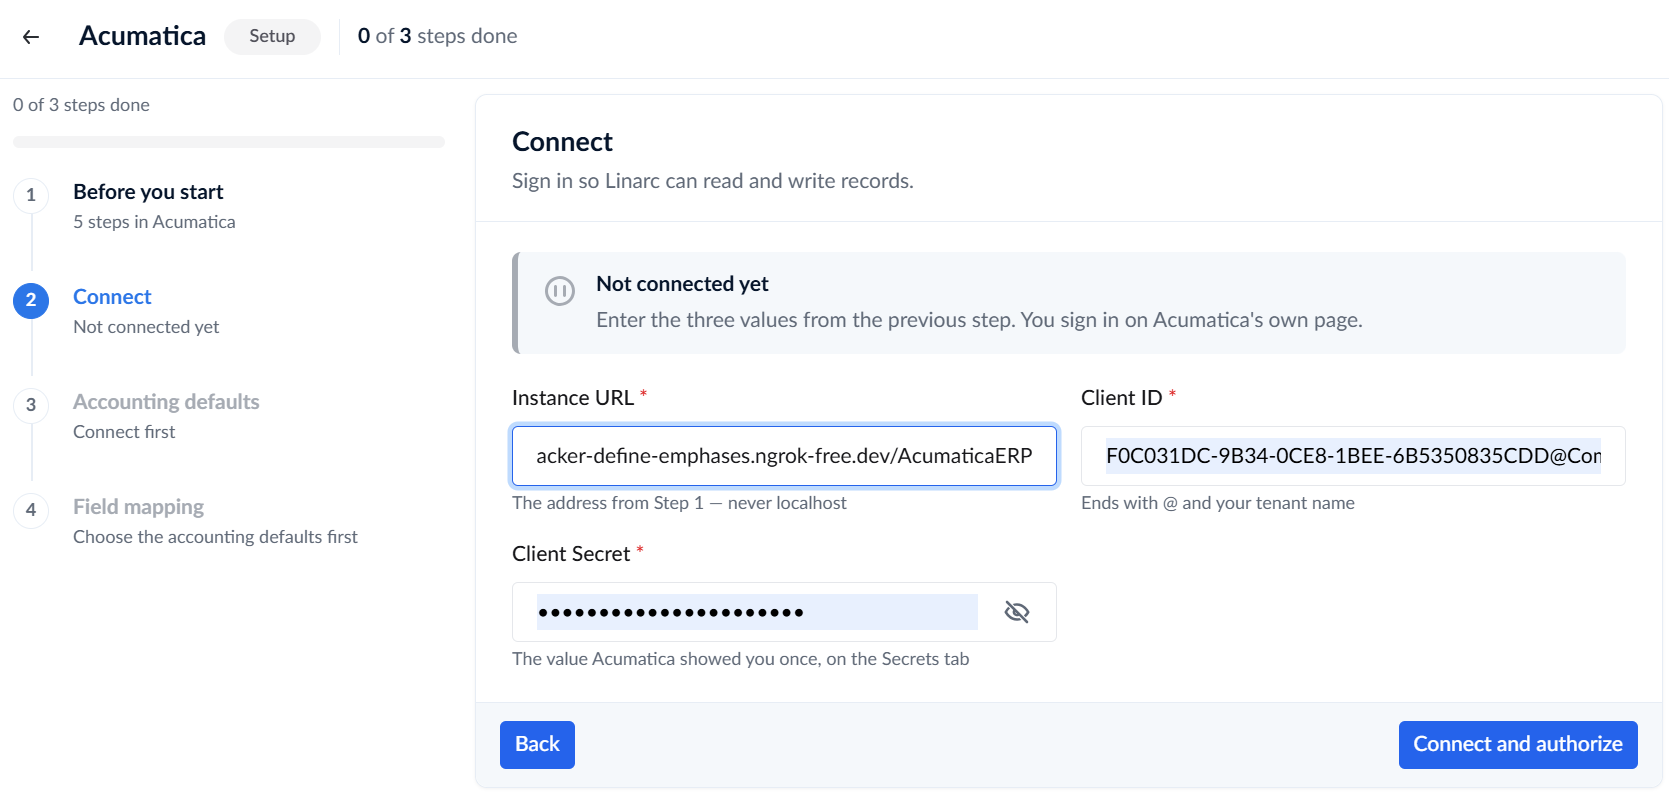
- Click 'Connect'.
Linarc takes you to the Acumatica sign-in page.
Step 3 - Sign In to Acumatica
- If the sign-in page lists tenants, select the same tenant in which you registered Linarc.
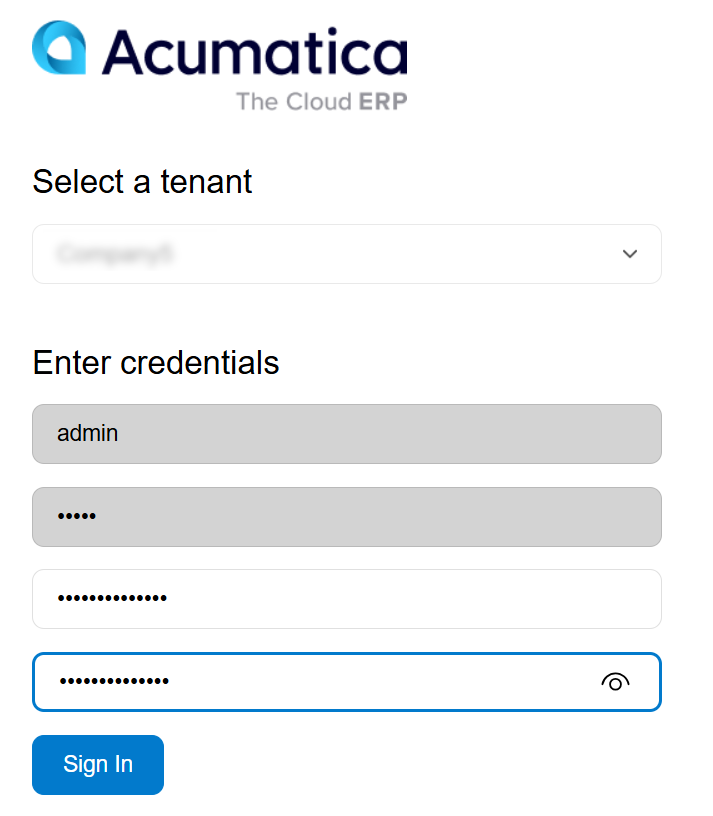
- Enter your Acumatica user name and password, and sign in.
Step 4 - Grant Permission to Linarc
After you sign in, Acumatica shows a consent screen that reads Linarc is requesting your permission'.
- Leave every check box as it is.
- Ensure the 'Offline Access' checkbox is selected
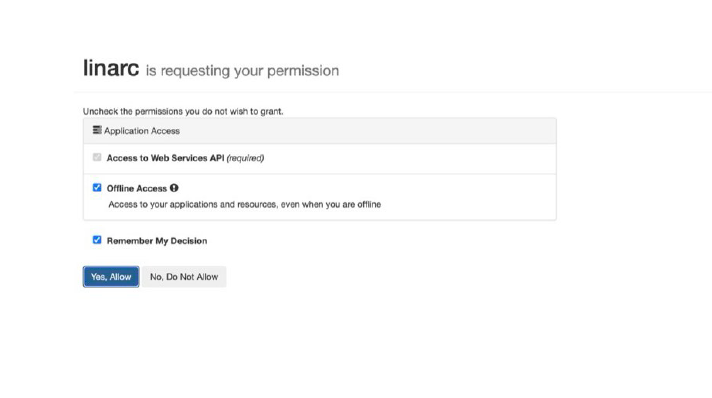
- Click 'Yes, Allow'.
Acumatica returns you to Linarc, and the Acumatica integration is connected.
Next Steps
After you connect, complete the setup before you sync:
- Prepare Cost Codes: Enable the Cost Codes feature in Acumatica and widen the cost code segment. Do this before your first sync, or cost codes can fail or be truncated.
- Account Configuration: Set the Payroll Expense Account, Payroll Liability Account, Sub Account, and Default Country.
- Data Mapping: Choose the source of truth for each record type and map the Linarc fields to the Acumatica fields.
See Configure Accounts and Map Data.
Was this article helpful?
That’s Great!
Thank you for your feedback
Sorry! We couldn't be helpful
Thank you for your feedback
Feedback sent
We appreciate your effort and will try to fix the article