Before Linarc can connect to Acumatica, you register Linarc as a connected application in your Acumatica tenant. The registration generates the Client ID and Client Secret that Linarc needs to connect. You register Linarc once for each Acumatica tenant, and a new tenant always needs a new registration.
Prerequisites:
• Administrator access to the Acumatica tenant that you want to connect.
• The Acumatica page in the Linarc Admin Portal, open in another browser tab. You copy the Redirect URI from the Setup Guide on that page. To open it, click 'Integrations' at the top and select 'ERP' on the left.
Tip: Everything in Acumatica is reachable from the search box at the top of the page. Type the screen name or the screen ID and press Enter.
Registering Linarc involves the following steps:
- Step 1 - Sign In to Your Acumatica Tenant
- Step 2 - Open Connected Applications
- Step 3 - Create an Authorization Code Application
- Step 4 - Add the Redirect URI
- Step 5 - Generate the Client Secret and Client ID
Step 1 - Sign In to Your Acumatica Tenant
- Open Acumatica in your browser and sign in to the tenant whose data you want to sync with Linarc.
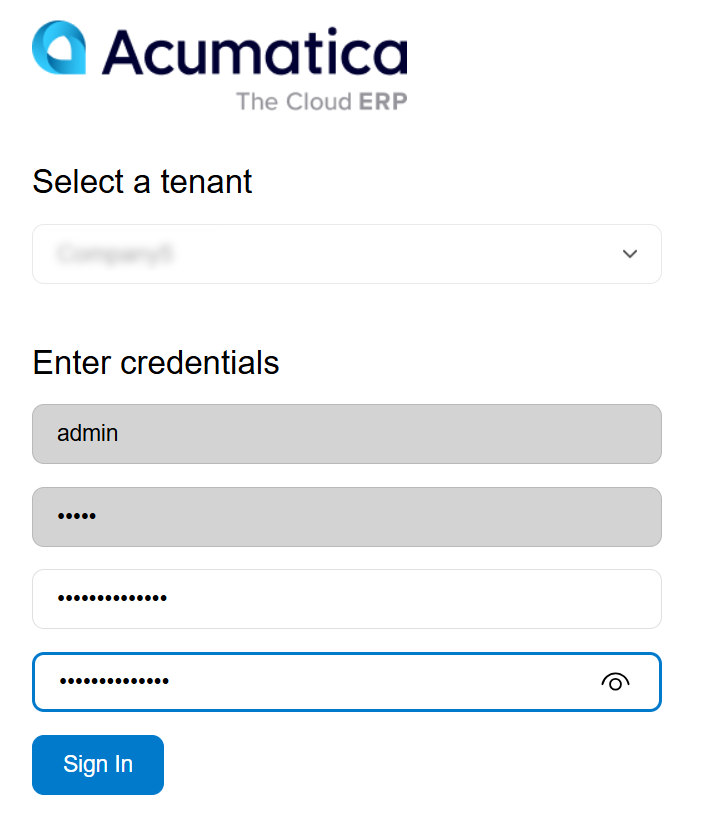
Note: The Client ID that you generate is tied to this tenant. Confirm the tenant name before you continue, because it is easy to register Linarc in the wrong tenant.
Step 2 - Open Connected Applications
- Click 'More Items' in the left menu.
- Click 'Integration' under the 'Configuration' group.
- Click 'Connected Applications' in the 'Preferences' column.
Tip: Search SM303010 on the search bar to open the 'Connected Application' screen on Acumatica
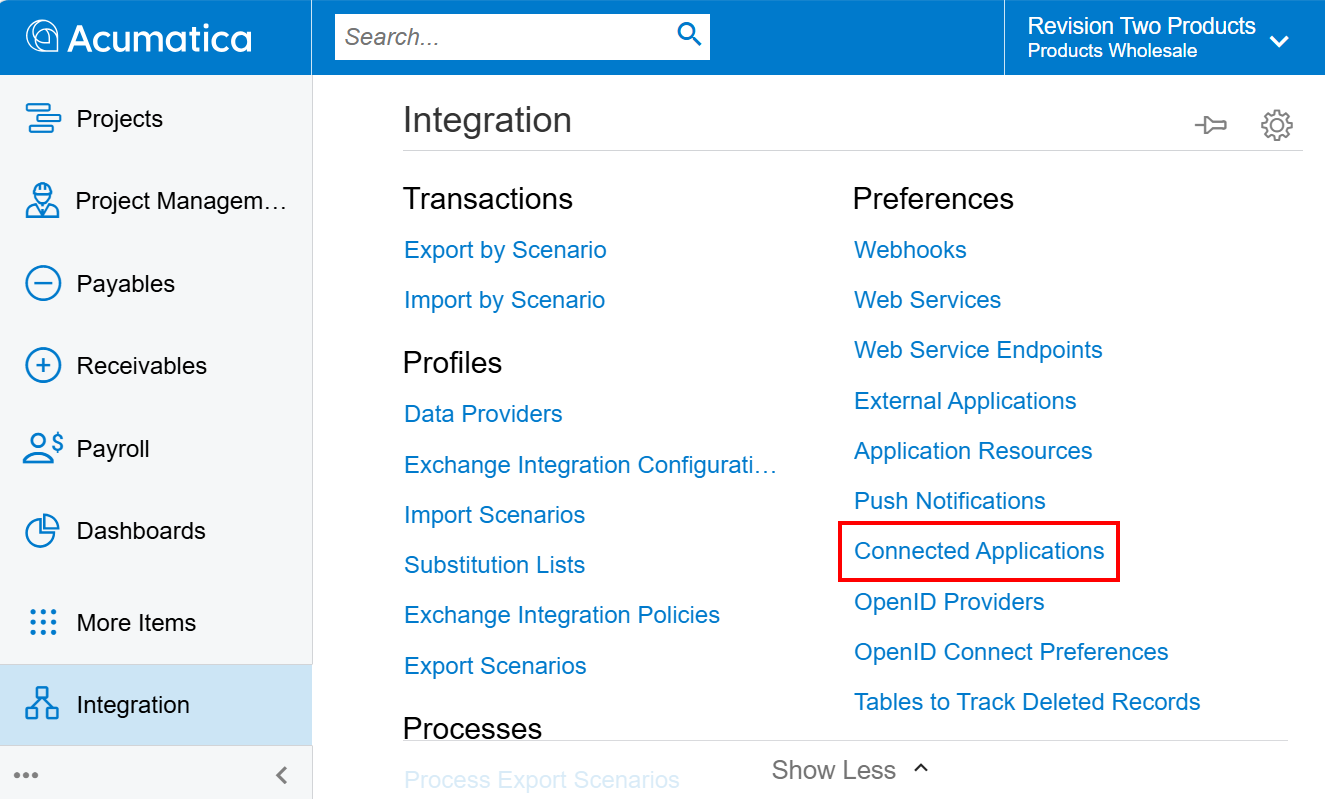
The 'Connected Applications' screen opens.
Step 3 - Create an Authorization Code Application
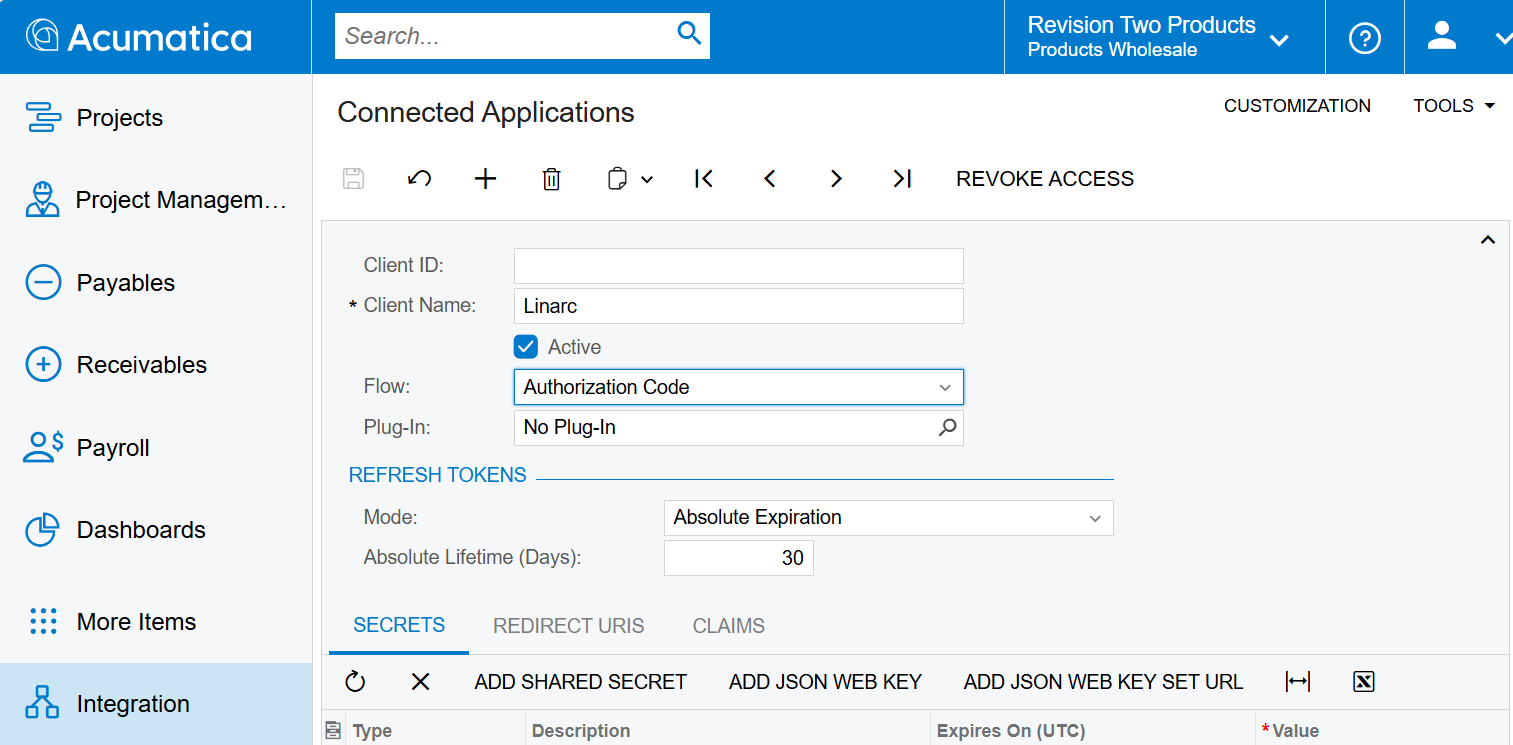
- Click '+' to add a record.
- Enter a desired client name in the 'Client Name' field.
- Leave the 'Active' check box selected.
- Select 'Authorization Code' in the 'Flow' field.
Step 4 - Add the Redirect URI
- In the Linarc Admin Portal, open the Setup Guide on the Acumatica page and copy the Redirect URI.
- In Acumatica, open the 'REDIRECT URIS' tab.
- Click '+' to add a row.
- Paste the Redirect URI into the new row.
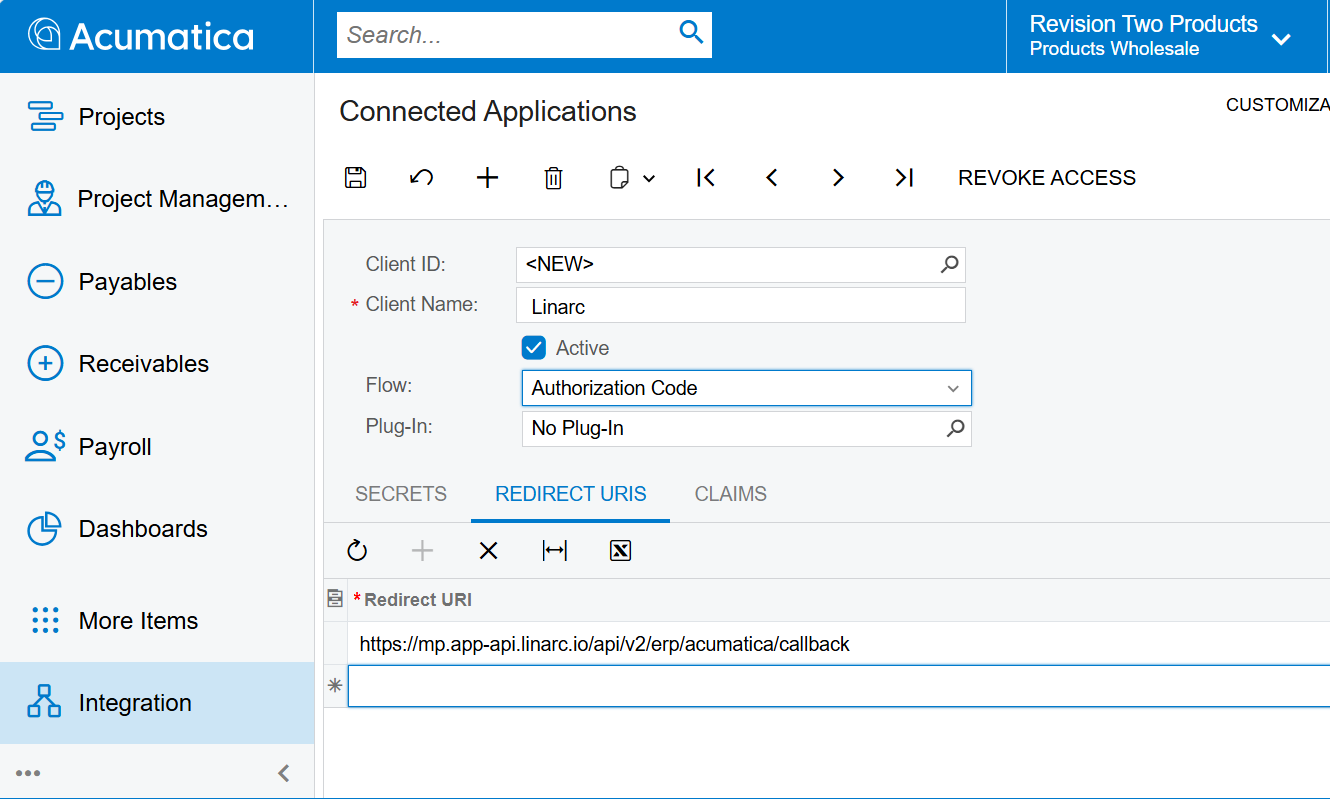
The tab shows one row with the Redirect URI exactly as it appears in Linarc.
Step 5 - Generate the Client Secret and Client ID
Important: Acumatica shows the Client Secret only once. After you close the dialog, Acumatica masks the secret permanently and you cannot read it again. If you lose it, you must add a new shared secret and start again.
- Open the 'SECRETS' tab.
- Click 'ADD SHARED SECRET'. A dialog shows the secret value.
- Enter a 'Description' and add the 'Expires On(UTC)' if required.
Important: If you have added an Expiration time, once the expiration time is over, you will have to disconnect Linarc, generate new Secret ID, Client ID and connect again.
- Copy the secret value immediately and paste it in a safe place.
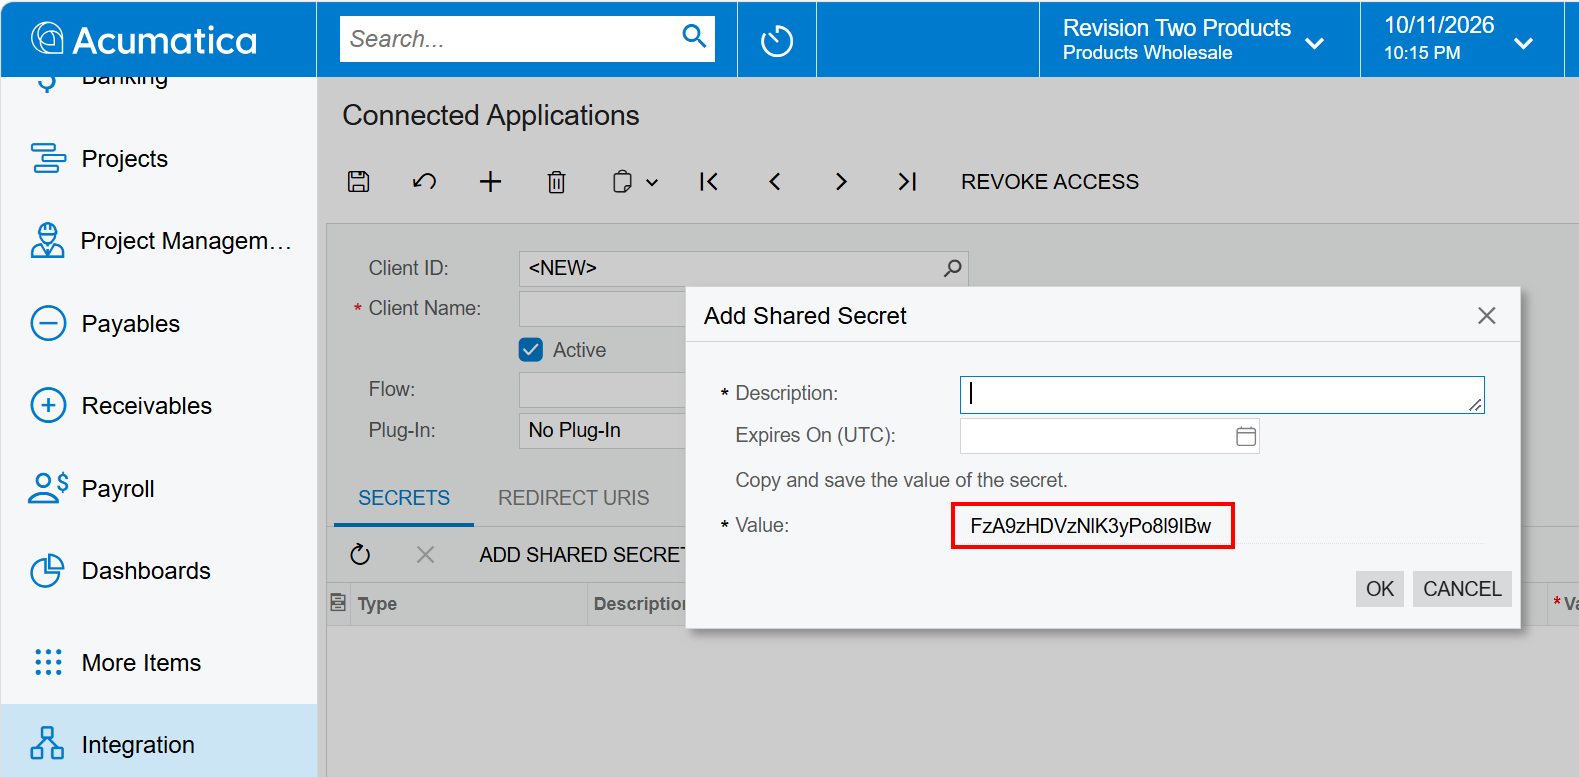
- Close the dialog.
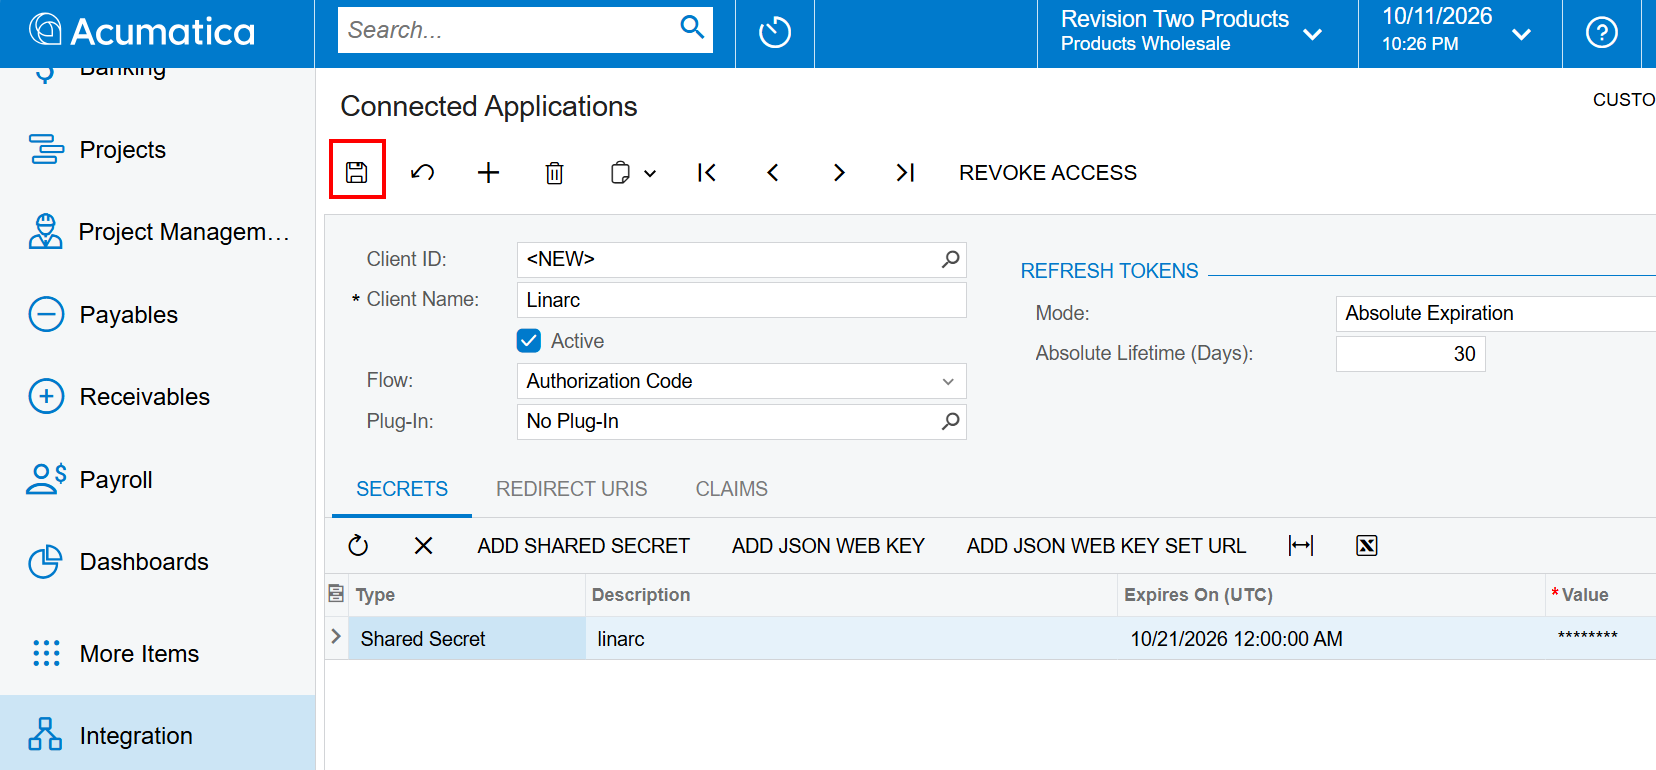
- Click 'Save' to save the record.
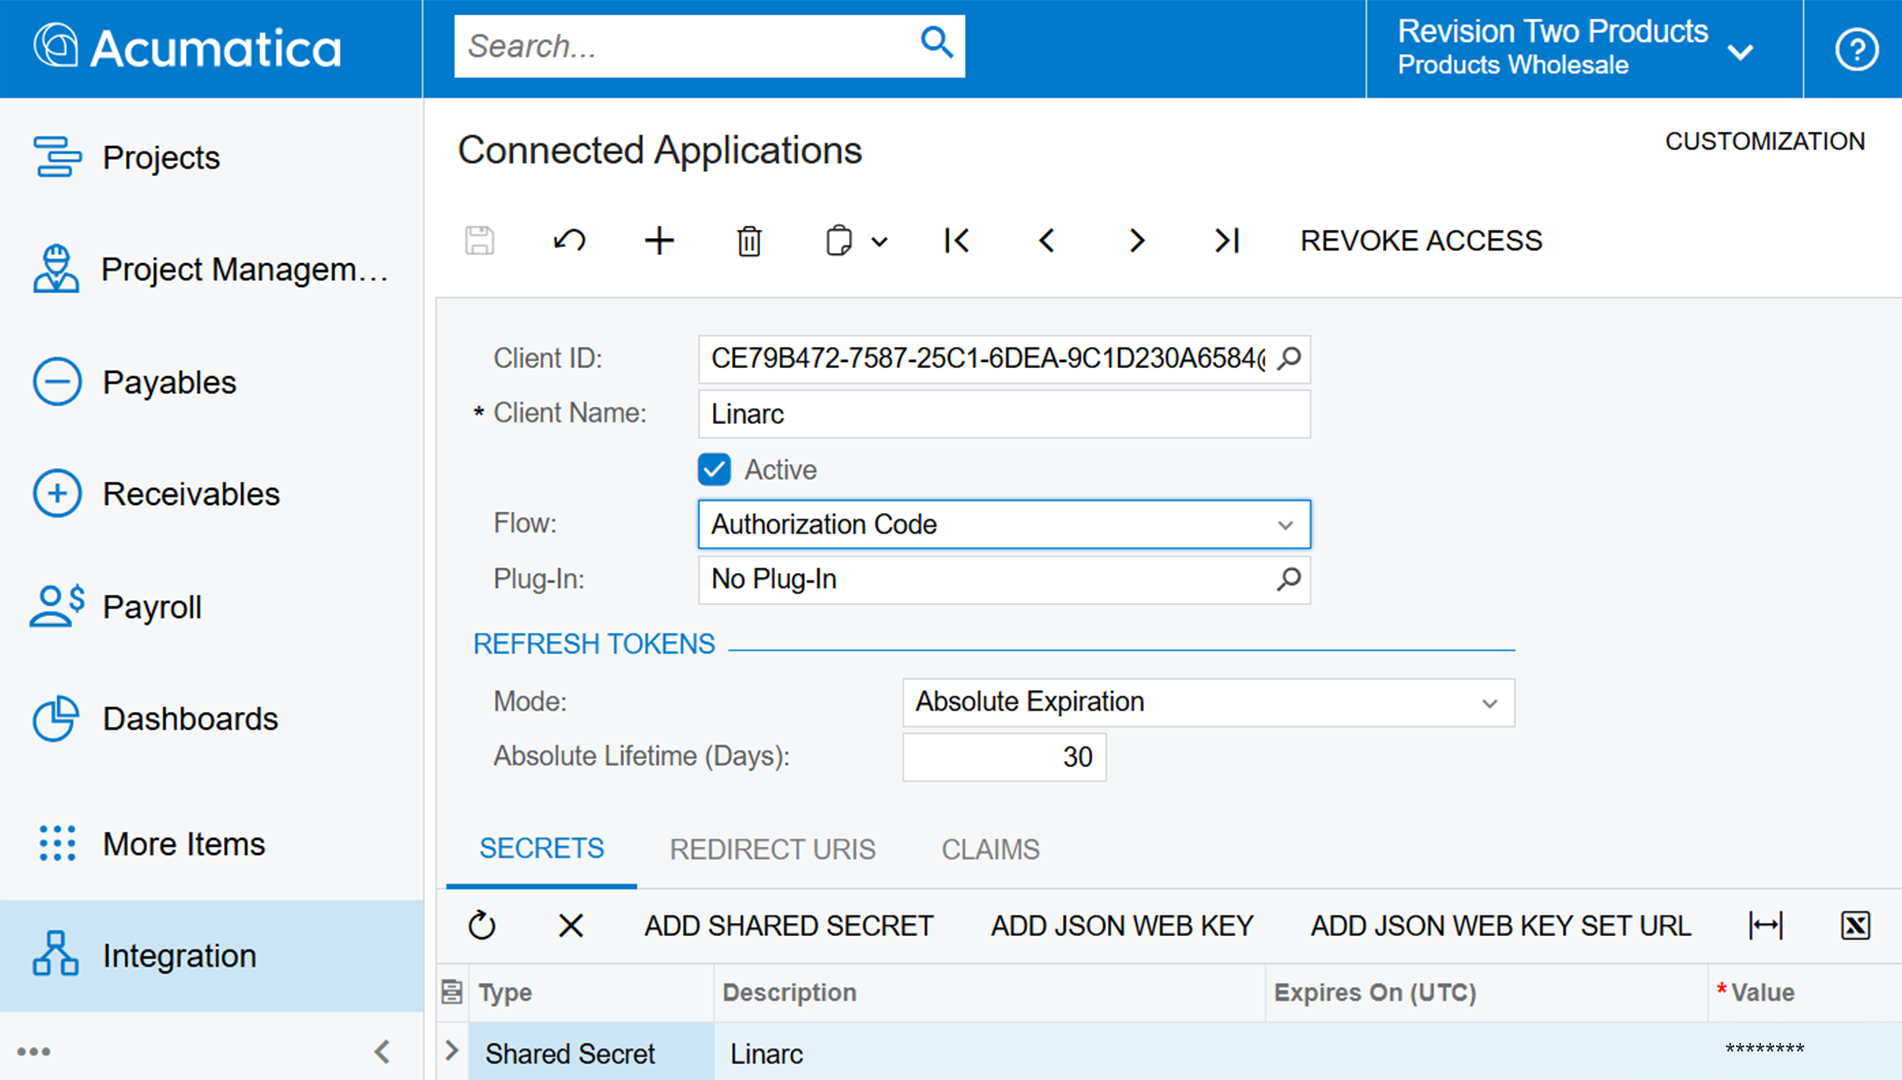
- Copy the 'Client ID' from the top of the form.
The Client ID ends with '@' followed by your tenant name.
Next Steps
You now have the three values that Linarc needs to connect:
- Instance URL: The web address of your Acumatica site. See Acumatica Instance URL in Acumatica Integration - Overview.
- Client ID: The ID that you copied from the top of the form.
- Client Secret: The secret value that you saved.
Enter these values in Linarc to connect. See Connect Linarc to Acumatica.
Was this article helpful?
That’s Great!
Thank you for your feedback
Sorry! We couldn't be helpful
Thank you for your feedback
Feedback sent
We appreciate your effort and will try to fix the article