Make your markups clear and easy to read by customizing their colors. Changing colors is a great way to visually categorize your markups, allowing your team to easily distinguish between defects, task assignments, or general notes.
You can change the stroke (outline) color for any tool, and add semi-transparent color fills to closed shapes like squares, circles, and clouds. To access these settings, simply click the color palette icon that appears next to any active markup to open the appearance menu.
Set up Stroke Color
Customize the appearance of markups like rectangles, circles, lines, arrows, etc., with your desired color.
- Click the color palatte that appears above the markup you are creating, to open the float menu:
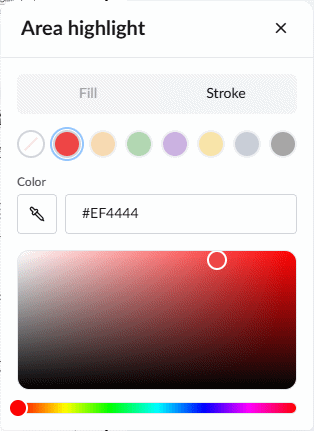
- Select 'Stroke'
You can choose your color in three different ways depending on your needs:
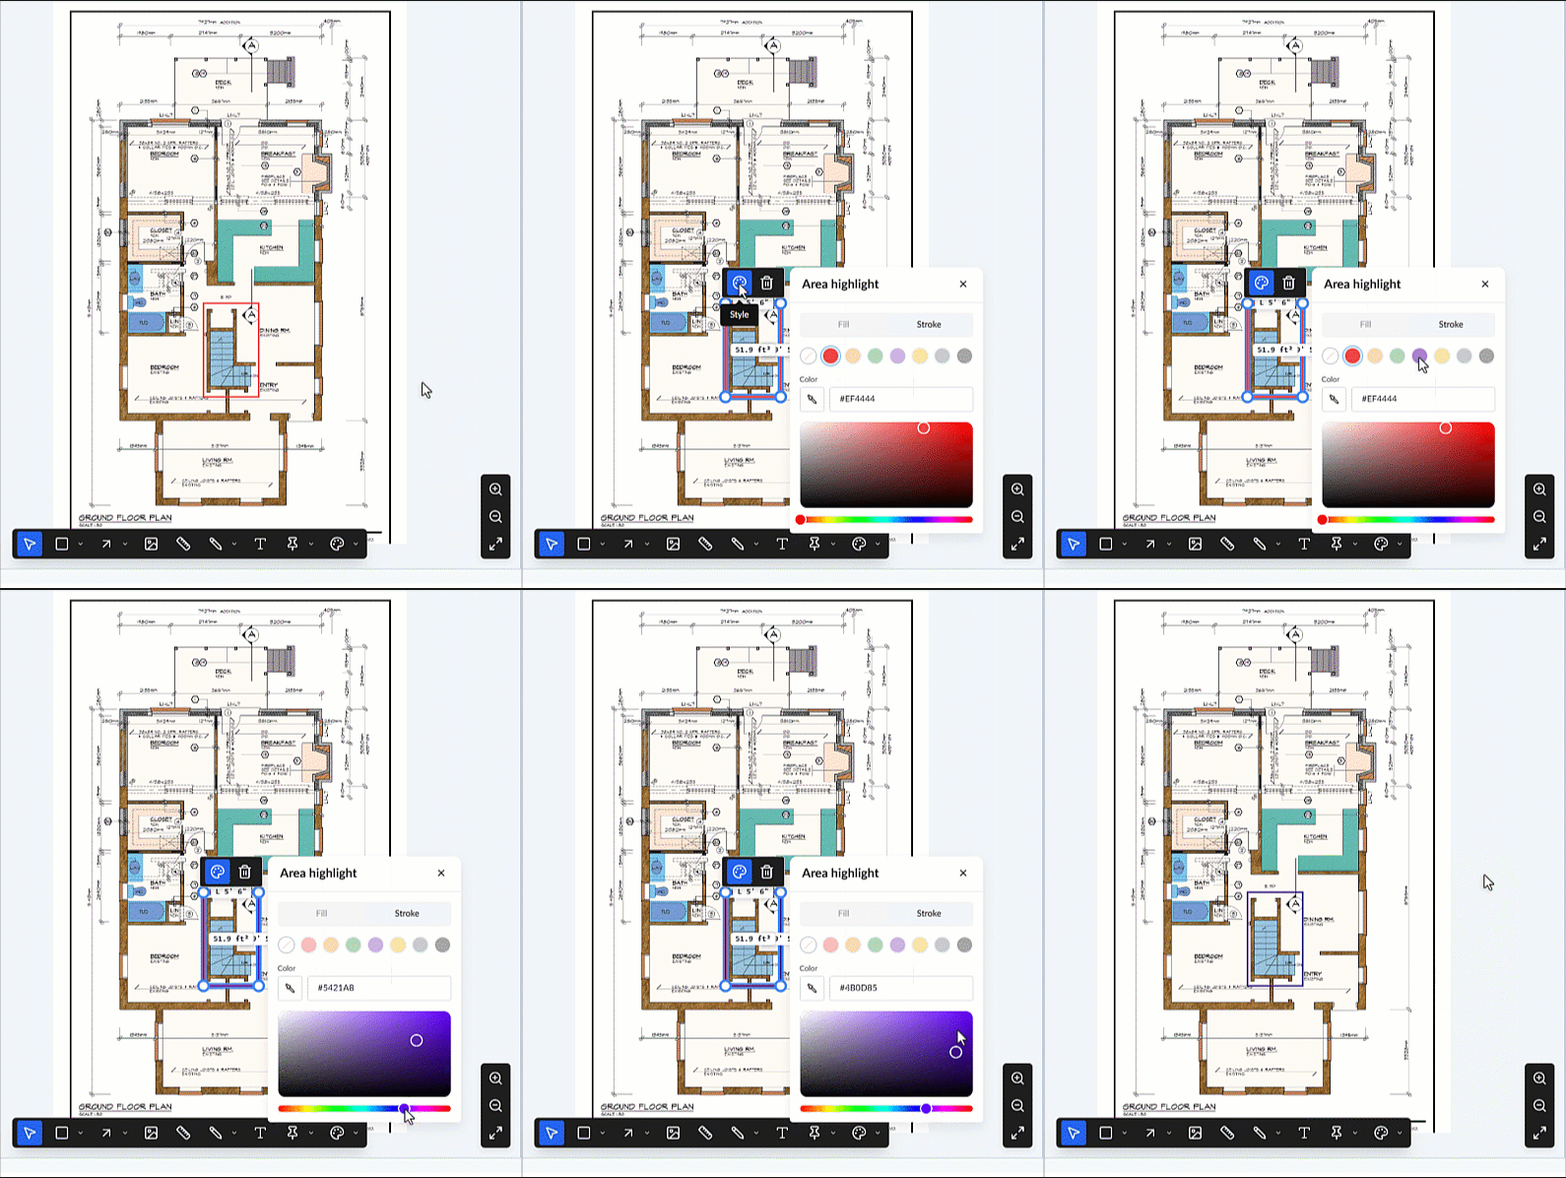
1. Color Palette
Choose a base color from the dots at the top of the menu, then adjust the gradient bars at the bottom to fine-tune the exact shade and tone.
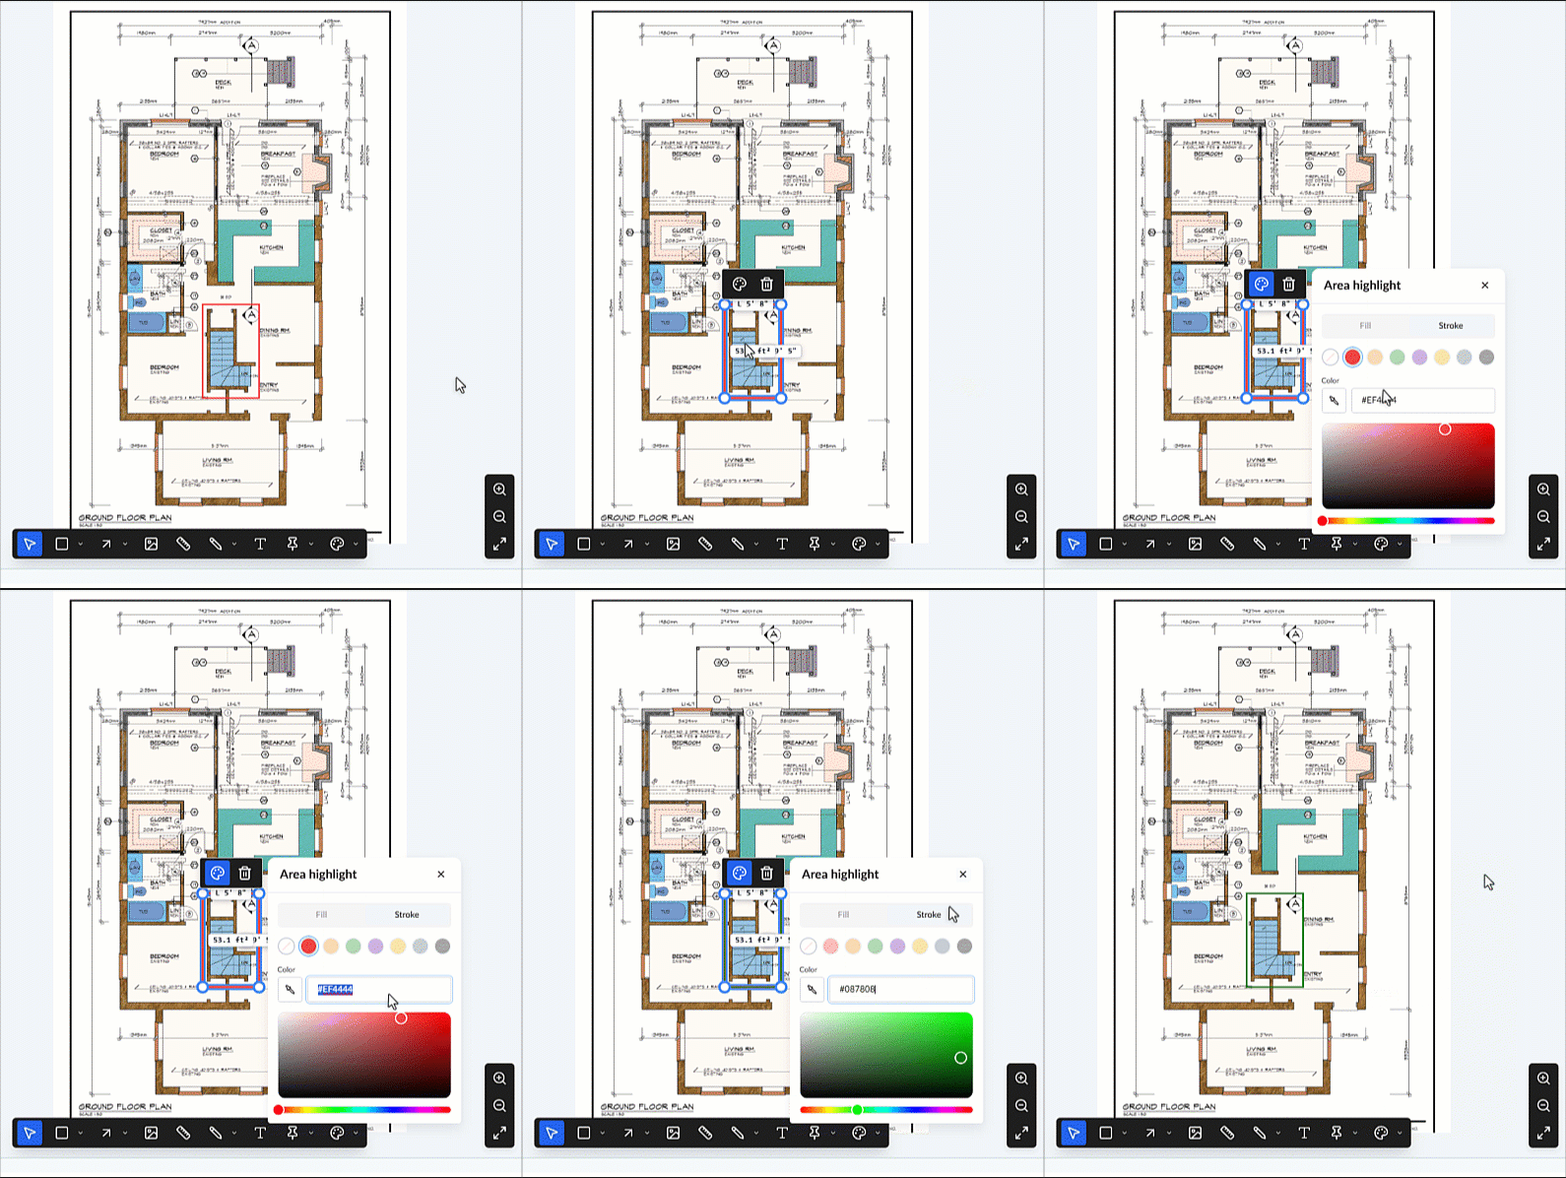
2. HEX Code
If you know the exact color you need, simply enter its HEX code (including the # prefix) directly into the text box for a perfect match.
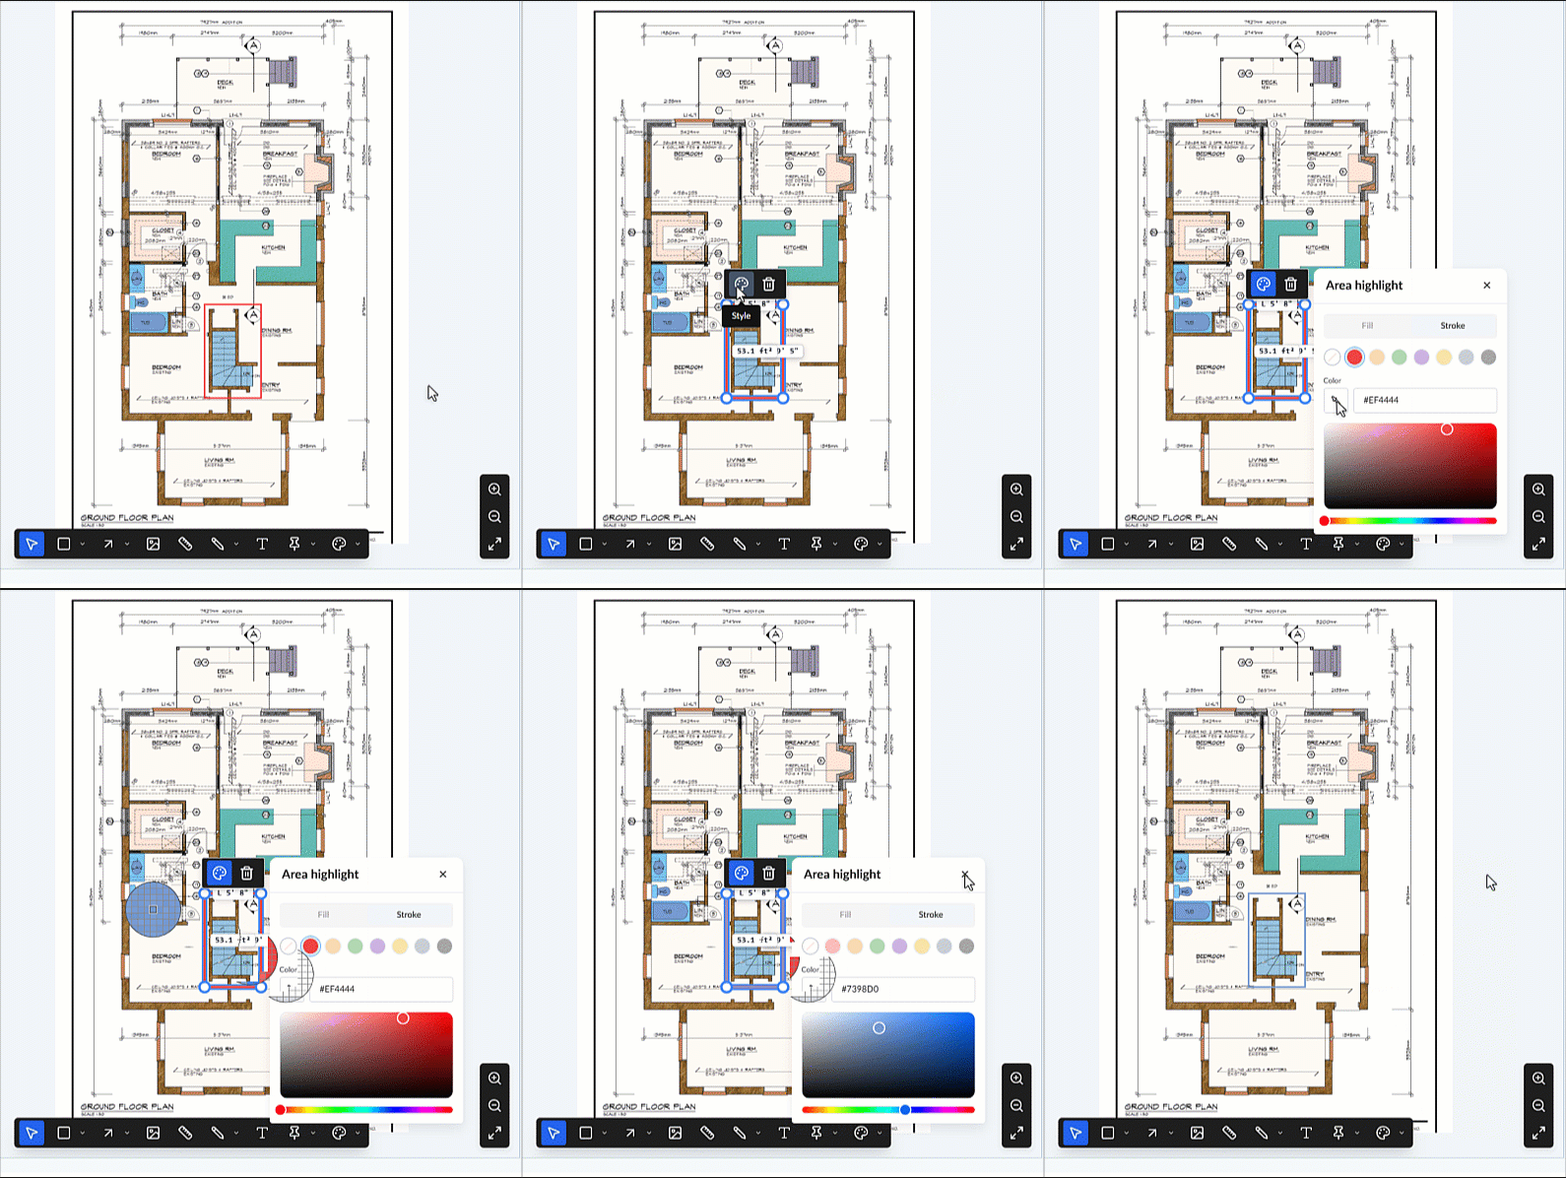
3. Color Picker
Use the color picker tool to click and sample any color currently visible on your screen. This will automatically apply that exact hue and tone to your markup.
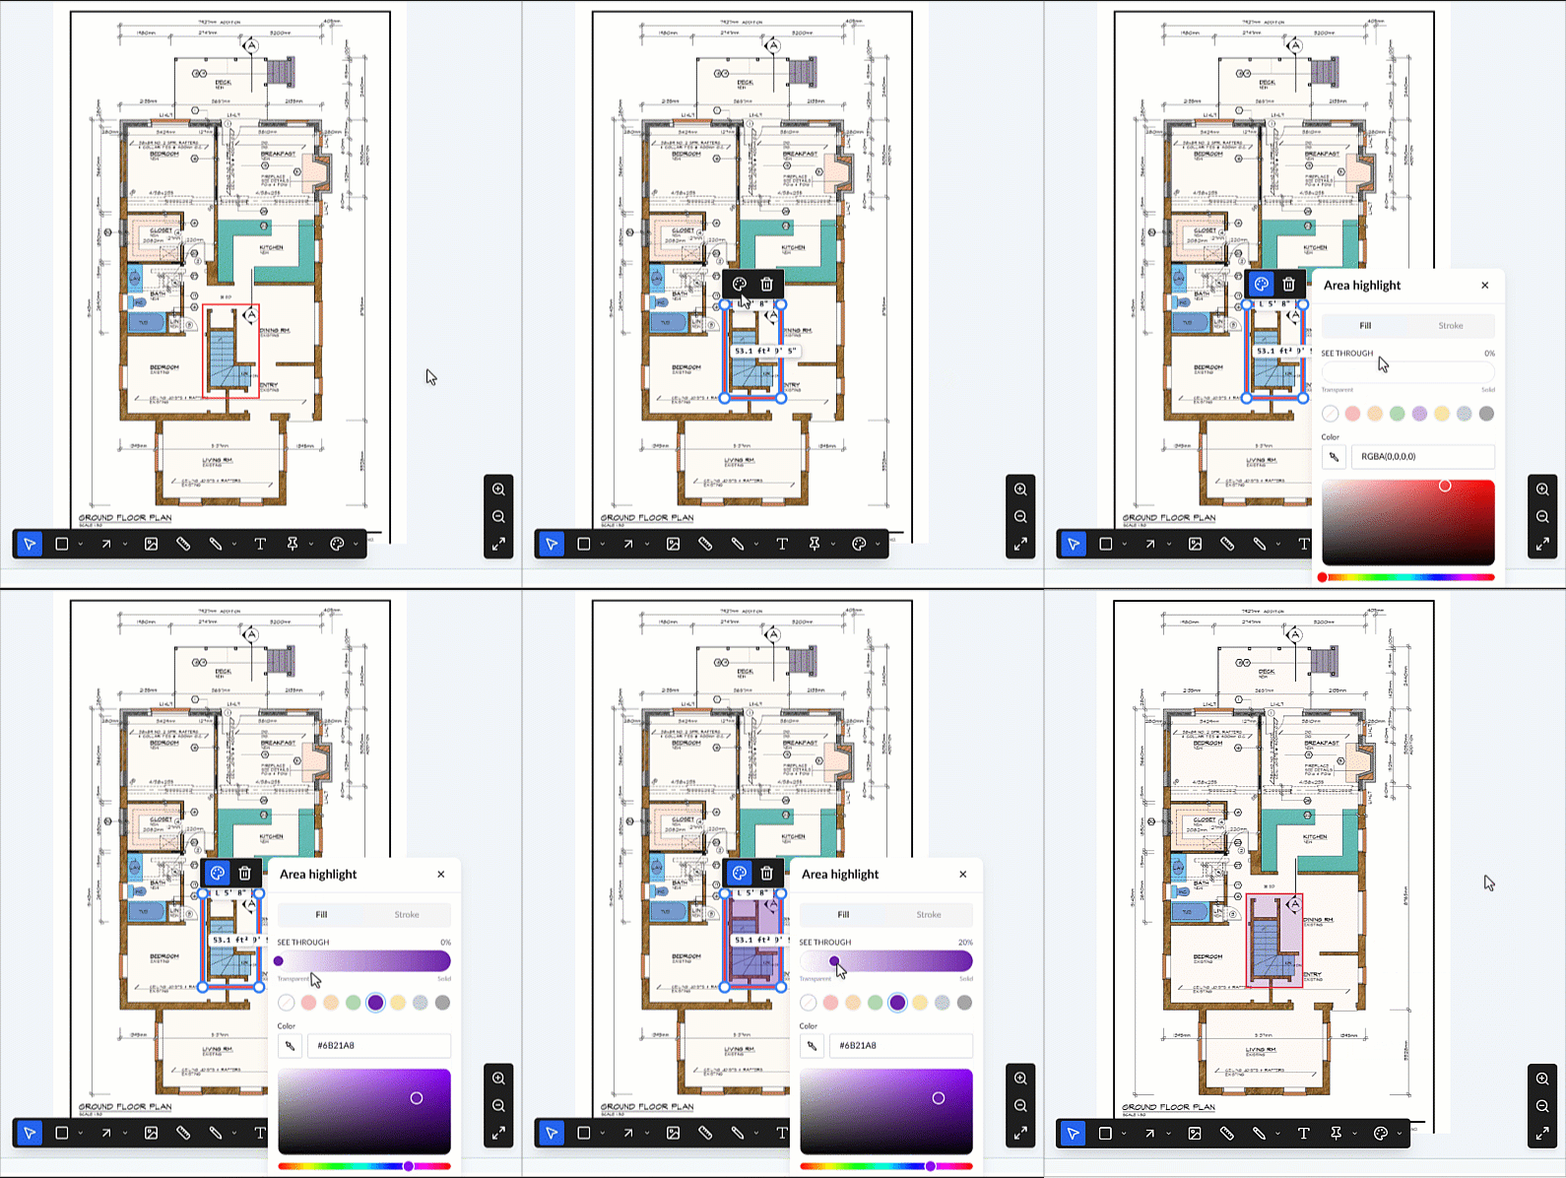
Set up the Fill Color
Fill colors can be applied to closed shape markups, such as squares, rectangles, circles, ellipses, clouds, and polygons. You can also adjust the opacity so the markup doesn't hide the drawing underneath.
- Select the Fill tab at the top of the float menu.
- Choose your color using any of the three methods explained above (Color Palette, HEX Code, or Color Picker).
- Use the slider to adjust the transparency of the fill color.
Was this article helpful?
That’s Great!
Thank you for your feedback
Sorry! We couldn't be helpful
Thank you for your feedback
Feedback sent
We appreciate your effort and will try to fix the article