Budget-Based billing operates completely independent of the project schedule. It does not draw from task progress updates nor require budget-to-schedule task allocations to calculate billable amounts. This makes it the ideal workflow for projects managed without setting up a detailed project schedule in Linarc.
Important Note: Creating payment applications using this workflow applies only to projects where the billing method is set to Budget-Based, as dictated by the governing contract at each tier. General Contractors and Stand-Alone Contractors establish this setting during initial contract setup, based on the terms of their contract with the client. Subcontractors establish this setting within their Linarc billing configuration, based on the terms of their commitment contract with the General Contractor.
The Current Period screen allows you to claim payment against applicable budget line items and approved change orders by manually entering either a completion percentage or a direct dollar amount.
Prerequisite: Budget-Based billing is available only after the complete project budget is set up, and the Schedule of Values (SOV) is generated from the budget and locked.
Available Billing Items by Contractor Type
- General Contractors: Your eligible list includes budget line items and change orders for both your self-performed work and the tasks assigned to your Subcontractors. You can claim amounts in part or full for the actual completion of both your self-performed work and the progress of work items reported by the subcontractors to submit a master Pay App to the project owner.
- Subcontractors: Your eligible list includes the project budget you set up along with the change order work assigned to you. You can claim amounts in part or full for the actual completion of your work items from the relevant budget line items. You will submit your Pay App directly to the GC for approval.
- Stand-Alone Contractors: Your eligible list includes the project budget you set up and your approved change orders. You can claim amounts in part or full for the actual completion of your work items from the relevant budget line items. You will submit your Pay App directly to your client (whether that is a GC or the project owner).
Once you specify your claims against the applicable budget lines, click Generate to create the payment application. Your current claims and remaining amounts update dynamically on the Current Period screen.
Note on Progressive Billing: If enabled in your project settings, you have the flexibility to draft multiple Pay Apps progressively throughout the month. As work is completed, you can build applications in successive terms and accumulate them to submit as one convenient batch on or after your monthly designated pay app submission date.
To generate a budget-based pay-app
Ensure you are on the Current Period screen. If not:
- Click the Main Menu button at the top-left.
- Under the 'Finance & Controls' section of the drop-down menu, select the appropriate billing module for your role:
- General Contractors: Select 'Owner Billing.'
- Subcontractors & Stand-alone Contractors: Select 'Monthly Billing.'
(Tip: Press and hold Cmd [Mac] or Ctrl [Windows] while clicking any menu item to open it in a new browser tab.)
- Select 'Current Period' from the left-hand navigation menu.
The interface displays all budget line items that are currently eligible for Pay App generation. The following example shows the 'Current Period' screen from a GC's workspace. The screen will be similar for other contractor types.

Column Descriptions:
- Description of Work: The title or label of the budget line item or approved change order.
- Scheduled Value (A): The total contract value allocated to the budget line item (the planned overall cost).
- Till Last Period % (C): The cumulative completion percentage billed through the previous payment application.
- Till Last Period Amount (B = A × C% ): The cumulative dollar amount billed through the previous payment application.
- Current Period % (E) - The percentage of the scheduled value claimed for the current billing cycle. Enter a value manually to update your claim.
- Current Period Amount (D): The gross billable dollar amount claimed for the current billing cycle.
Note: Entering a value in column E auto-calculates column D, and vice-versa.
- Stored Materials (F):The monetary value of uninstalled or stocked materials allocated to the line item. Enter this value manually.
Note: Under Budget-Based billing, this value is for tracking/informational purposes only and is excluded from the current pay application total. See Add Stored Material Cost below to learn more.
- Progress Billed (P = B + D): The total cumulative billable amount claimed across all billing cycles to date.
- % Billed to Date (M = P / A): The total completion percentage billed to date relative to the scheduled value.
- Total Retainage (T): The amount withheld from the gross progress billed total in accordance with contract retainage terms.
- Completed & Stored (G = P + F ): The sum of total progress billed plus the dollar value of stored materials (informational only).
- Balance to Finish (K = A - P): The remaining unbilled contract amount for the line item following the current billing cycle.
- Links: Click to view or link related project items (such as RFIs, Submittals, plan sheets with markups, or schedule tasks) to the work item.
- Attachments: Click to attach new files/photos or view existing documents linked to the work item.
Search, Filter, and Sorting Options
- Click the magnifier icon and use the 'Search' box located at the top left to find an entry using any value from the table as search criteria
- Click any column header to sort the rows in ascending or descending order based on that column's data.
- Click the cog wheel icon at the top right to adjust the display density and customize the display and order of the columns
- The options at the top left allow you to filter the entries, create nested groups of entries, highlight cells and manage personalized and customized views of the table. Use the links below to learn more:
Creating a pay app involves three steps:
- Step 1 - Record Current Period Progress
- Step 2 - Add Stored Materials Cost
- Step 3 - Generate the Pay App
Step 1 - Record Current Period Progress
To protect data integrity across billing cycles, most fields on this screen are read-only. You can edit values only in the 'Current Period' column group.
- Locate the budget line item you want to bill against.
- Enter your claim using either method:
- By Percentage: Enter the percentage of amount you want to claim from the scheduled value of the line item for this billing period in the Current Period % column.
- By Direct Monetary Value: Enter the dollar amount you wish to claim in the Current Period Amount column.
(Note: The system automatically calculates and fills the corresponding field—entering a percentage auto-calculates the dollar amount, and vice-versa.)
- Observe that your current claim totals, progress billed, and remaining balance-to-finish values update dynamically.
- Repeat this process for each applicable budget line item completed or worked on during the current billing period.
Step 2 - Add Stored Materials Cost
Enter the monetary value of uninstalled materials stored on-site or in an off-site warehouse. (Note: Under Budget-Based billing, this value is recorded for informational/inventory purposes only.)
- Click within the 'Stored Materials' column for the specific item to input the cost of unused materials.
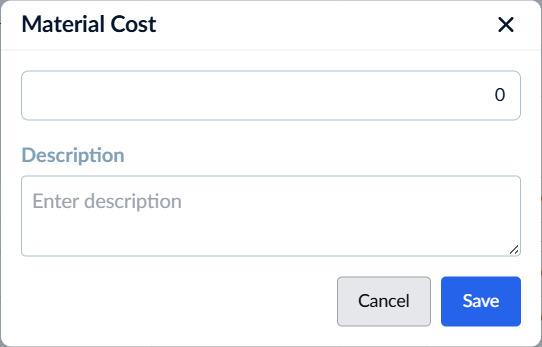
- Enter the monetary value of the materials currently in stock.
- Enter your notes or comments about the remaining materials in the 'Description' field
- Click 'Save'
- Repeat the process for all applicable task items.
Step 3 - Generate the Pay App
Once you have finalized the list of items for the 'Current Period' screen, you can compose it as a Pay App.
You have two options:
- Instantly submit it as a PDF to the paying party - Applies to those created on or after the monthly submission threshold date
- Save it for submission to the paying party after the monthly submission threshold date
Pay App Prerequisites:
- Signature Setup – Your Pay App is generated with your digital signature, which is automatically fetched from your profile. You must have this set up beforehand. If you haven't done so yet, Linarc will prompt you to register it when you create the Pay App. See Register Your Signature for detailed steps.
- Template Configuration – Pay Apps are generated using a template defined at the portfolio level. Linarc provides a default preset, but you can also create custom templates—either from scratch or by cloning a predefined one—to align with your company’s branding. See PDF Templates – Overview for details.
To compile the pay app
- Click 'Generate' a the top-right
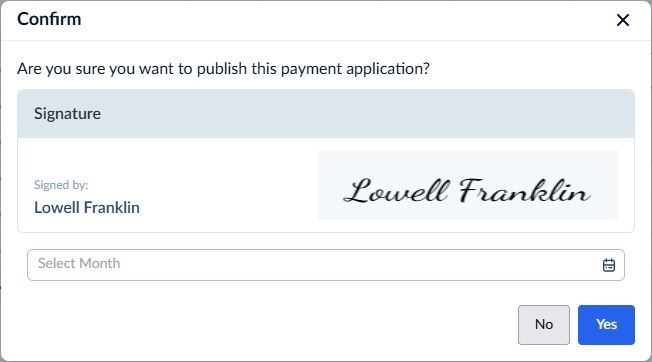
- Confirm your signature. The signature is fetched from your profile settings. If you haven't added your signature to your profile, you will be prompted to do so.
- Enter the month for which the payment application is generated.
- Click 'Yes' to continue

- Review the details and check the Forms:
- Form 1 Tab: Displays the Pay App summary layout formatted to industry standards.
- Form 2 Tab: Displays detailed line-item breakdowns of amounts billed against each SOV line.

- Click the
 (Preview) icon to view the PDF version of the pay app.
 - Click the
 button on the top right to download the PDF version of the pay app
You can view the list of pay apps generated in the 'Progress Billing' > 'Pay Apps' screen.
Next Steps:
1. If generated on or after the submission date:
- Click 'Submit' to instantly forward the pay app to your client. How your Pay App is routed depends on your contractor type:
- General Contractors: The Pay App routes directly to the Owner if they are in the project directory. If they are not in the directory, you must forward the PDF to the Owner externally. Once you receive their out-of-band approval, manually mark the Pay App as 'Approved' in Linarc, and proceed to invoice generation.
- Subcontractors: The Pay App automatically routes to the General Contractor within Linarc. Once the GC approves it, you can proceed to invoice generation.
- Stand-alone Contractors: Linarc automatically emails the PDF version to the client listed in your billing configuration. Once the client approves it, you can proceed to invoice generation.
2. If generated before the submission date:
The Pay App will simply be added to your pending list. You can accumulate multiple progressive Pay Apps throughout the month and submit them all together as a single batch once your official submission date arrives. See Submit Payment Applications for guidance.
Was this article helpful?
That’s Great!
Thank you for your feedback
Sorry! We couldn't be helpful
Thank you for your feedback
Feedback sent
We appreciate your effort and will try to fix the article