Setting up your Billing Configuration in Linarc lays the foundation for an automated payment cycle. This initial setup enables the platform to generate submit-ready Payment Applications (Pay Apps) based on real-time project progress, which automatically turn into trackable invoices once approved.
Setup Differences by Contractor Role
Your role determines how you interact with the Billing Configuration process:
- General Contractors (GCs): Configure your billing cycle to bill project owners. Client details are fetched automatically from the project directory.
- Subcontractors (SCs): Most of your billing setup is managed by the GC via your commitment contract. However, you can configure your monthly billing mode (progress-based vs. manual), bank details, and obligatory additions like state-specific taxes or discounts.
- Stand-alone Contractors: Configure your billing cycle to bill your direct client (e.g., GC or owner). You must manually enter your client's contact details during this setup.
Use the 'Billing Configuration' screen to:
- Automate Preferences: Set automation rules for generating Pay Apps and invoices.
- Set Financial Parameters: Define standard retainage (GC and Stand-Alone only) and overhead percentages, taxes, discounts, and more.
- Manage Payment Details: Add paying party contact information and your bank details for direct payment processing.
- Standardize Documents: Ensure all billing documents are correctly formatted, numbered, and ready for submission.
Locking Your Configuration & Retainage Flexibility
Once complete, you must lock your configuration to prevent unintended changes to core settings.
Retainage Rules:
- GCs & Stand-alone Contractors: Retainage percentages remain unlocked after setup, giving you flexibility to adjust rates as the project advances. Lowering your retainage percentage prompts Linarc to calculate the difference and generate a targeted Pay App to claim the released funds.
- Subcontractors: Retainage rates are controlled by the GC. GCs can apply progressive retainage reduction rules directly within the commitment contract as your billed percentage increases. SCs can generate pay-apps exclusively to claim the retainage releases.
Default Settings Note: Certain basic parameters are automatically inherited from your company-level Global Finance Configuration as default values, which you can override at the project level to fit specific project needs. Other sections must be configured exclusively at the project level. See Global Finance Configuration to learn more
To configure the billing parameters
- Click the main menu icon at the top-left of your screen.
- Select 'Owner Contract' or 'Contract' under the 'Finance & Controls' section in the drop-down menu.
Tip: Press and hold the 'Cmd' (Mac) or 'Ctrl' (Windows) key on your keyboard while clicking to open the module in a new browser tab.
- Click 'Configure' at the top
- The Billing Configuration screen opens by default. If not, click 'Finance Config' on the left
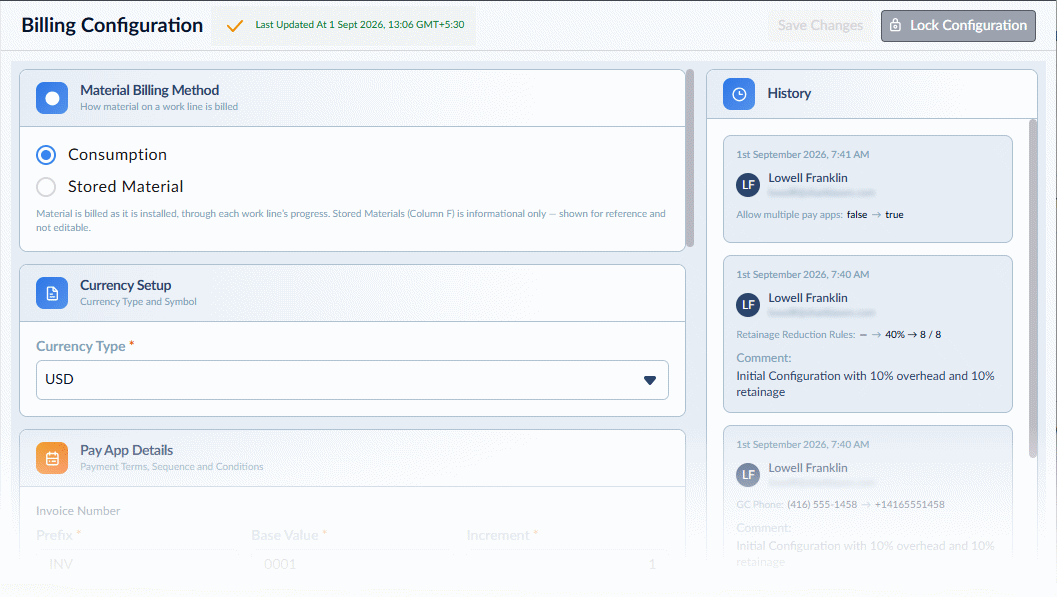
Available configuration fields vary based on your contractor role (General Contractor, Subcontractor, or Stand-Alone Contractor). This article details all setup fields and highlights options exclusive to specific contractor types. The example shown below is for a general contractor:
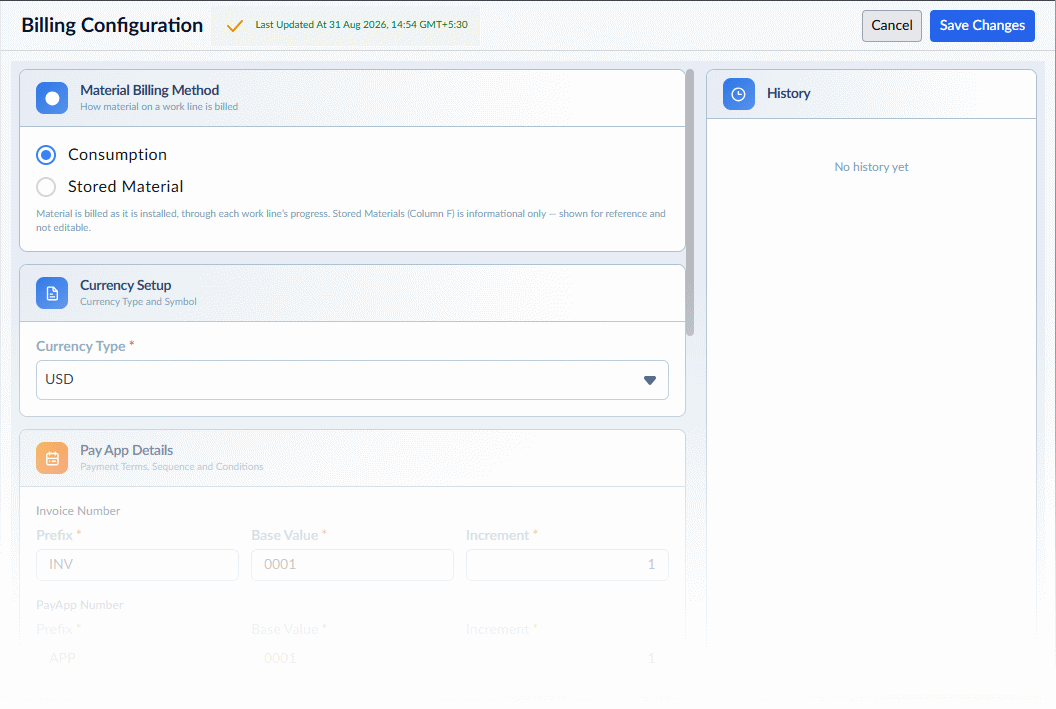
Enter the details under the following sections:
Billing Method - Applies only to Subcontractors - Allows SCs to select your billing mode. (GCs and Stand-alone contractors configure this settings in thier client contract):
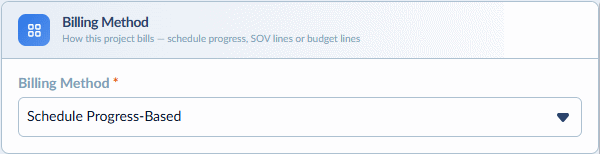
Select your primary progress billing mode to govern how pay applications are generated:
- Schedule - Progress Based: Linarc dynamically calculates earned billable values by tracking task completion percentages on the schedule. Best for projects strictly tied to physical schedule progress.
- SOV-Based: Allows you to claim progress billings by percentage or direct dollar amounts against individual Schedule of Values line items. Best for lump-sum or fixed-price contracts using standard AIA-style pay apps.
- Budget-Based: Allows you to claim progress billings by percentage or direct dollar amounts against itemized budget line items for monthly work completed. Best for Cost-Plus or GMP contracts requiring detailed cost tracking.
Material Billing Method - Configure how procured and stocked materials are claimed on monthly pay applications based on your contract terms:
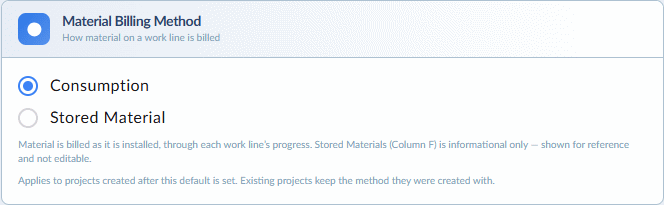
- Consumption - Material costs can only be claimed for the quantity actually consumed, in proportion to task progress during the billing period. The system automatically calculates this amount based on the budget allocated to the task and reflects it in your progress billing. Under this method, you cannot claim materials procured and stored on-site or in a warehouse for future use.
- Stored Material - Allows you to claim the value of materials procured and stocked on-site or in a warehouse prior to installation. Enter the dollar value of the stored inventory in the Stored Materials column on the Pay App generation screen to include it in that month’s billing application.
Currency Setup - Define the financial currency standard used for calculating project costs and receiving payments:
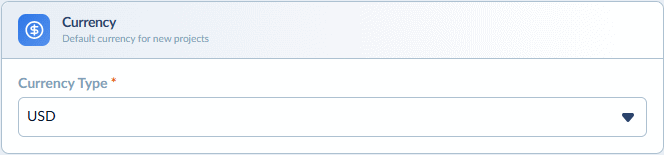
- Currency Type: Select the appropriate currency from the drop-down menu.
Pay App Details Define the sequential numbering structure for your Pay Apps and Invoices and payment conditions:
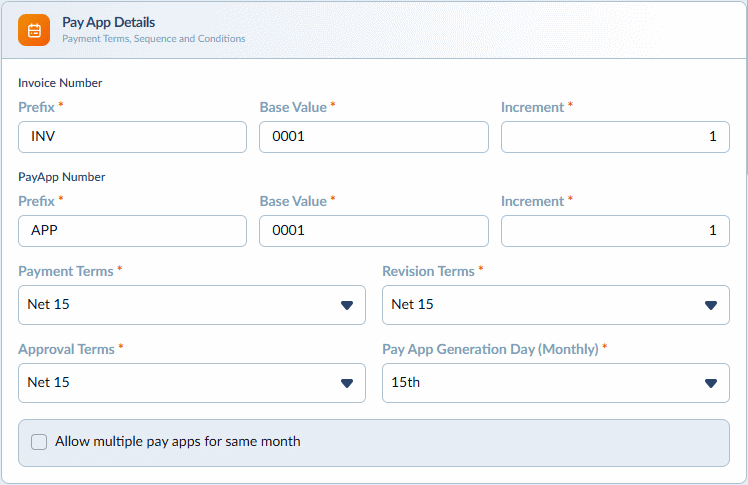
Prefix, Base Value & Increment: Set an alphanumeric identifier (Prefix, for example the initials of your company name), the starting serial number (Base Value), and the step value (Increment) for each successive document.
The following settings in the 'Pay App Details' section apply only to General and Stand-alone Contractors
Payment Terms: The agreed-upon payment schedule (e.g., 'Net 30' means payment is due 30 days from the invoice date).
Revision Terms: The allowed timeframe and conditions for modifying a submitted Pay App.
Approval Terms: The agreed-upon time for approving pay applications (for example, 'Net 15' – Approval required within 15 days).
Pay App Generated Day (Monthly): The specific day of the month when a Pay App becomes eligible for submission to the payor. While you can generate a draft Pay App(s) at any point during the month, the system restricts official submission until on or after this designated date.
- Allow multiple pay apps for same month - When enabled, you can progressively create multiple Pay App drafts throughout the month as work is completed or reaches specific milestones. The system groups these drafts together so you can submit them all at once on or after your designated submission day. This feature also allows you to include standalone Pay Apps generated specifically for claiming release of certain amount from the retainage.
Bank & Tax - The details of the beneficiary bank account where you will receive payments.
Account Name & Bank Name: The account nickname and the holding bank.
Bank Address & Routing Number: The bank branch's physical address and its 9-digit routing code.
Account Number: The receiving beneficiary account number. Enter the account number and re-enter the same in the next field for confirmation.
Tax Percentage: Enter the percentage of the payment to be deducted or applied for taxes.
Additions & Deductions - Set up rules to automatically adjust the total Pay App value by adding required tax line items or deducting applicable withholdings and credits. You can create custom rules and selectively enable or disable them at any time throughout the project's lifecycle.
- Additions: Include custom taxes, statutory surcharges, or location-specific financial regulations that are added on top of your work completed. For example:
- Gross Receipts Tax (GRT): In jurisdictions like New Mexico, contractors collect location-specific Gross Receipts Tax from their clients by adding it to their monthly Pay Apps.
- Municipal Surcharges: Add city- or town-level contractor revenue taxes, transit district fees, or local infrastructure surcharges where required by local government regulations.
- Deductions: Apply statutory tax withholdings, agreed-upon resource adjustments, or contract credits:
- Statutory Tax Withholdings: In jurisdictions that mandate state- or county-level tax withholdings—such as the 1% Public Contractor’s Gross Receipts Tax (PCGRT) enforced on public works in Montana—the paying entity is legally required to deduct and hold this tax from each progress payment.
- Shared Operational Resources: Apply deductions for Shared Equipment Usage (such as shared crane time, hoisting, or generator services), site utility usage, or back-charges.
- Contractual Credits: Apply negotiated volume discounts or safety milestone credits.
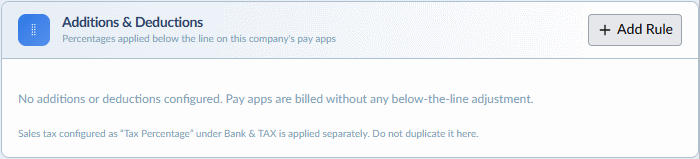
To add a rule
- Click 'Add Rule'
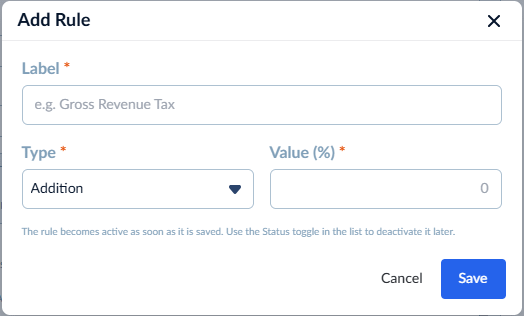
Label - Enter a descriptive title or subject for the adjustment (e.g., Public Contractor Gross Receipts Tax, Shared Equipment Usage Credit, Site Utility Reimbursement, etc.).
Type - Select whether the adjustment is an Addition or Deduction
Value - Enter the adjustment amount as a percentage to be added to or deducted from the total Pay App value.
- Click 'Save'
- Repeat the process to add more adjustment rules as needed
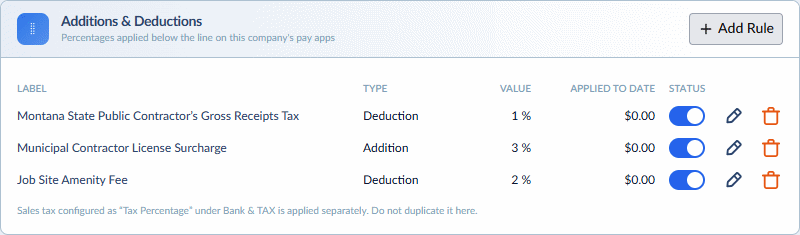
Manage the Rules Throughout the Project Lifecycle
- Enable / Disable: Use the toggle switch next to any rule to temporarily activate or deactivate it for upcoming billing cycles.
- Edit / Delete: Click the pencil (Edit) icon to update a rule’s parameters, or use the trashcan icon to delete rules that are no longer valid.
Impact on Pay Apps: Changes made to adjustment rules (such as editing values, toggling rules on/off, or adding new rules) apply only to future Pay Apps generated after the update. Previously submitted, approved, or finalized Pay Apps remain completely unaffected, preserving your historical financial records.
Terms & Percentages Set the automated calculations for indirect costs, retainage withholds and more.
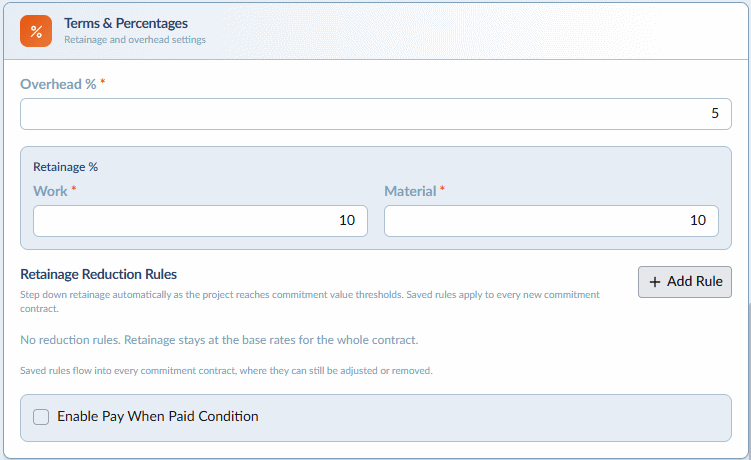
Overhead Percentage: The rate applied to cover indirect project expenses, such as administration and supervision. This is auto-calculated for each cost item in the budget, but you can manually reconcile them as required.
The following settings in the 'Terms & Percentages' section apply only to General and Stand-alone Contractors
Retainage Percentage: The portion of each payment that can be withheld by the paying party (Owner or the General Contractor) until the project (or scope) is satisfactorily completed. You can apply retainage to labor costs, material costs, or both.
Labor and Equipment - Enter the percentage to withhold from the labor and equipment cost component of each task based on its monthly billed progress.
Material - Enter the percentage to withhold from the material cost component of each task based on its monthly billed progress.
Retainage Reduction Rules - Set up rules to automatically reduce the retainage percentage as the project progresses. When a reduction rule is triggered upon the overall billed amount reaches the set percentage, the retainage percentage is lowered to the set value. You can claim the released portion of the withheld retainage, calculated from the difference between the previous and new retainage rates, as a dedicated pay app.
To add a new rule
- Click '+ Add Rule' and enter the following parameters:
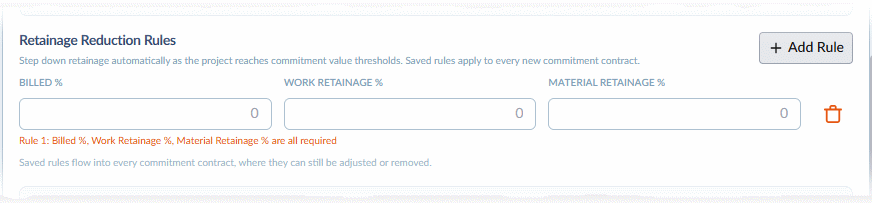
Billed Percentage: The completion threshold (billed progress percentage) at which the retainage rate decreases.
Work Retainage: The revised retainage percentage applied to the labor cost component once the threshold is reached.
Material Retainage: The revised retainage percentage applied to the material cost component once the threshold is reached.
- Click '+ Add Rule' and repeat the process to create additional milestones for descending retainage rates
Your rules are auto-saved. You can remove the rules that are no longer valid, using the trashcan icon against them.
Pay When Paid
Enable 'Pay When Paid' Condition - Applicable only to stand-alone contractors. When enabled, your payment is contingent upon the General Contractor receiving their funds from the project owner. (Note: This setting is only applicable when the paying party is a General Contractor).
External GC/Owner The paying party's information, which will appear on all submitted Pay Apps and invoices.
- For General Contractor - The Owner details are auto-fetched from the Project Directory. You can edit the details as required.
- For Stand-alone Contractors - Enter the details manually
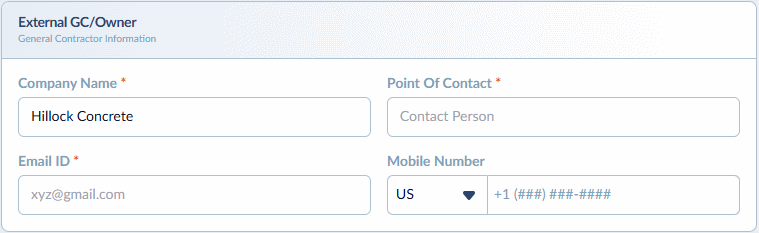
Company Name: The entity responsible for paying your invoices.
Point of Contact: The individual accountable for managing payments.
Email ID & Contact Number: The email address and phone number for the point of contact.
You can modify the configuration at any time prior to locking.
- To save your progress, click 'Save Changes', at the top-right
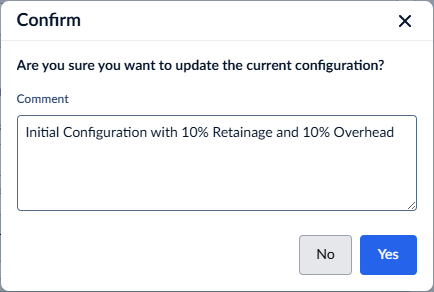
- Enter a revision note in the confirmation dialog, and click 'Yes' to save your configuration.
Lock the Configuration
After entering all your parameters, you must lock the configuration for the settings to take effect.
To lock your settings
- Click 'Lock Configuration' on the top-right,
- Review the confirmation dialog, which displays a summary of the sections you just configured.
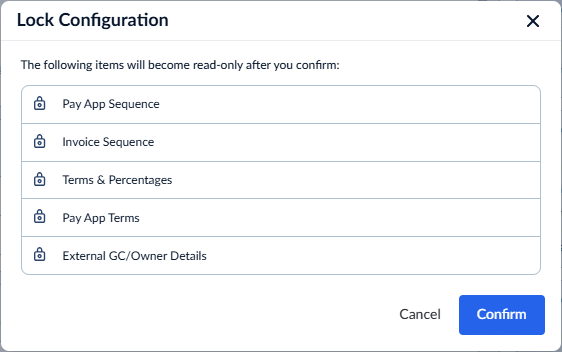
- Click Confirm to finalize your setup.
These configurations will automatically apply to all Pay Apps and invoices generated starting with your next billing cycle.
View the Change Log
The 'History' panel on the right displays a chronological record of all edits made to your billing configuration over time.
Was this article helpful?
That’s Great!
Thank you for your feedback
Sorry! We couldn't be helpful
Thank you for your feedback
Feedback sent
We appreciate your effort and will try to fix the article