After reviewing the Look Ahead schedule and ensuring all subcontractor commitments are finalized, the General Contractor officially publishes the schedule. When the Look Ahead is in the Active status, the GC can oversee the progress of tasks assigned to subcontractors, manage self-performed tasks, and track schedule adjustments by viewing deltas to easily identify any tasks that have been added or removed compared to the previous period.
Note:
The General Contractor retains final schedule approval and can either accept proposed date revisions or publish the original look ahead plan to maintain project alignment.
- Publish the Look Ahead Schedule
- Add Crew Members to a Task
- Log Actual Quantity to a Task
- Update Task Progress
- Manage Real-Time Constraints
- View Schedule Deltas
Publish the Look Ahead Schedule
- Click the main menu at the top-left
- Select 'Schedule' under the 'Scheduler' section
- Select 'Look Ahead' on the left menu
The current active look ahead schedule opens by default. To view other Look Aheads that are in review or draft status, open the date range drop-down at the top left and select the desired period.
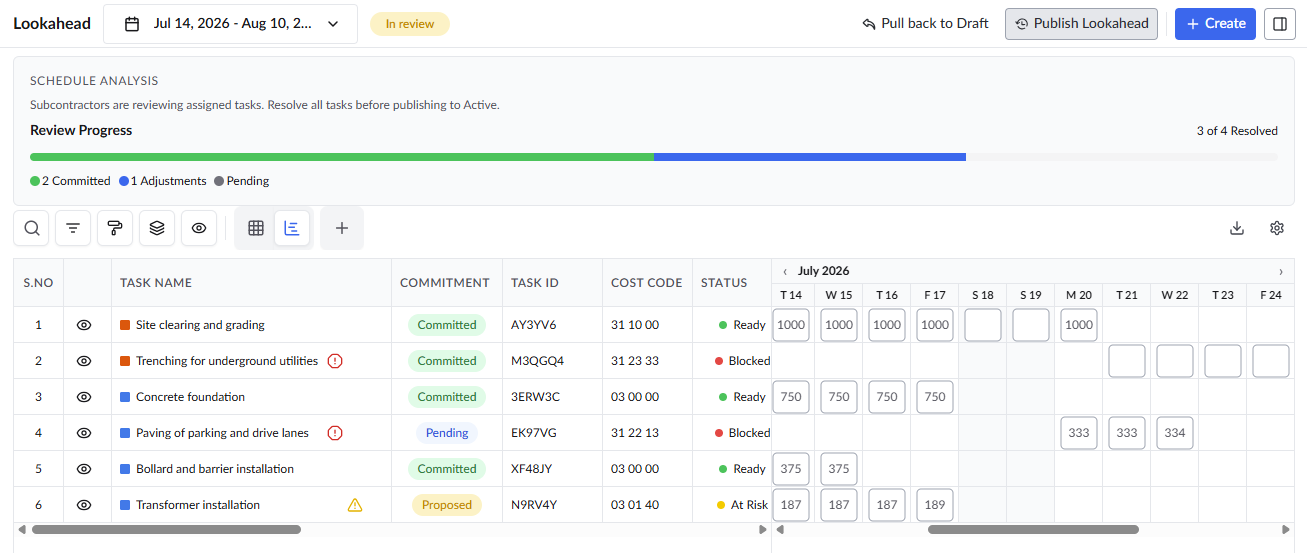
- Click the 'Publish' button on the top right
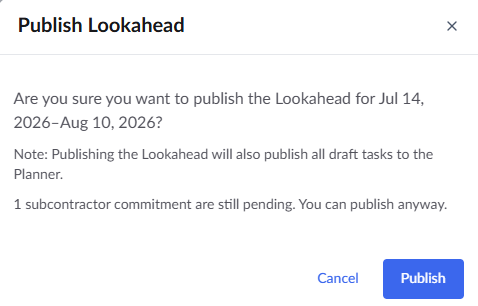
- Click 'Publish' to confirm your action
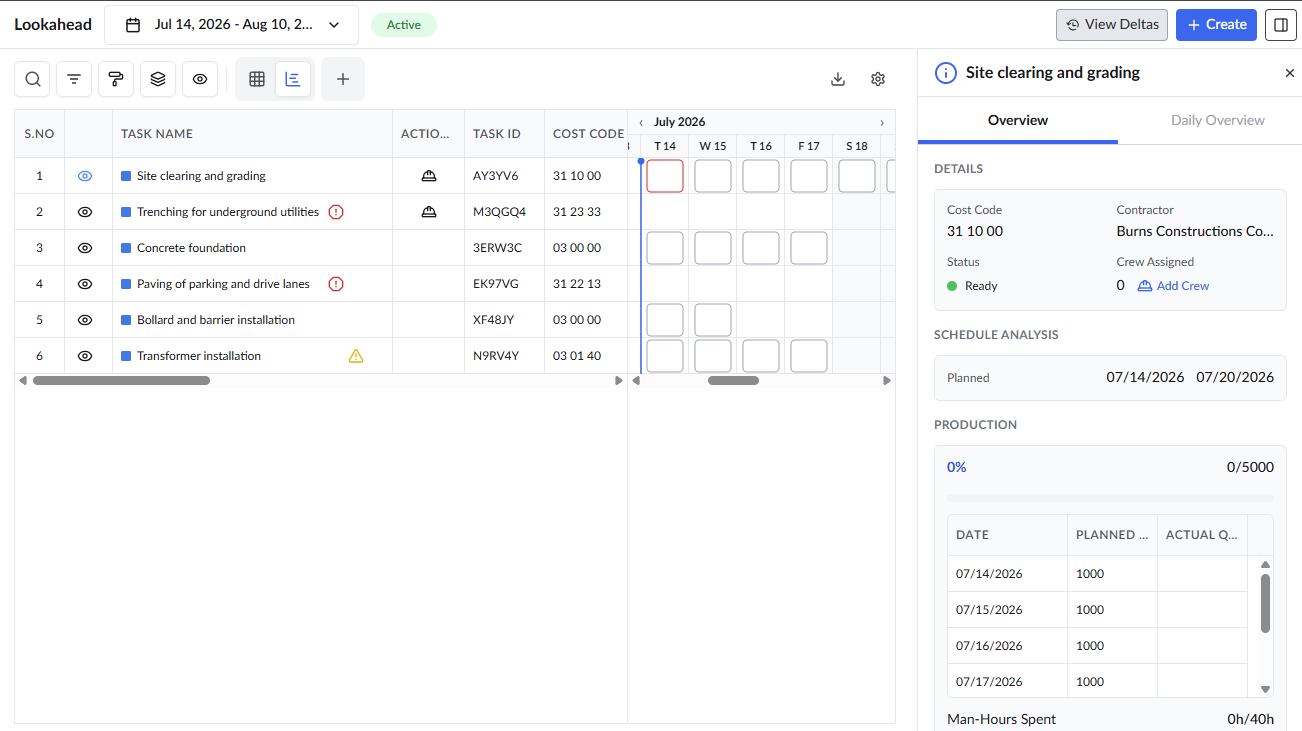
Once a new Look Ahead schedule is published, the previously completed or in-progress schedule is moved to 'Closed' status.
Add Crew Members to a Task
The project manager can assign crew members to tasks from the office based on project needs. This is especially useful for tasks that require specialized skills or focused attention, ensuring the right personnel are allocated to the right work. You can add crew members to a task in three different methods:
Note: Crew members can be added to tasks only in the Active Look Ahead schedule and only for tasks that belong to your company.
From Look ahead Grid
- Click the
 icon in the 'Action' column of the lookahead grid
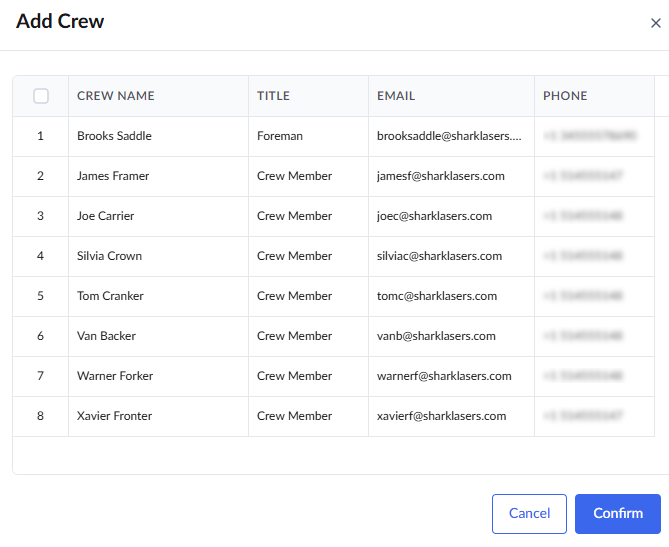
- Locate the desired crew member and click their corresponding serial number to select them for the assignment.
- Click 'Confirm' button to add the crew members to the task
From Task overview Tab
- Click the eye icon next to the task name to open the task details panel on the right side of the screen.
- Ensure the 'Overview' tab is selected at the top of the panel.
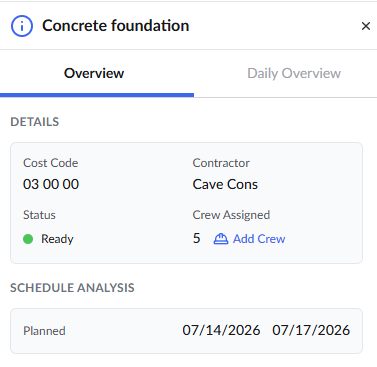
- Click the
 button under 'Crew Assigned' in the 'Details' section
 - Locate the desired crew member and click their corresponding serial number to select them for the assignment.
- Click 'Confirm' button to add the crew members to the task
From Daily overview Tab
- Click the eye icon next to the task name to open the task details panel on the right side of the screen.
- Ensure the 'Daily Overview' tab is selected at the top of the panel.
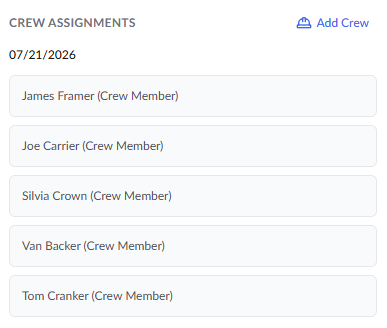
- Click thebutton under 'Crew Assignments'
- Locate the desired crew member and click their corresponding serial number to select them for the assignment.
- Click 'Confirm' button to add the crew members to the task
Log Actual Quantity to a Task
Tracking the daily installed quantities provides a direct comparison against the planned quantities agreed upon during the review phase. You can add actual quantity of work in three ways
- Enter Actual Quantities via the Gantt View
- Enter Actual Quantities via the Task Overview Tab
- Enter Actual Quantities Via the Daily Overview Tab
Enter Actual Quantities via the Gantt View
- Locate the task within the Active Look Ahead schedule grid.
In the Gantt view on the right side of the table, locate the column for the specific date the work was performed.
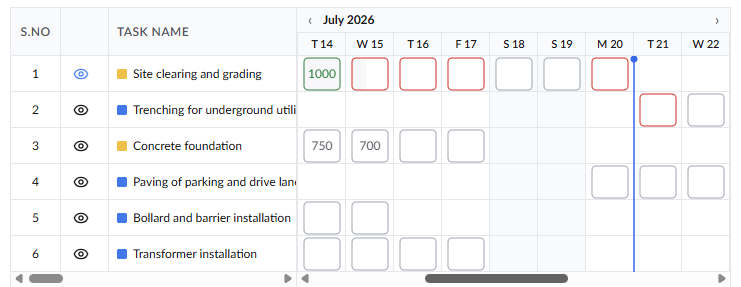
Click directly into the cell intersecting the task and the date.
Enter the actual quantity of work completed for that single day.
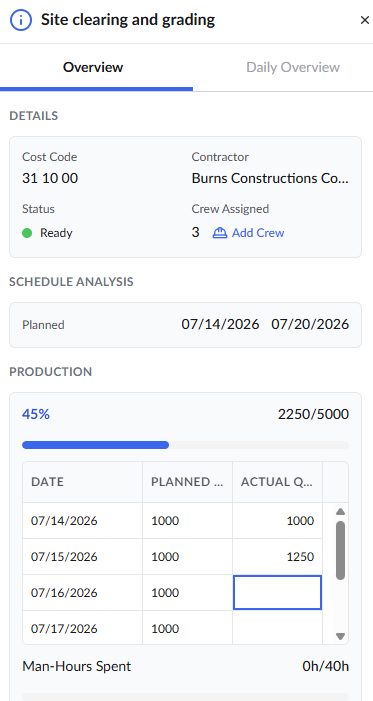
- Locate the task in the Look Ahead grid.
- Click the eye icon next to the task name to open the task details panel on the right side of the screen.
- Ensure the 'Overview' tab is selected at the top of the panel and scroll down to the 'Production' section.
- Locate the production tracking table, which displays the Dates alongside the Planned and Actual Quantities.
- Click into the corresponding cell under the 'Actual Quantity' column and enter the value
Enter Actual Quantities Via the Daily Overview Tab
- Locate the task in the Look Ahead grid.
- Click the eye icon next to the task name, then select the 'Daily Overview' tab to view the metrics for the current date.
Or
- Ensure the task overview pane is open and click a specific date cell for that task in the gantt to open the 'Daily Overview' tab for that exact date.
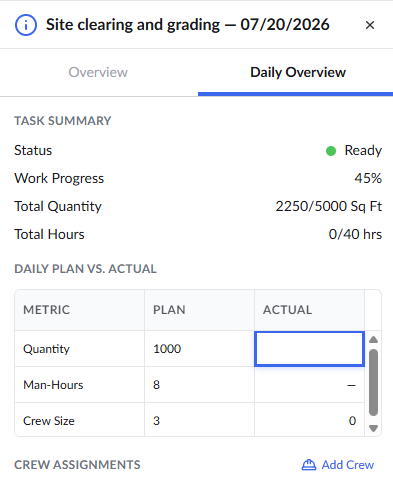
- Click into the field under the 'Actual' column and enter the quantity completed for that day.
Update Task Progress
As fieldwork advances, the overall completion percentage of the task must be updated to reflect current progress.
- For Tasks Without Planned Quantities : If a task does not have planned quantities, you must manually update its progress percentage.
- For Tasks With Planned Quantities: If a task has planned quantities, its progress percentage is calculated automatically based on the daily actual quantities you log as mentioned below.
To update task progress
- Locate the assigned task within the Active Look Ahead schedule grid.
- Click the 'Progress' column to open the Set Progress pop-up window.
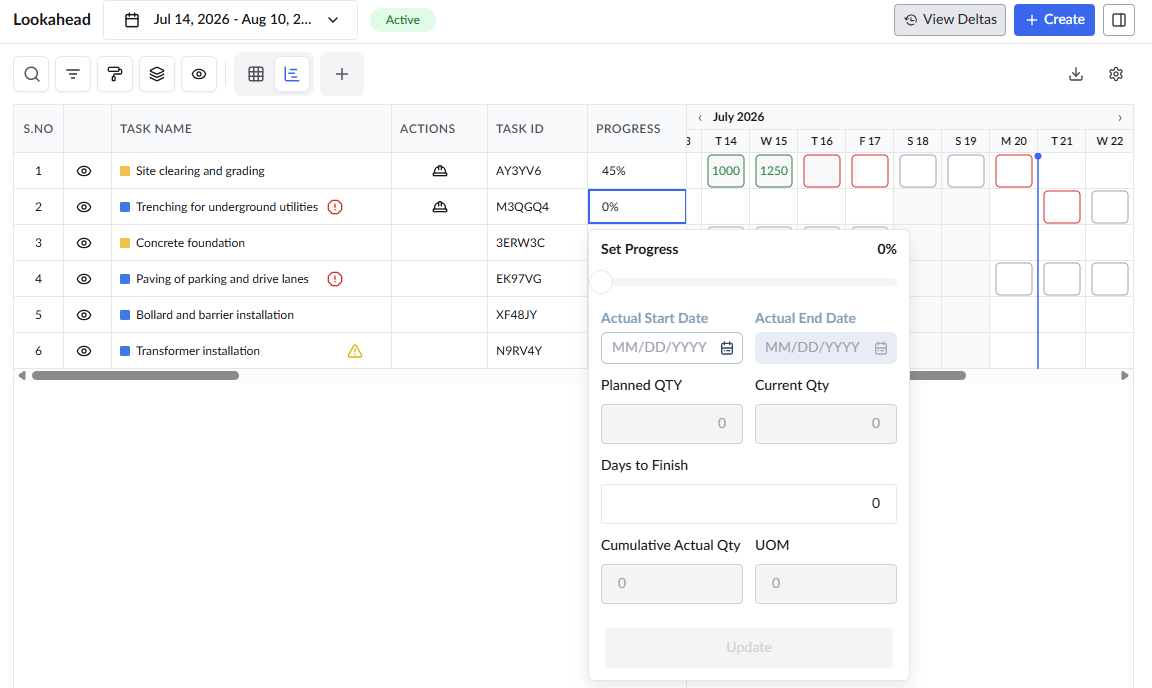
- Click and drag the progress slider at the top of the window to reflect the current completion percentage
- Click the calendar icon to select the Actual Start Date.
- Click 'Update'. See Update and Share Task Progress for more details
Manage Real-Time Constraints
Even during the execution phase, unexpected roadblocks can arise. Active tasks must be monitored for sudden issues like material shortages or site access problems. See Manage Task Constraints in Lookahead Schedule for more details.
Note: Once a task reaches 100% complete further constraint management (adding, editing, or resolving) is disabled.
- Click the eye icon next to the task name to open the task details panel on the right side of the screen.
- Click + Flag a Constraint to add a new Blocking or Warning constraint.
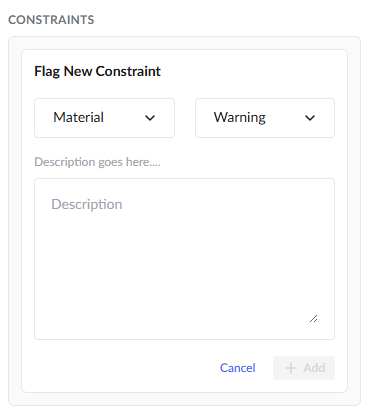
Select the constraint category from the first drop-down menu (e.g., Material, RFI, Permit).
Select the severity from the second drop-down menu:
Warning: Flags a potential issue but does not stop work (changes task status to 'At Risk').
Blocking: Strictly halts execution (changes task status to 'Blocked').
Enter a detailed explanation of the roadblock in the description text box.
Click the '+ Add' button to attach the constraint to the task.
- Click the three-dot menu to edit, resolve or delete existing constraints as conditions change or Resolved when a roadblock is cleared.
View Schedule Deltas
Gain a clear overview of changes between your previous and current Look Ahead schedules to quickly identify newly added tasks. This ensures you can proactively adjust site logistics, equipment, and laydown areas for the new work.
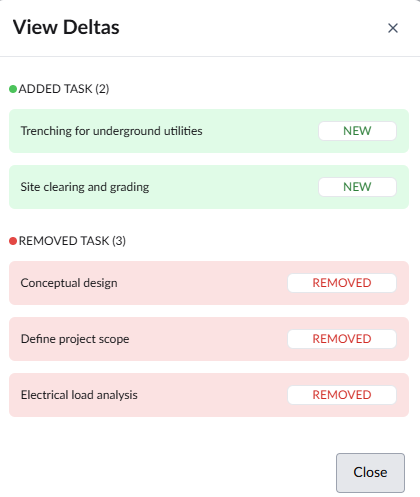
- Click the 'View Deltas' button at the top
- Added Task (Green): Displays brand-new tasks introduced in the current active schedule that were absent in the previous period.
- Removed Task (Red): Displays tasks from the previous schedule that have since been removed or pushed out of the current active period.
Was this article helpful?
That’s Great!
Thank you for your feedback
Sorry! We couldn't be helpful
Thank you for your feedback
Feedback sent
We appreciate your effort and will try to fix the article