The Baseline screen provides a comprehensive list of baseline versions created at different stages of the project. These baselines capture key schedule snapshots, allowing you to track changes and assess project progress over time.
- Compare the current schedule with any previous baseline to evaluate schedule deviations.
- Alternatively, compare baselines directly against each other for in-depth analysis of project adjustments.
- Compare up to three baselines for a side-by-side view, enhancing clarity and decision-making.
- View comparisons in the Gantt chart for a more intuitive and visually digestible analysis
To compare baselines
Ensure that you are in the grid view of the 'Schedule' module. If not,
- Click the main menu at the top left
- Click 'Schedule' under 'Scheduler'
- Click the 'Baseline summary' on the left
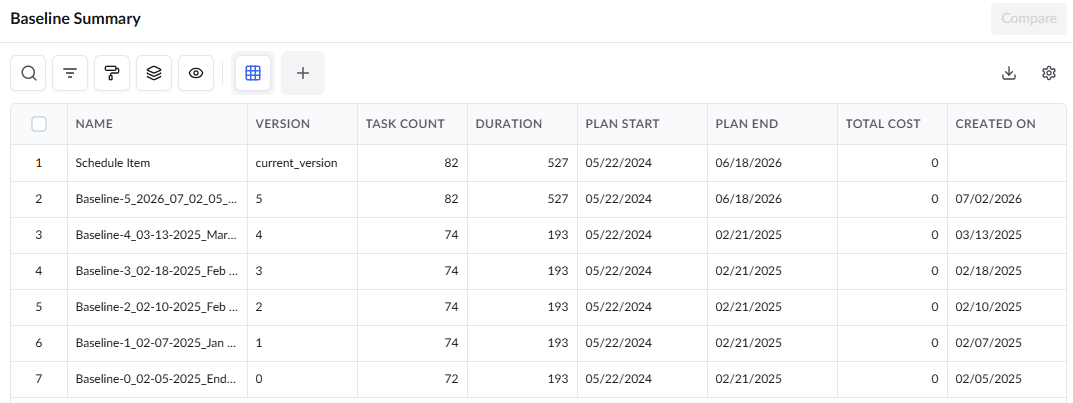 Select the baselines you want to compare, a minimum of two
- Click the serial number to select a baseline version
- Click 'Compare' at the top
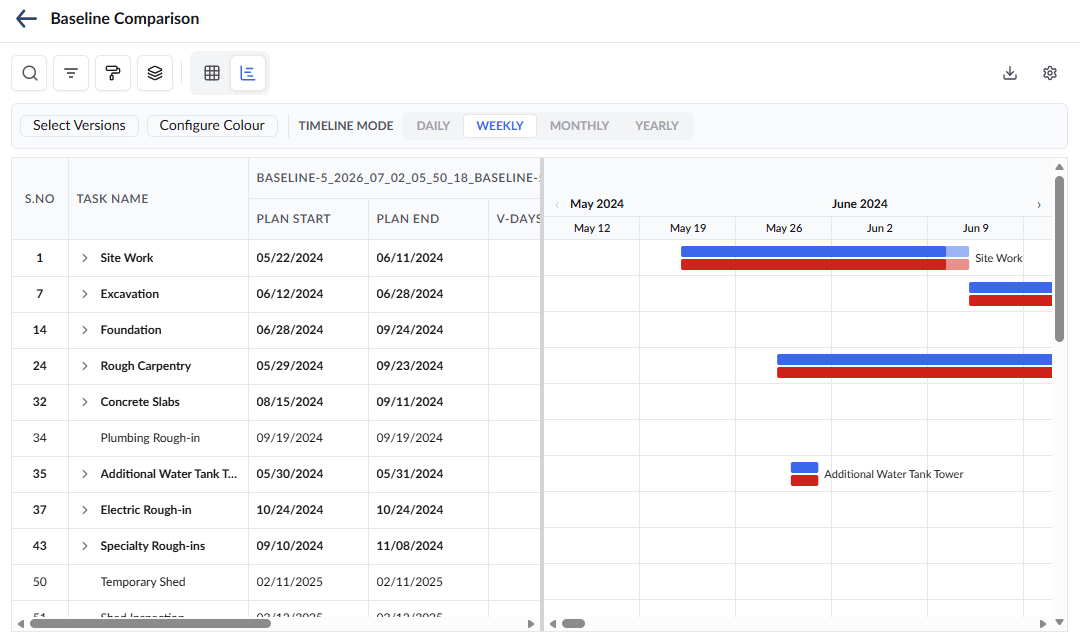
The comparison screen opens at the 'Grid and Gantt' view with the comparison table and the Gantt chart side-by-side. If you want to add another baseline to the comparison:
- Click 'Select Versions' at the top-left and choose the desired baseline form the drop down.
Note: You can only compare up to three baseline at a time
You can have two views:
Grid View
- Click the
 icon at the top.
The grid view presents selected baselines side by side with perfectly aligned rows, enabling seamless, row-wise comparison.
- Easily expand WBS branches by clicking the right arrows beside parent elements to reveal a more detailed, granular comparison.
Note on Baseline Order: Select baselines in the exact order you want them to appear in the comparison screen. If the current version is included, it will always be positioned at the far left, regardless of the selection sequence.
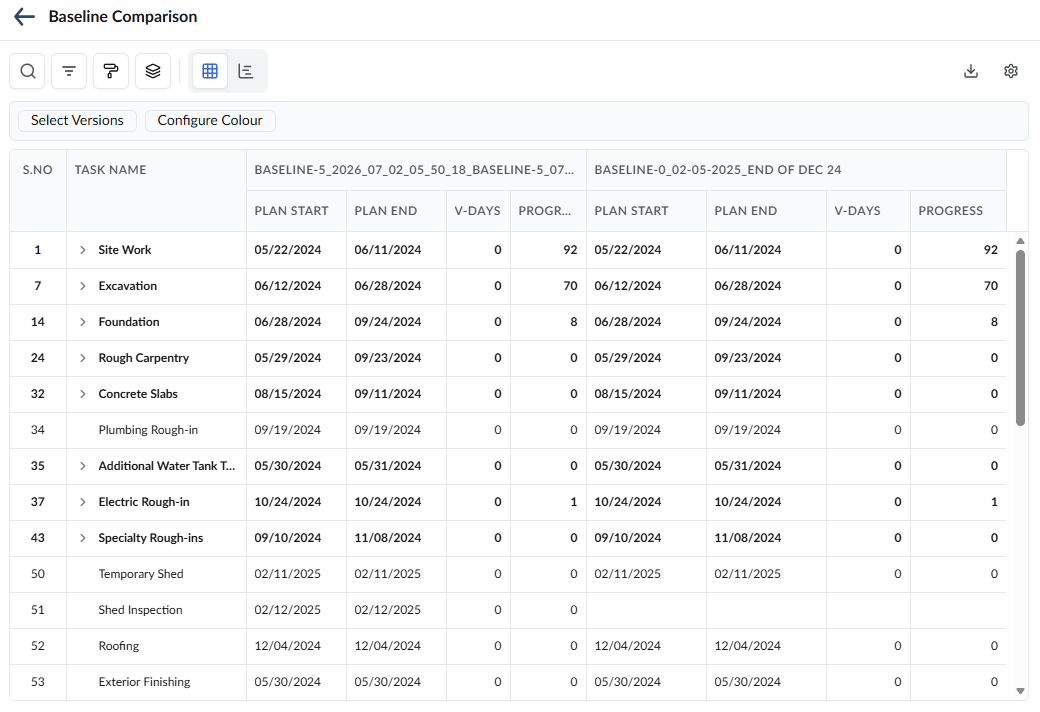
- The ' Serial Number' and 'Task Name' columns are consistently displayed across all baselines being compared.
- The task items that were present in the previous version(s) but removed in the successive version are shown at the bottom of the list with a pink highlight.
The following columns are shown by default for each version
- Plan Start: The planned start date of the task according to the schedule baseline version.
- Plan End: The planned completion date of the task according to that schedule baseline version.
- V-Days (Variance Days): The variance in days is calculated as the difference between the planned end date of the task in the current schedule version and its planned end date in the previous baseline version. This calculation accounts for site holidays.
- Progress: The percentage of completion of the task at the time the baseline version was created.
Note: Variance days for tasks in the current version are not calculated. To view variance days for the current version in comparison to previous baselines, save it as a new baseline and then compare it with the desired baselines.
Grid and Gantt View
The 'Grid and Gantt' view shows the comparisons on both the grid-view and the Gantt-view side-by-side.
To see the comparison in the Grid and Gantt view
- Select the
 icon at the top.
 - Use the filter at the top to choose between the day, weekly, or monthly view for the Gantt chart
- Expand the parent tasks to the required level in the grid view to view their stripes in the Gantt view.
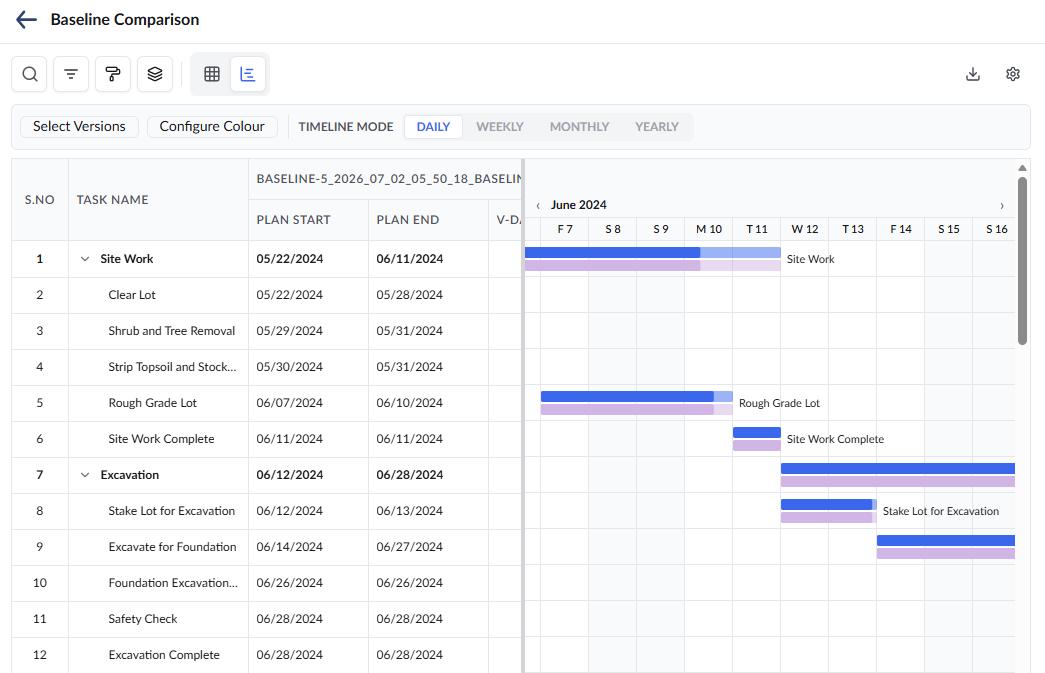
- See the descriptions above for the options available in both the grid and the Gantt views.
Change the color of a baseline
You can change the color in which a baseline is shown in the Gantt chart. This is useful, for example, if similar colors are used for successive versions of the baseline and the difference is not vivid in the stack.
To change the representation color of a baseline
- Click the 'Configure Color' button at the top
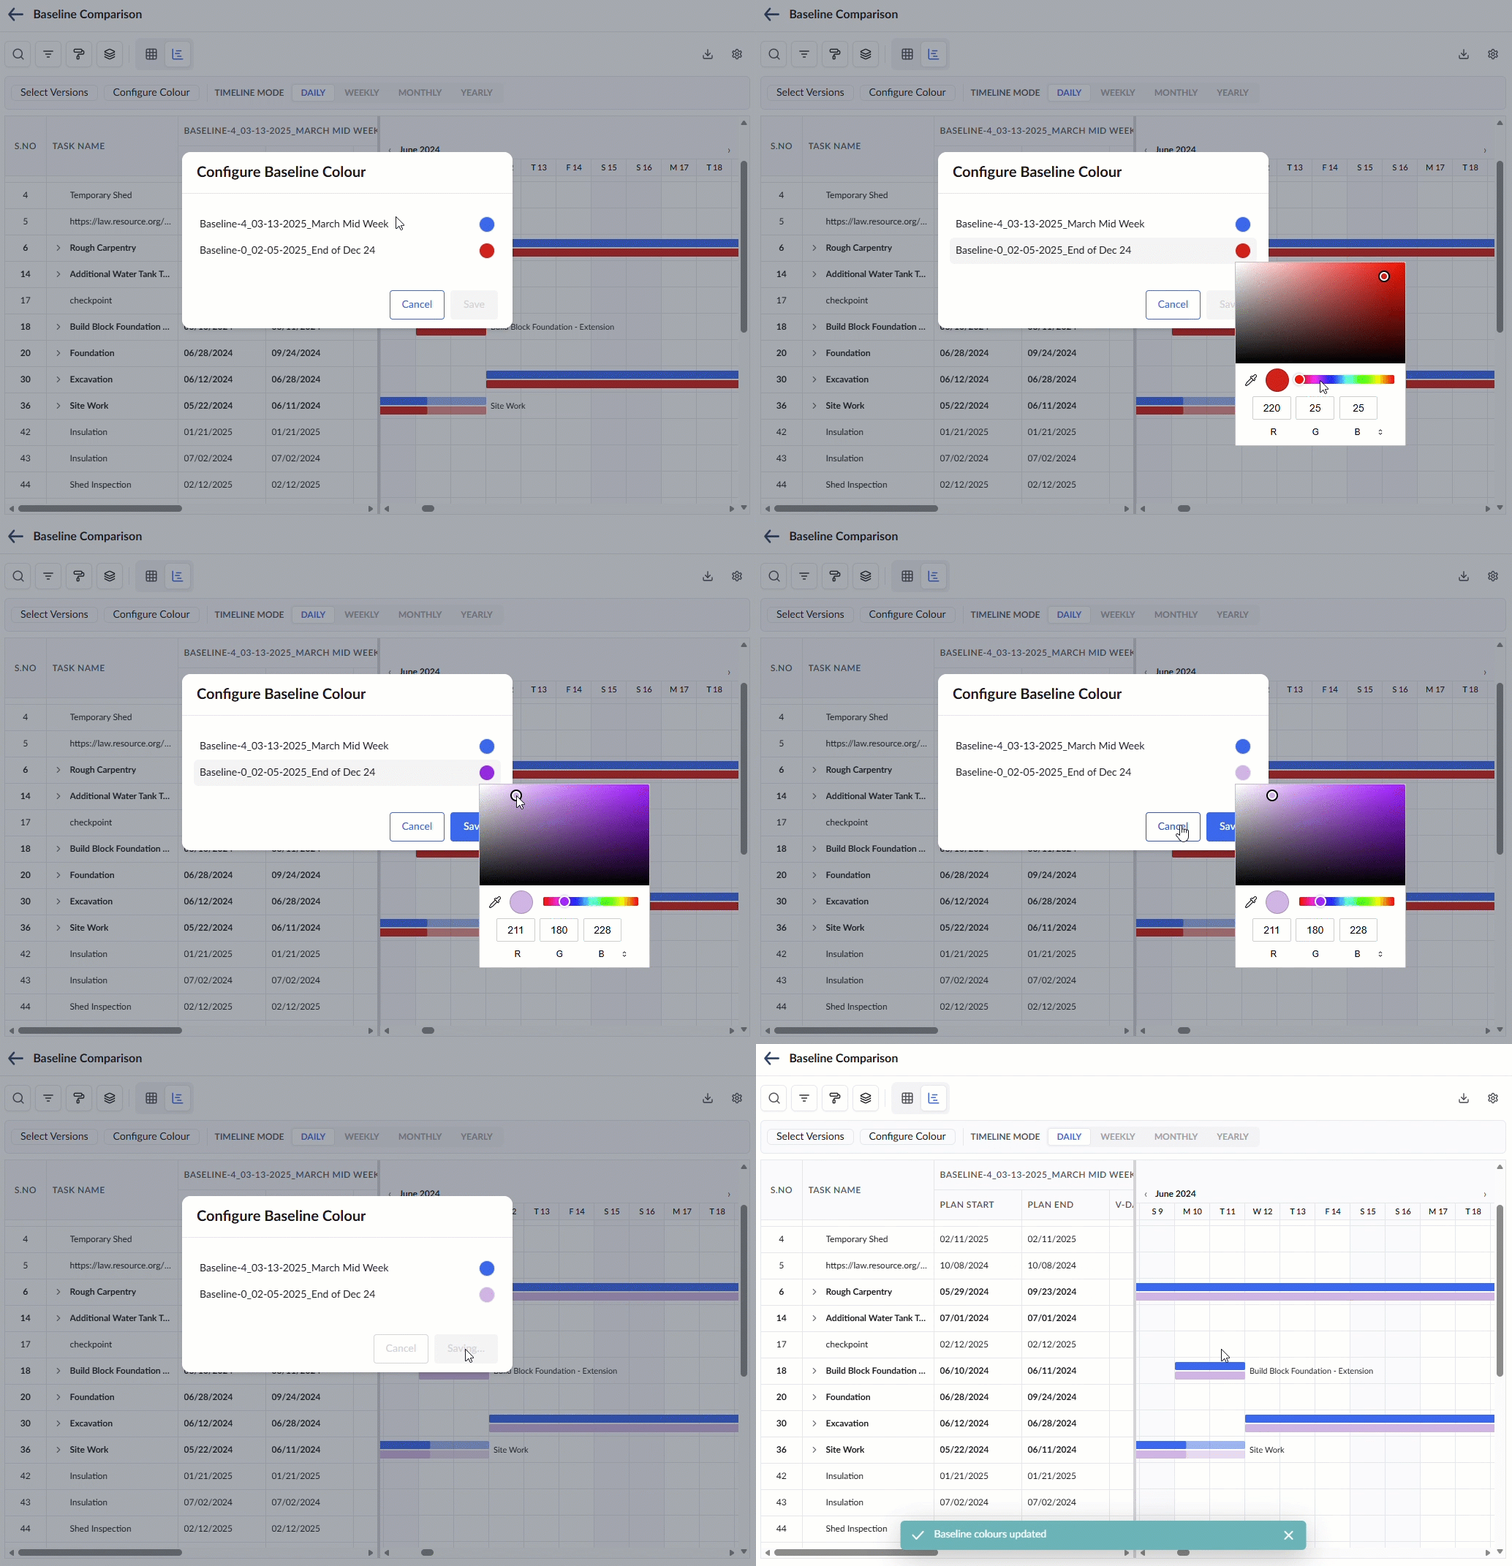
- Click the color dot in the row of a baseline version
- Use the color picker to select the color
- Alternatively, specify the color using HEX, RGB, or HSL codes.
- Use the top and bottom arrows to select the color system
- Enter the codes in the respective boxes
Was this article helpful?
That’s Great!
Thank you for your feedback
Sorry! We couldn't be helpful
Thank you for your feedback
Feedback sent
We appreciate your effort and will try to fix the article