The 'Checklist Schedules' screen lists all the recurring checklist schedules in the project, with their details. From here, you can edit a schedule, change its assignees, stop and restart it, or delete schedules that are no longer needed.
This article explains how to manage existing checklist schedules. For guidance on creating new checklist schedules, see Schedule Recurring Checklists.
To view the checklist schedules
Ensure you are on the 'Checklist Schedules' screen. If not
- Click the main menu at the top-left
- Select 'Checklist' under 'Quality' in the menu drop-down pane
- Choose 'Schedules' on the left
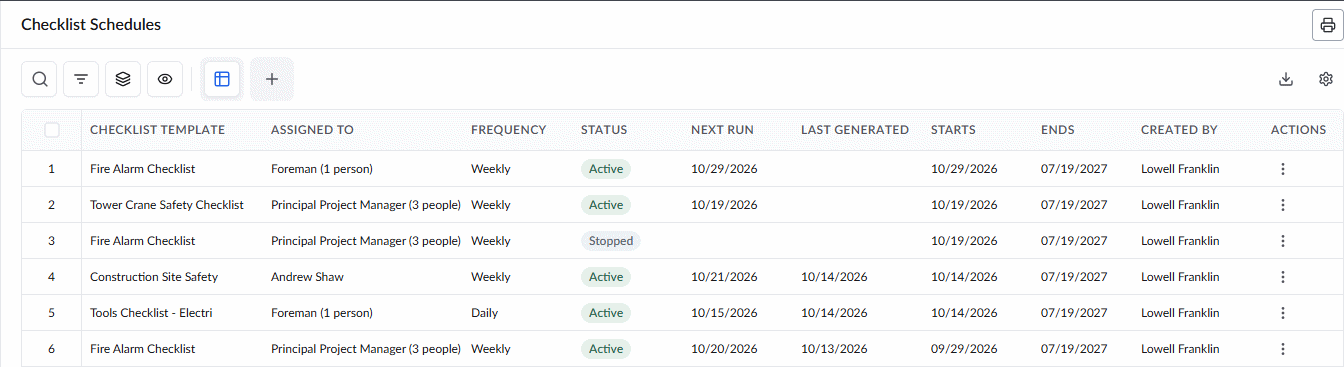
The list shows the following details:
Checklist Template - The checklist template the schedule creates checklists from.
Assigned To - The role or person the checklists are assigned to. For roles, the number of people currently holding the role is also shown.
Frequency - How often checklists are created: Daily, Weekly or Monthly.
Status - Whether the schedule is active or paused
- Active - Checklists are being created as scheduled.
- Stopped - No new checklists are being created after being paused. You can restart the schedule at any time. See Pause & Resume a Checklist for guidance.
Next Run - The next date on which checklists will be created. Blank for stopped schedules.
Last Generated - The date on which checklists were last created.
Starts - The date the schedule started from.
Ends - The last date on which a checklist will be created.
Created By - The person who set up the schedule. Only this person can edit, stop, restart or delete it.
Actions - Contains options to edit, stop/restart or delete the schedule. You can also download a report on all previously completed checklists in that schedule.
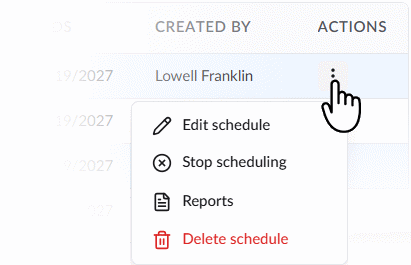
See the following sections to learn more:
Edit a Schedule
To change the frequency, assignee, or dates of a schedule
- Click the vertical ellipsis (three dots) in the action column of the schedule and select 'Edit schedule' from the options
- The 'Schedule Checklist' pop-up opens with the current settings. Update the fields as required. This is similar to creating a new schedule. See Step 2 - Schedule and Assign the Checklist in the page Schedule Recurring Checklists for guidance
- Click 'Save Changes' for your new settings to take effect.
The changes apply to checklists created from the next run onward. Checklists already created are not changed.
Pause and Resume a Schedule
Stop a schedule when you want to pause the recurring checklists, for example, during a work stoppage.
To stop a schedule
- Click the vertical ellipsis (three dots) in the action column of the schedule and select 'Stop schedule' from the options.
Note: The 'Stop' option is available to the 'Active' schedules.
No new checklists are created from this point. All checklists already created remain available and can still be completed and submitted.
To restart a stopped schedule
- Click the vertical ellipsis (three dots) in the action column of the schedule and select 'Start schedule' from the options.
Note: The 'Start' option is available to the schedules with 'Stopped' status.
Restarting a schedule does not create checklists for the days it was stopped. Checklists are created again from the next scheduled date.
Remove a Schedule
To delete a schedule
- Click the vertical ellipsis (three dots) in the action column of the schedule and select 'Delete schedule' from the options.
The schedule is removed and no further checklists are created from it. All checklists already created from the schedule are kept as inspection records, along with their responses, attachments and PDFs.
Generate Reports
You can generate a PDF report for all the checklists completed to date under a schedule.
Prerequisite - An active PDF template for scheduled checklists must be set at the company level in the portfolio console. See PDF Templates - Overview for guidance.
To generate a report
- Click the vertical ellipsis (three dots) in the action column of the schedule and select 'Reports' from the options.
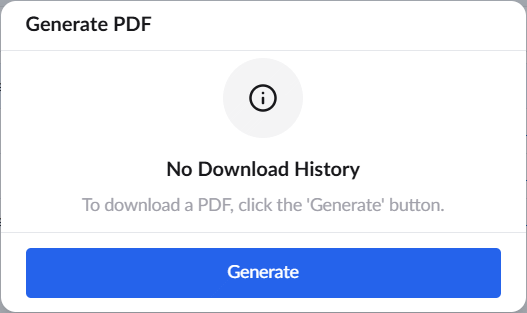
The pop-up shows the list of any previously generated reports.
- Click 'Generate' to create a new report.
The report generation takes a few seconds.
To download the generated report click the same vertical ellipsis and select 'Reports'
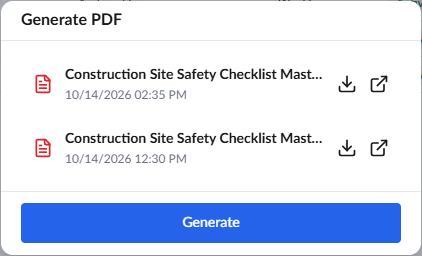
- Click the
 icon beside the latest version of the report to preview it
 - Click the
 icon beside the latest version of the report to download it
Was this article helpful?
That’s Great!
Thank you for your feedback
Sorry! We couldn't be helpful
Thank you for your feedback
Feedback sent
We appreciate your effort and will try to fix the article