Once a checklist has been created and assigned to a contractor organization, the designated representative, typically a project manager, from that organization can select the appropriate team member to carry out the event or inspection task. The checklist is then routed to the selected individual.
This process ensures that the task is delegated to the right person, maintaining accountability and supporting efficient execution.
To select a team member and assign the checklist
- Ensure you are on the 'Checklist Lists' screen within the 'Quality' module of the project. If not:
- Click the main menu at the top-left
- Click 'Checklist' under 'Quality' in the menu drop-down.
- The 'Checklist Lists' screen opens by default.
- Click 'Board' on the left
- Click the main menu at the top-left
The 'Boards' screen opens and shows the checklists under various stages.
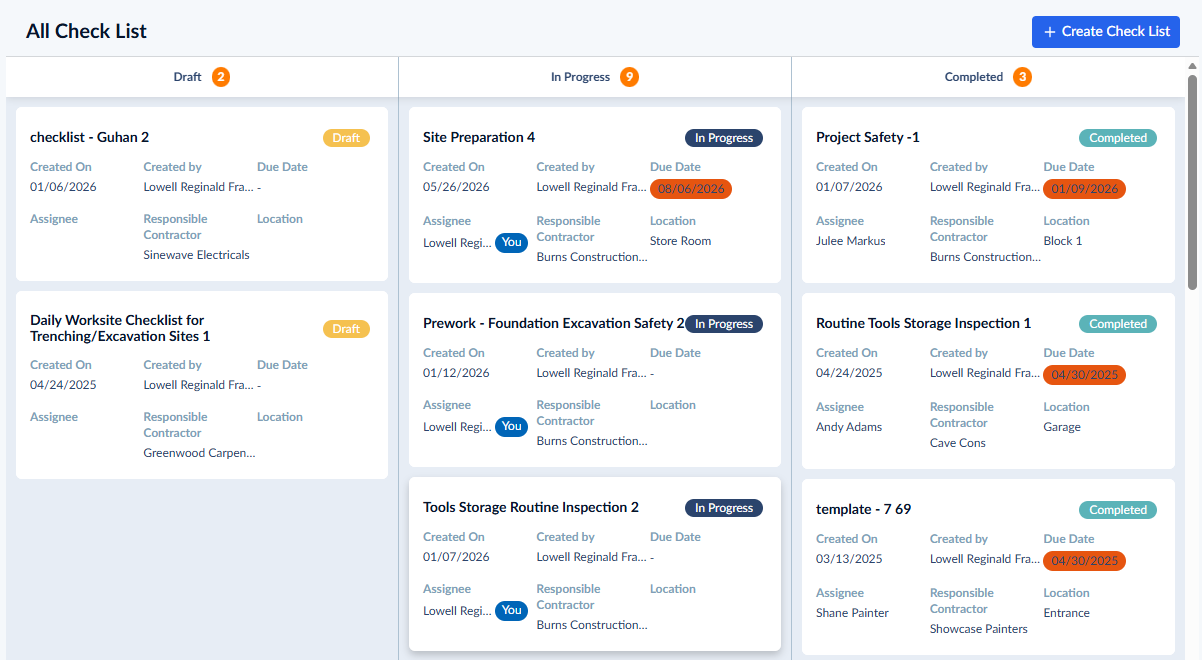
- Open the checklist assigned to your company from the 'In Progress' column
- Alternatively, switch to the list view and click the name of the checklist
- Assess the details.
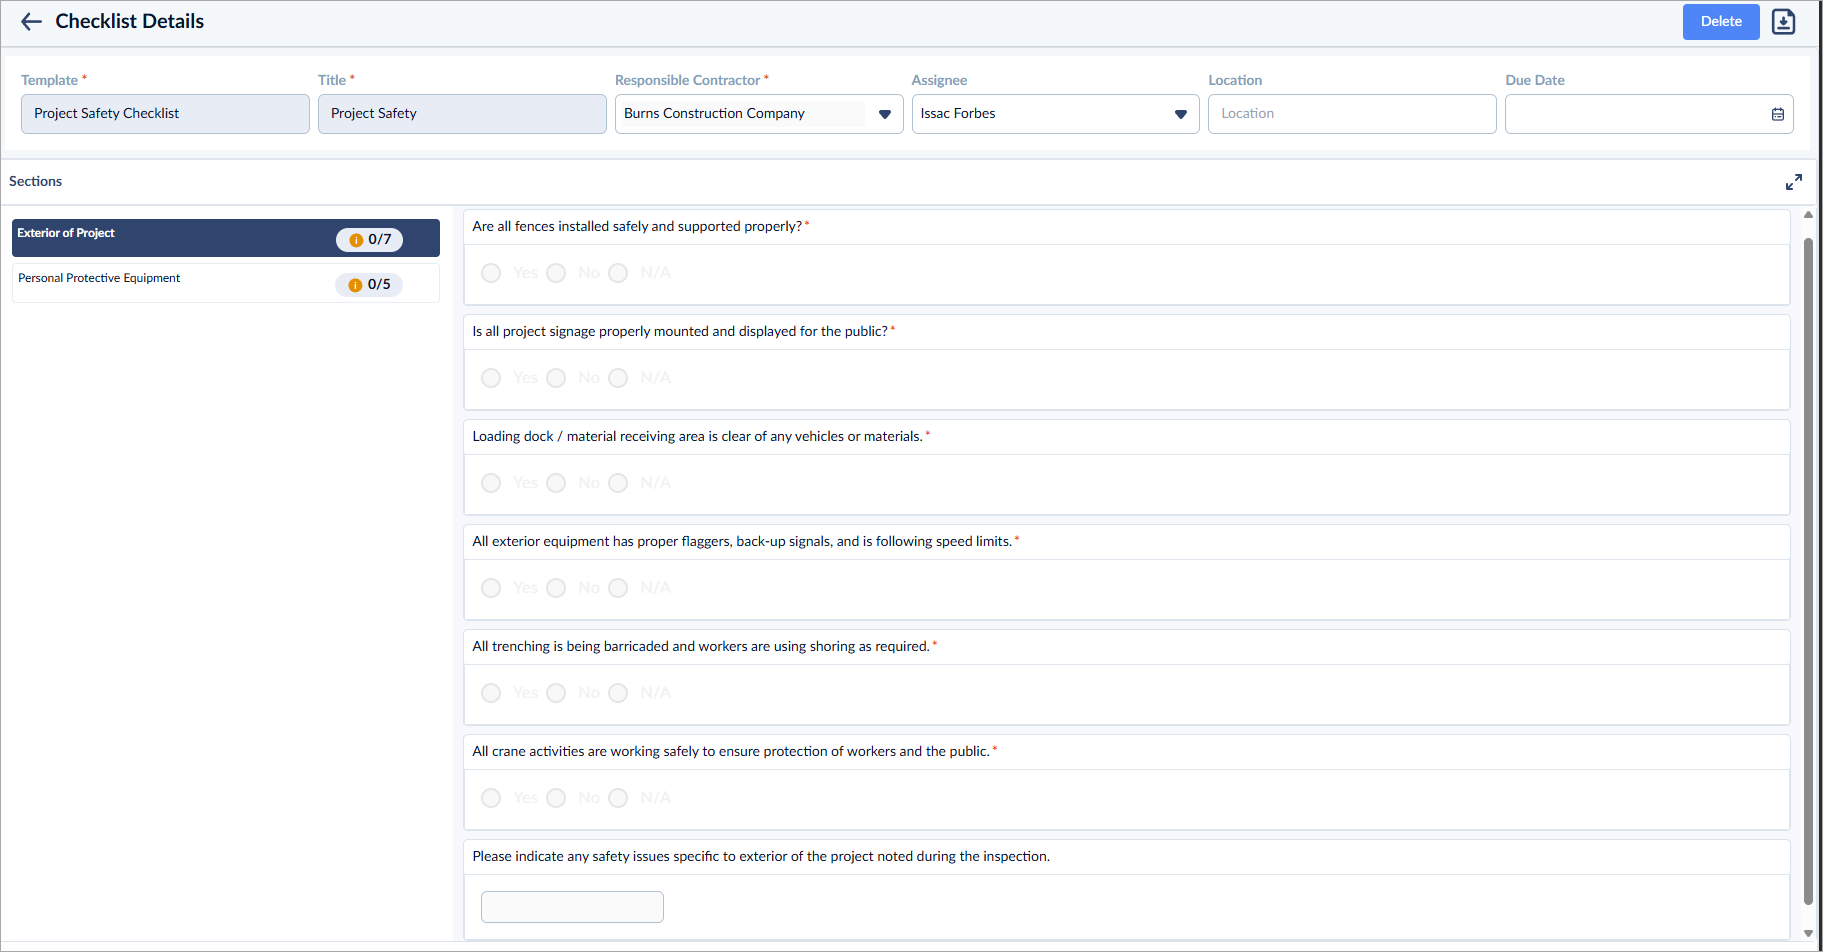
You can edit only the following fields:
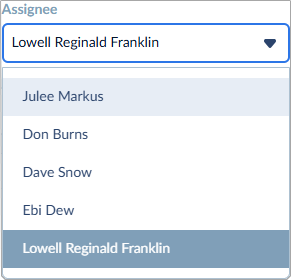
- Assignee: The individual who will perform the task. Click inside the field and select the team member from the options. If the work is self-performed, select your name from the drop-down.
- Location: The specific area on the site where the inspection is to be carried out. The location is predefined by the checklist creator. However, if necessary, for example, if the selected location is incorrect, you have the option to update it. Modifying the location is optional and can be done as needed.
To add a new location
- Click inside the location field
The 'Select Location' pop-up shows the hierarchically nested locations defined for the project:
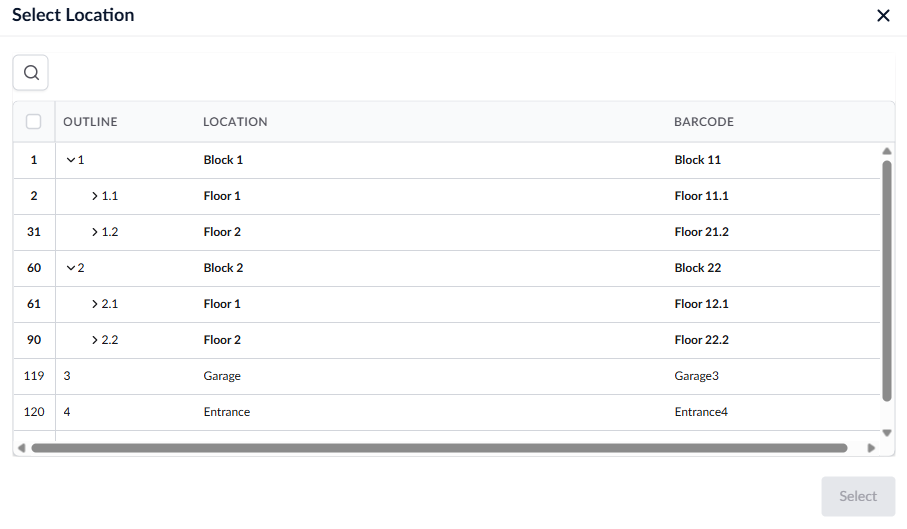
- Use the right arrows beside the parent-level items to expand them as required
- Select the location by clicking its serial number and clicking 'Ok'
- Due Date: Shows the deadline initially set by the checklist creator. If needed, you can update the due date by clicking inside the field and selecting a new date from the calendar. This allows for flexibility in case the schedule changes or additional time is required to complete the task.
- Click the 'Submit' button
Your changes are saved and the assignee will now be able to access the checklist on their web console or the mobile app and work on the task.
Was this article helpful?
That’s Great!
Thank you for your feedback
Sorry! We couldn't be helpful
Thank you for your feedback
Feedback sent
We appreciate your effort and will try to fix the article