Capturing field conditions requires clear visual context to identify constructability issues, material defects, or spatial clashes directly on site photos. When you attach images to RFIs, Submittals, Punch Lists, or Change Orders, you can add markups directly within the workflow to clarify descriptions, review comments, and approval responses.
- Spotlight field issues: Call out trade clashes, defective installs, or field changes directly on site photos.
- Add visual annotations: Draw shapes, place directional arrows, and add text callouts in seconds to provide clear context.
- Accelerate resolution: Reduce back-and-forth communication by giving trade partners and design teams immediate visual clarity on pending items.
Annotation Tools
 | - | Highlight specific areas using a rectangle, ellipse, polygon, or cloud shape. |
 | - | Draw lines or arrows to point to specific locations or items. |
 | - | Use the pen or brush tool to draw freehand shapes and annotations, or to highlight specific areas, measurements, or notes on the image. |
 | - | Insert text notes and comments using a fixed-size or adaptive text box. You can customize the font size and text color |
 | - | Move the markup across the screen, which is especially useful for focusing on specific details after zooming in. |
You can change the color and resize, rotate, or reposition these items.
To annotate an image attachment
- Click the thumbnail of the photo or image attached to the item to open it.
- Click 'Add Markup' in the top-right corner of the image. The annotation toolbar appears at the top of the image.
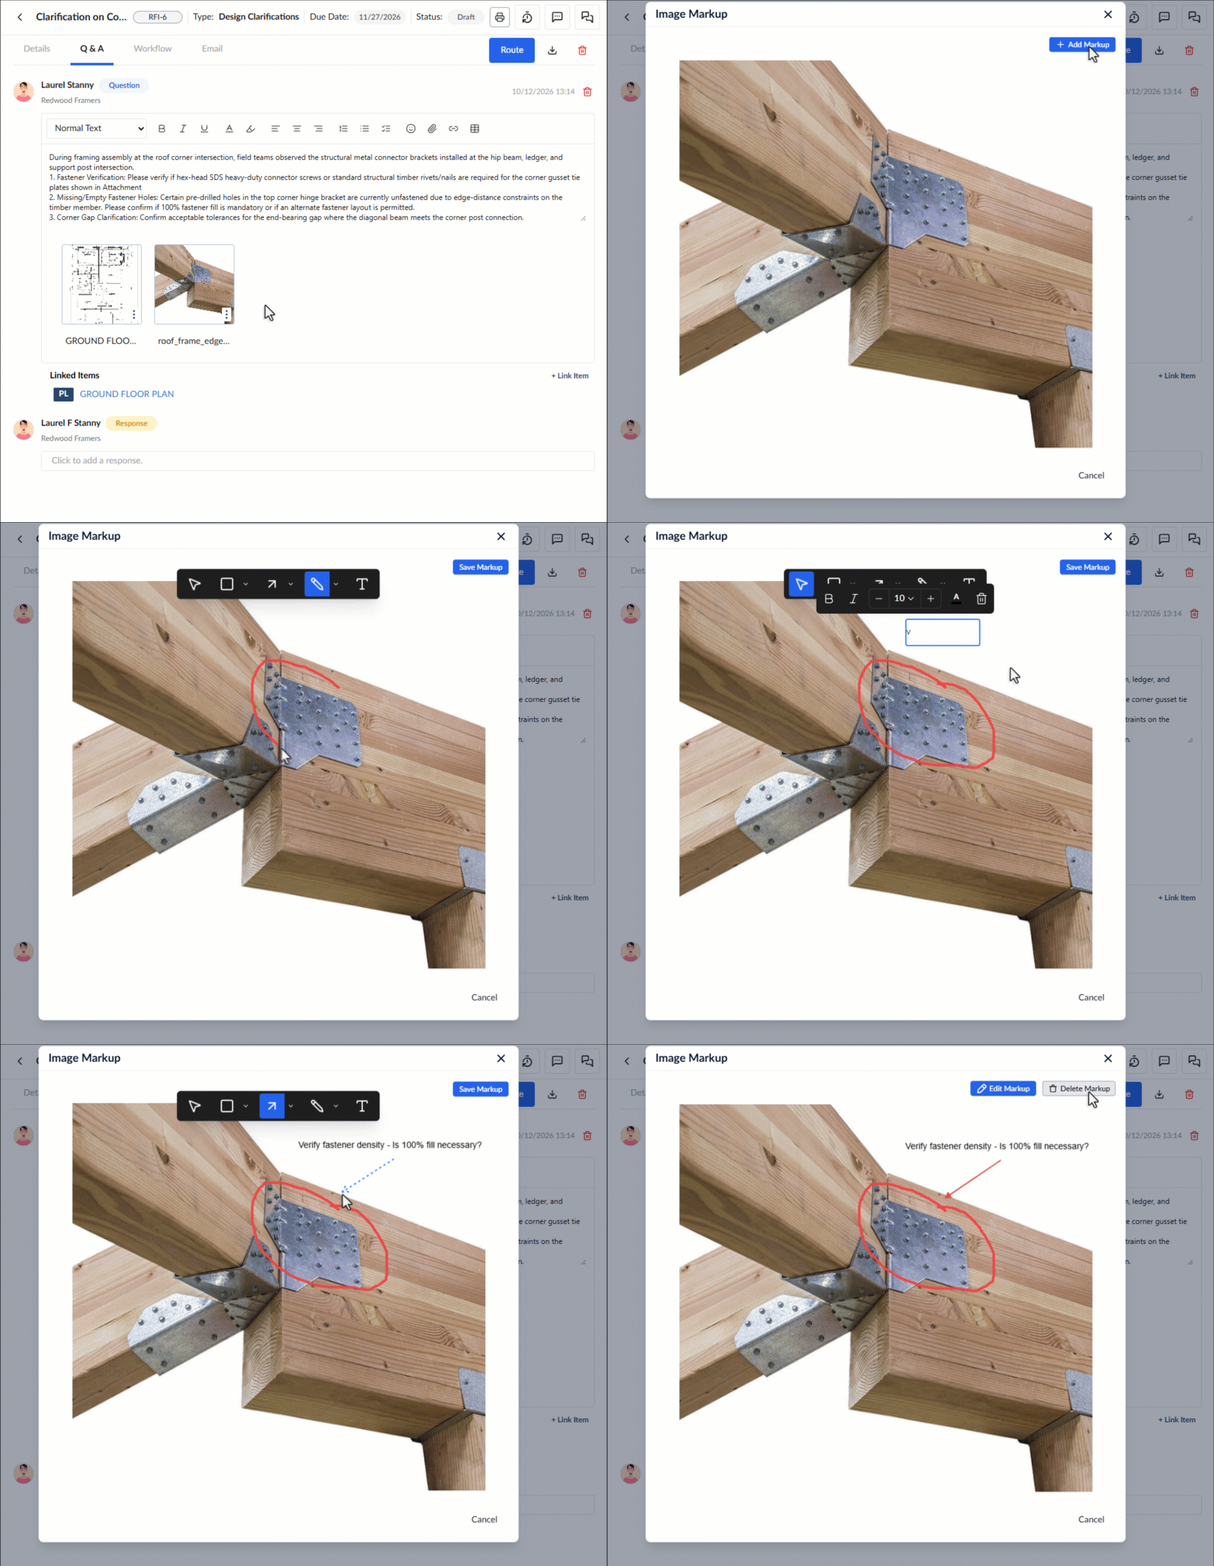
- Select a tool (Shape, Line, Freehand, or Text) from the toolbar.
- Click and drag on the photo to draw your markup, or click to place a text box.
- Use the color palette to set the color, stroke width, fill color, and transparency.
- Repeat to add more elements.
- Click Save Markup in the top-right corner.
Adding an annotation is similar to adding a markup on a plan sheet. For detailed guidance on each drawing tool, see the related help pages listed below.
- Mark areas with shape tools or cloud
- Draw arrows or lines
- Create a Free-form/Freehand Markup with the pen tool
- Insert a text note
To edit an existing markup
- Open the project document that contains the image (for example, a Punch List item or RFI).
- In the ttachments' section, click the photo thumbnail.
- Click 'Edit Markup' in the top-left corner.
- Select the markup, then drag its corners to resize it, or click it to edit the text note.
- Click 'Save Markup' at the top to confirm your changes.
To delete a markup
- Open the project document that contains the image (for example, a Punch List item or RFI).
- In the 'Attachments' section, click the photo thumbnail.
- Click 'Delete Markup' in the top-left corner.
- Click 'Delete' to confirm.
Was this article helpful?
That’s Great!
Thank you for your feedback
Sorry! We couldn't be helpful
Thank you for your feedback
Feedback sent
We appreciate your effort and will try to fix the article