Once the General Contractor (GC) issues or updates a lookahead schedule, Subcontractors use the active lookahead to manage field execution, coordinate trade crews, capture real-time progress, and resolve site conflicts.
To open the look ahead schedule
- Click the main menu at the top-left
- Select 'Schedule' under the 'Scheduler' section
- Select 'Look Ahead' on the left menu
The current active look ahead schedule opens by default:
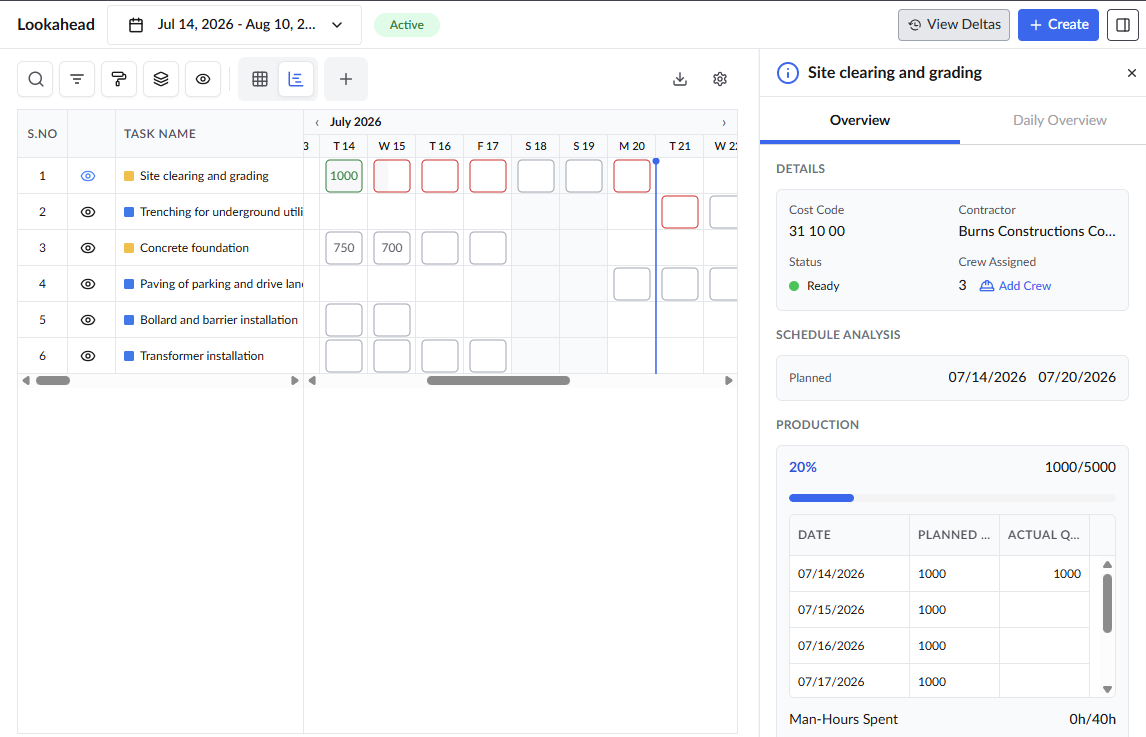
The screen allow you to:
- Publish Tasks to the Field
- Update and Report Task Progresses
- Add Crew Members to a Task
- Manage Real-Time Constraints
Publish Tasks to the Field
Before field crews can begin execution, trade managers must review and publish lookahead tasks to mobile field devices. The subcontractors can directly publish the tasks assigned by the GC or create subtasks and activities to the tasks at successive tiers as a hierarchical structure, then publish the leaf-level taks to push them to the field. This can be done from:
- From the main planner - The 'Scheduler' > 'Grid' screen allows you add sub tasks and publish them. See Add Subtasks and Publish a Task for guidance.
- From the Lookahead - Right-click on the assigned task, and click 'Publish.'
The tasks are forwarded to the field mobile filed app which enables the foremen to plan, and execute the tasks and report their progress.
Update and Report Task Progresses
Field progress reported by your staff via mobile devices syncs directly to your main and lookahead schedules. The progress reported for child-level tasks get automatically roll up to parent-level task progress automatically.
You can also reconcile and manually update progress directly within the lookahead for both field- and office-executed tasks.
Record Task Progress
Progress can be updated using one of two methods:
- Tasks Without Planned Quantities: Manually enter a completion percentage by clicking directly into the Progress column. (See Update Task Progress Manually)
- Tasks With Planned Quantities: Progress is calculated automatically based on daily actual quantities logged in the system. (See Update Task Progress Based on Actual Quantities)
Update Task Progress Manually
- Locate the assigned task within the Lookahead schedule grid.
- Click the 'Progress' column to open the 'Set Progress' pop-up.
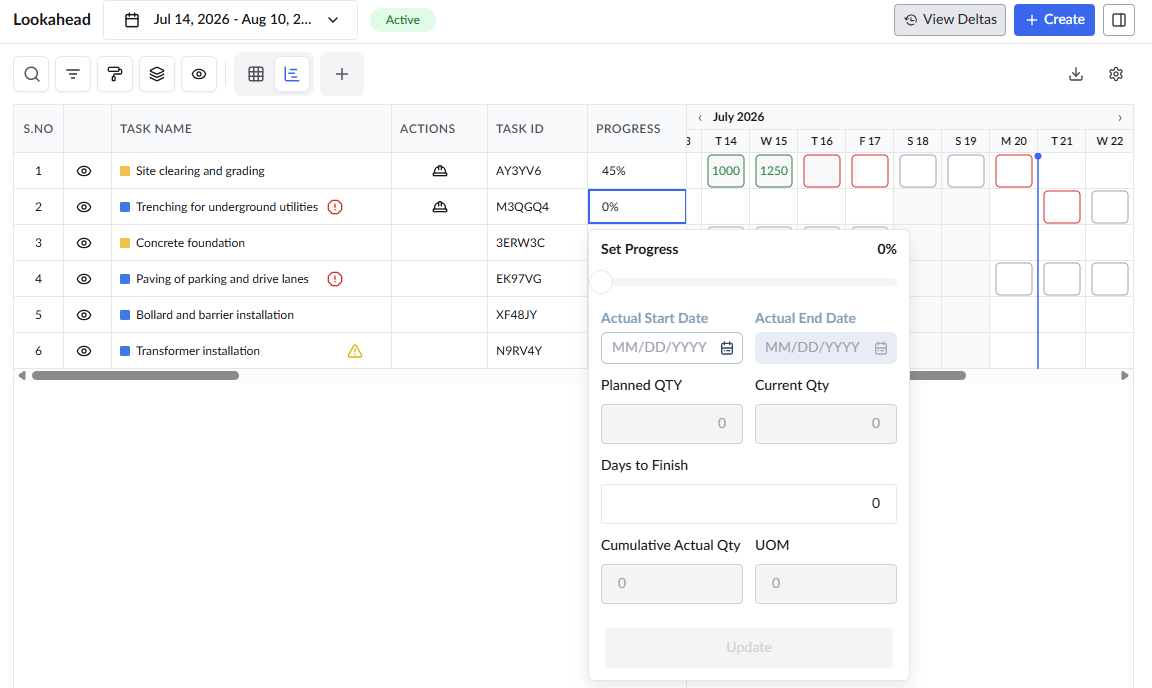
- Click and drag the progress slider at the top of the window to reflect the current completion percentage.
- If this is the initial progress update, click the calendar icon to set the 'Actual Start' Date.
Update Task Progress Based on Actual Quantities
Recording daily achieved quantities provides a direct comparison against the planned quantities established during the review phase. You can log actual quantities in two ways:
- Option 1: Enter Actual Quantities via the Gantt View
- Option 2: Enter Actual Quantities via the 'Details' Pane
Option 1: Enter Actual Quantities via the Gantt View
The Gantt view on the right displays daily work quantities reported directly from the field. Each date cell is color-coded to reflect performance against planned targets:
- Green: Achieved quantity met or exceeded the planned target.
- Red: Achieved quantity fell short of the planned target, or progress was unreported for past workdays from the field. You can click blank cells to manually enter quantities.
- Gray: Non-editable. Applies to future dates and scheduled holidays.
- Note for General Contractors: Gray cells also display progress entries reported directly by your subcontractors.
- Note for General Contractors: Gray cells also display progress entries reported directly by your subcontractors.
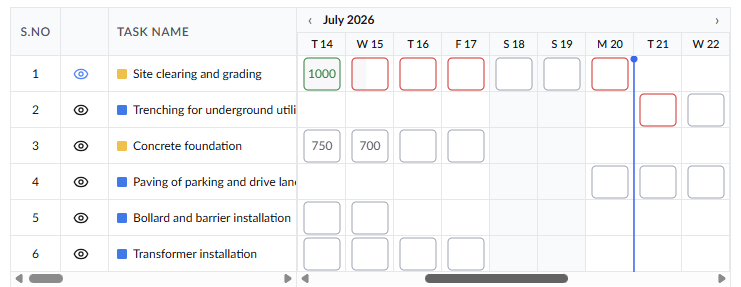
To enter the quantity manually
- Locate the task on the left
- In the Gantt view on the right, enter the quantity of work completed for that single day into the specific date box.
- Repeat this step to mark updates for more tasks and dates as needed.
The system automatically aggregates daily entries and updates the overall task progress percentage.
Option 2: Enter Actual Quantities via the 'Details' Pane
- Click the Eye icon next to the task name to open the task details panel on the right.
- Select your preferred tab at the top of the panel:
| The 'Overview' Tab | The 'Daily Overview' Tab |
| 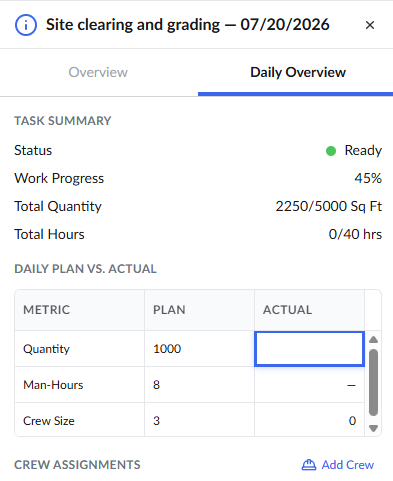 |
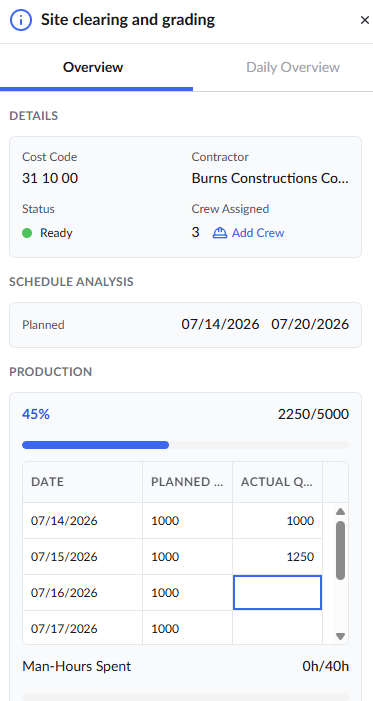
- Locate the production tracking table, which displays dates alongside planned and actual quantities.
- Click into the corresponding cell under the Actual Quantity column and enter the value.
The system automatically aggregates daily entries to update the total progress bar and completion fraction.
Report Task Progress
Subcontractors can periodically report progress on their assigned tasks to the General Contractor (GC) for integration into the master project schedule.
To report the progress of tasks
- Right-click on the task
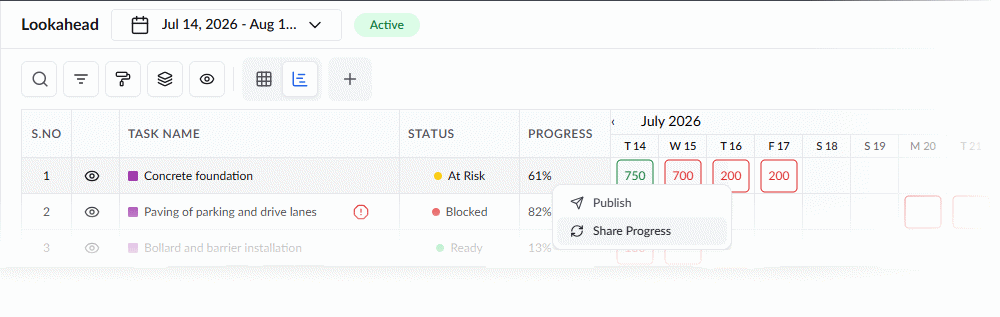
- Select 'Share Progress'
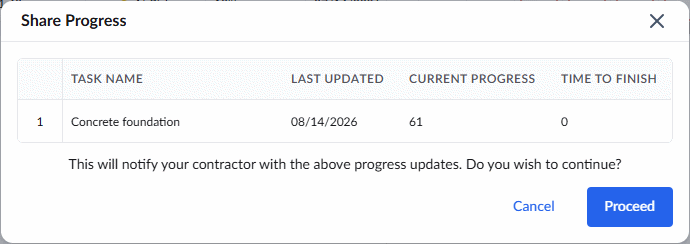
- In the confirmation dialog displaying the recorded work progress, click 'Proceed' to submit your update to the GC.
- Repeat the process to report the progress of other tasks.
Add Crew Members to a Task
The project manager can assign crew members to tasks from the office based on project needs. This is especially useful for tasks that require specialized skills or focused attention, ensuring the right personnel are allocated to the right work.
You can assign crew members using two methods:
Method 1: Add Crew from the Lookahead Grid
- Click the 'Add Crew' icon
 in the 'Action' column of the lookahead grid.
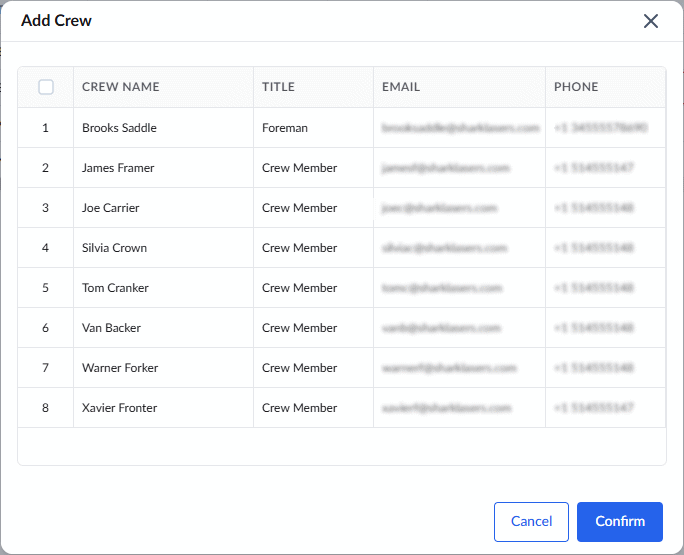
- Select crew members by clicking their serial numbers in the 'Add Crew' dialog.
- Click 'Confirm' to save the crew assignment.
Method 2: Add Crew from the Task Details Pane
- Click the Eye icon next to the task name to open the task details panel.
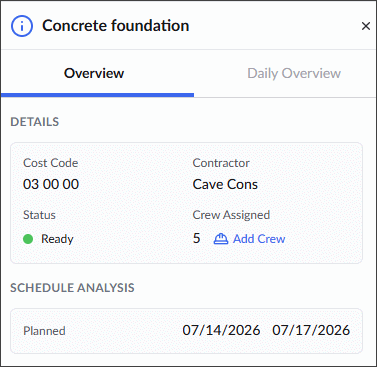
You can assign crew to the task from both the tabs in the screen:
| The 'Overview' Tab | The 'Daily Overview' Tab |
|
|
 link
link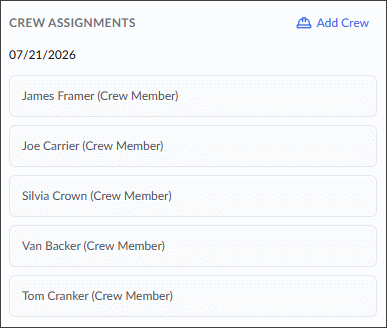 Scroll to the 'Crew Assignments' section, and click the
  link
link- Select the desired crew members by clicking their serial numbers in the 'Add Crew' dialog.
- Click 'Confirm' to assign them to the task.
Manage Real-Time Constraints
Unexpected site conditions can arise during execution. Active tasks must be monitored for sudden roadblocks such as material shortages or permit delays. See Manage Task Constraints in Lookahead Schedule for detailed guidance.
Note: Once a task reaches 100% completion, constraint management (adding, editing, or resolving) is automatically disabled for that task.
To flag a new constraint
- Click the Eye icon next to the task name to open the task details panel.
- Click '+ Flag a Constraint'.
- Select a category from the first drop-down menu (e.g., Material, RFI, Permit).
- Select the severity from the second drop-down menu:
- Warning: Flags a potential issue without halting work (updates task status to At Risk).
- Blocking: Halts task execution entirely (updates task status to Blocked).
- Enter a clear explanation of the issue in the description box.
- Click '+ Add' to attach the constraint to the task.
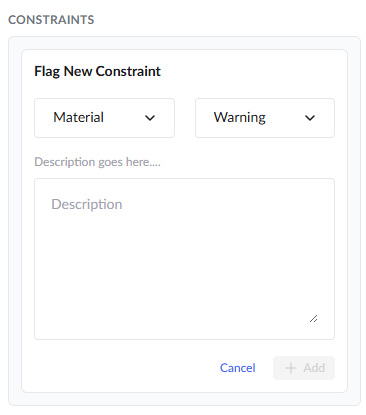
Once flagged, the constraint is automatically communicated to the General Contractor. The GC team can then take corrective action—such as adjusting schedule logic or expediting permits, RFIs, submittals—to resolve the issue.
To editing or resolving constraints
- Click the Three-Dot menu next to an existing constraint to edit details, update status as conditions evolve, or select 'Resolved' once a roadblock is cleared.
Was this article helpful?
That’s Great!
Thank you for your feedback
Sorry! We couldn't be helpful
Thank you for your feedback
Feedback sent
We appreciate your effort and will try to fix the article