Constraints identify prerequisites, dependencies, or potential roadblocks that must be managed to prevent fieldwork delays. Resolving these issues early ensures that crew only execute tasks that are fully unblocked. Constraints on a task typically fall into two categories:
- Schedule-Related Constraints: These are system-generated constraints driven by task dependencies within your project's master schedule. If a predecessor task is delayed or incomplete, the dependent task cannot start, automatically changing its status to 'Blocked'.
- Manually Added Constraints: Project Managers can manually attach specific roadblocks to a task—such as pending RFIs, material delivery delays, missing submittals, crew availability or required permits. Manually added roadblocks can either completely halt a task or simply flag potential issues. Depending on the severity of the situation, you can mark the issue as a Blocking constraint or a Warning constraint
- Blocking Constraints: These strictly halt execution until the issue is resolved, changing the task status to 'Blocked'.
- Warning Constraints: These flag potential issues that need monitoring but do not strictly stop work, changing the task status to 'At Risk'.
These manually added constraints can be resolved, edited, or deleted at any time to reflect current project conditions.
General Contractors - Can manage constraints on any task, whether self-performed or assigned to another contractor, regardless of the Look Ahead status (Draft, In Review, Active, or Closed)
Subcontractors - Can only manage constraints on tasks directly assigned to them. Constraint management is permitted when the Look Ahead schedule is 'In Review' (pending feedback) or 'Active' status.
Standalone contractors - Add, edit, resolve, or delete constraints at any time, regardless of the Look Ahead status
Note:
- When a constraint is added to a task, it automatically updates across all Look Ahead schedules that include that task.
- Constraints cannot be added, edited, or resolved on tasks that are 100% complete
To open task constraints section
- Click the main menu at the top-left
- Select 'Schedule' under the 'Scheduler' section
- Select 'Look Ahead' on the left menu
The current active look ahead schedule opens by default. To view other Look Aheads that are in draft, or in review status, open the date range drop-down at the top left and select the desired period.
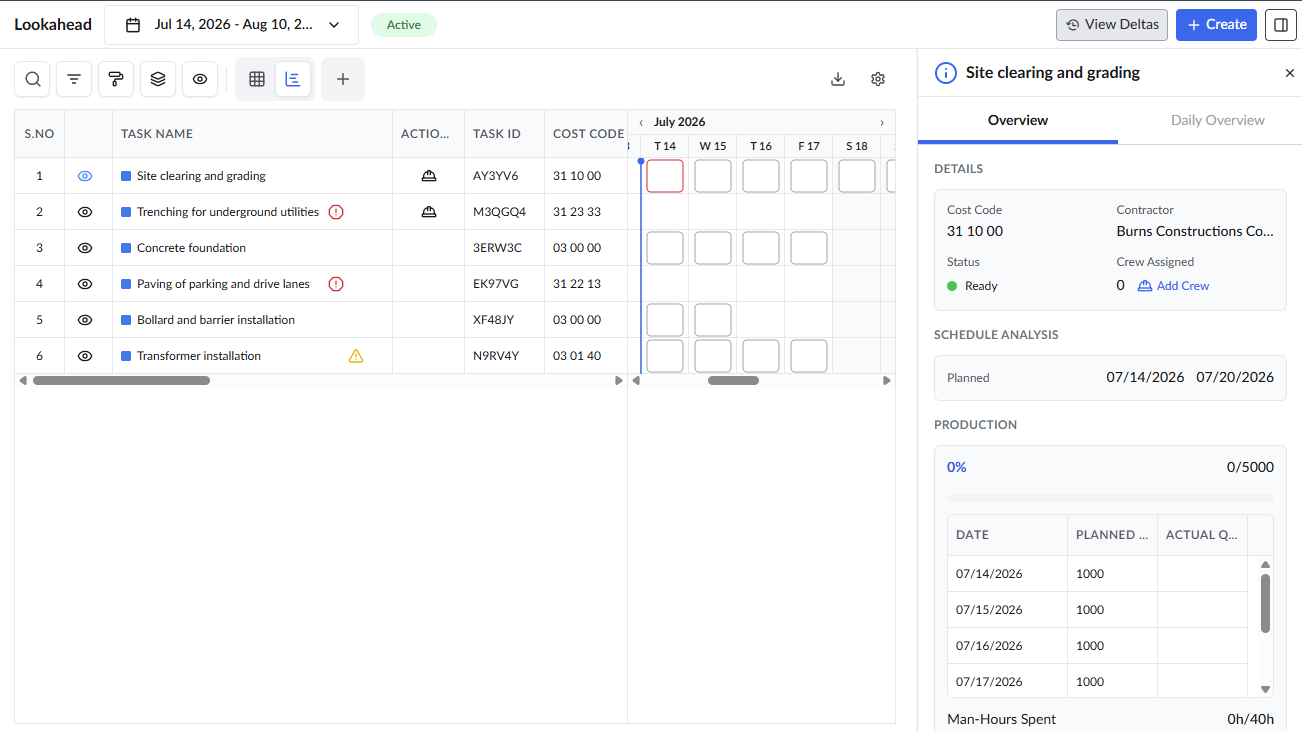
- Click the
 icon on the left of the task name to open the details pane on the right. The task overview tab open by default.
 - Scroll down to locate the constraint section at the bottom
Use the following links to jump to the sections you need help with:
Add a constraint
Adding a constraint immediately flags an issue to the project team and updates the task's status based on the selected severity.
Open the task overview screen as mentioned above
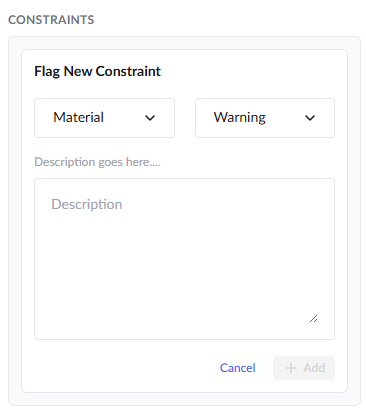
Select the constraint category from the first drop-down menu (e.g., Material, RFI, Permit).
Select the severity from the second drop-down menu:
Warning: Flags a potential issue but does not stop work (changes task status to 'At Risk').
Blocking: Strictly halts execution (changes task status to 'Blocked').
- Enter a detailed explanation of the roadblock in the description text box.
- Click the '+ Add' button to attach the constraint to the task.
Edit Constraint
As project conditions evolve, existing manually added constraints can be updated to reflect the latest information.
Open the task overview screen as mentioned above
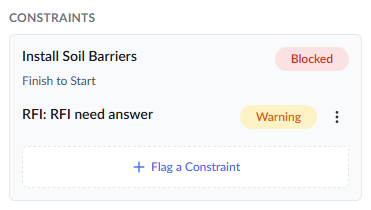
- Click the three-dot menu (⋮) next to the constraint's status tag.
- Select 'Edit' from the dropdown options.
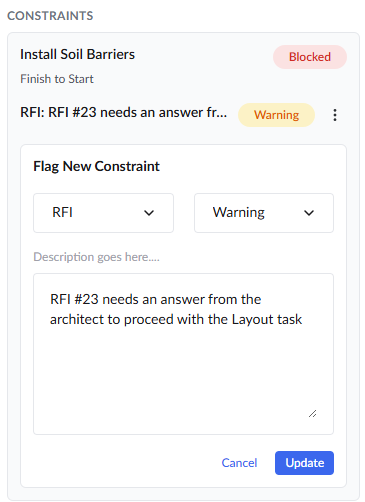
- Modify the category, change the severity or update the description with new details.
- Click 'Update' to save the changes to the task
Resolve a Constraint
When a roadblock is cleared—such as delayed materials arriving on site or an RFI being answered—the constraint must be resolved to signal that work can proceed.
- Locate the active constraint in the list as mentioned above
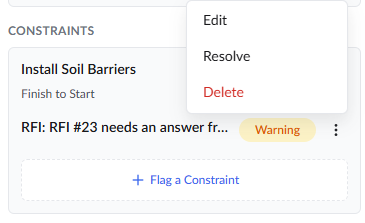
- Click the three-dot menu (⋮) next to the constraint.
- Select Resolve from the dropdown options.
Note: Resolving the final 'Blocked' constraint on a task will return the task's status to 'Ready'.
Delete a Constraint
Deleting a constraint completely removes it from the task's history. This action is generally reserved for constraints that were added by mistake.
- Locate the relevant constraint in the list as mentioned above
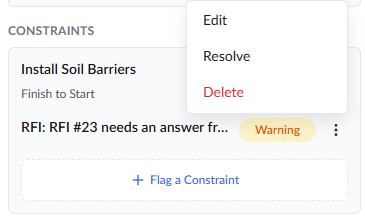
- Click the three-dot menu (⋮) next to the constraint.
- Select Delete from the dropdown options.
- Confirm the deletion to remove it permanently from the record.
See the following pages for more details:
Was this article helpful?
That’s Great!
Thank you for your feedback
Sorry! We couldn't be helpful
Thank you for your feedback
Feedback sent
We appreciate your effort and will try to fix the article