The Project Images module allows you to view all photos and images, like site photos, task progress photos, daily field reports, photos of completed deliverables, and more submitted by all construction team members from the field and office throughout the project progress. The module acts as a unified picture repository for the team to have a visual perception of the progress of the tasks, incidents, and the status of various construction items at various points in time.
You can also upload images to the project feeds by capturing a picture from your device camera or from your device's gallery.
Note: The mobile app requires access to your device's camera, microphone, and gallery. Please ensure that the necessary permissions are enabled on your device.
To open the project images module
- Log in to the Linarc app and select the project
- Tap 'Module' at the bottom and choose the 'Project Images'
Using this module, you can:
View project images
By default, the Project Images screen shows all the images uploaded for the project.
- Open the 'Project Images' module as explained above
The project images are shown as thumbnails:
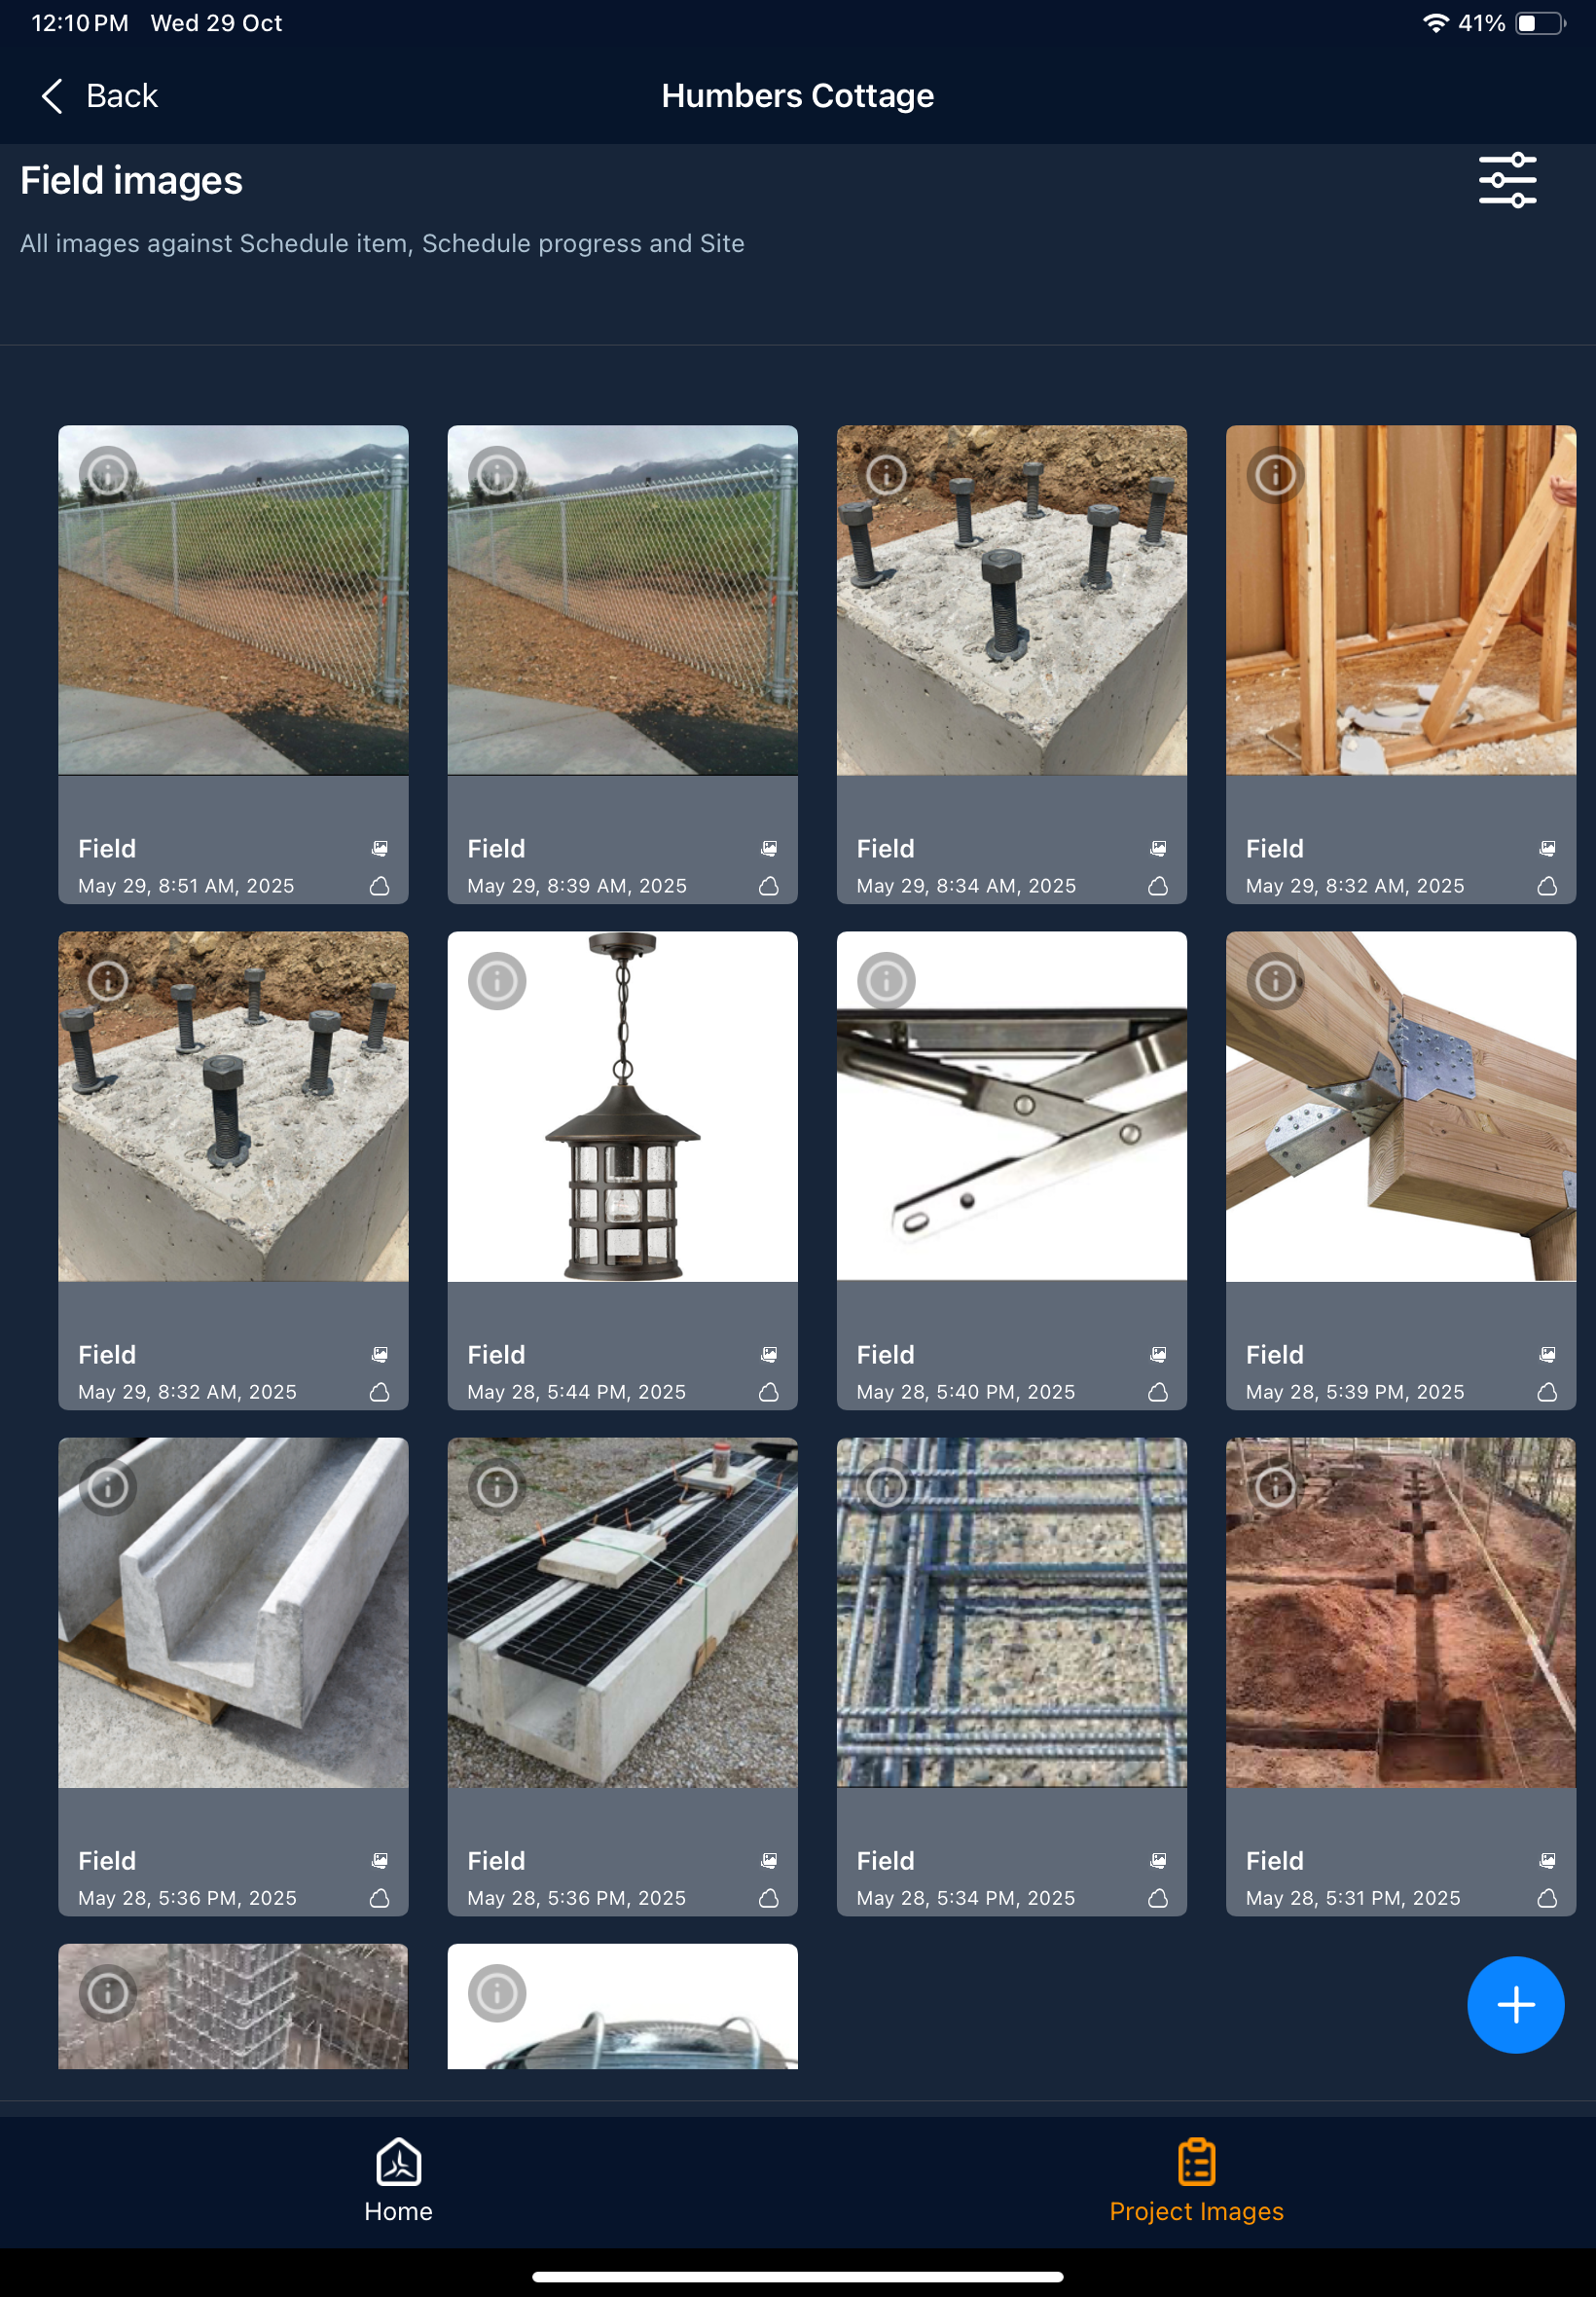
- Touch a thumbnail to view the full picture
Upload image feeds
You can upload photos, images, or plan sheet markups as site photos, task progress photos, task description images, etc., as progress feeds.
Note: You can upload upto 3 images or videos or plan sheet markups at a time.
- Photos and images can be uploaded in two ways:
- Capture directly using the device camera
- Choose an image from the device gallery
To capture directly using the device camera:
- Tap the plus button
 at the bottom right
 - Capture the image on your camera. Repeat to add up to 3 images at a time if necessary.
- Tap 'Done' to upload
To upload images from the gallery
- Tap the plus button at the bottom right
- Tap the
 on the left of the capture button to open the gallery
 - Select the images you need and tap 'Done'
Add markup to images
If you are uploading a photo or image, you can add markups before uploading it to your feeds.
- Tap the plus button at the bottom right
- Capture the image on your camera or tap on the left of the capture button to open the gallery
- Tap the thumbnail of an uploaded file on the right to open its preview screen.
If you upload the maximum limit of three media files at once, the preview screen opens automatically.
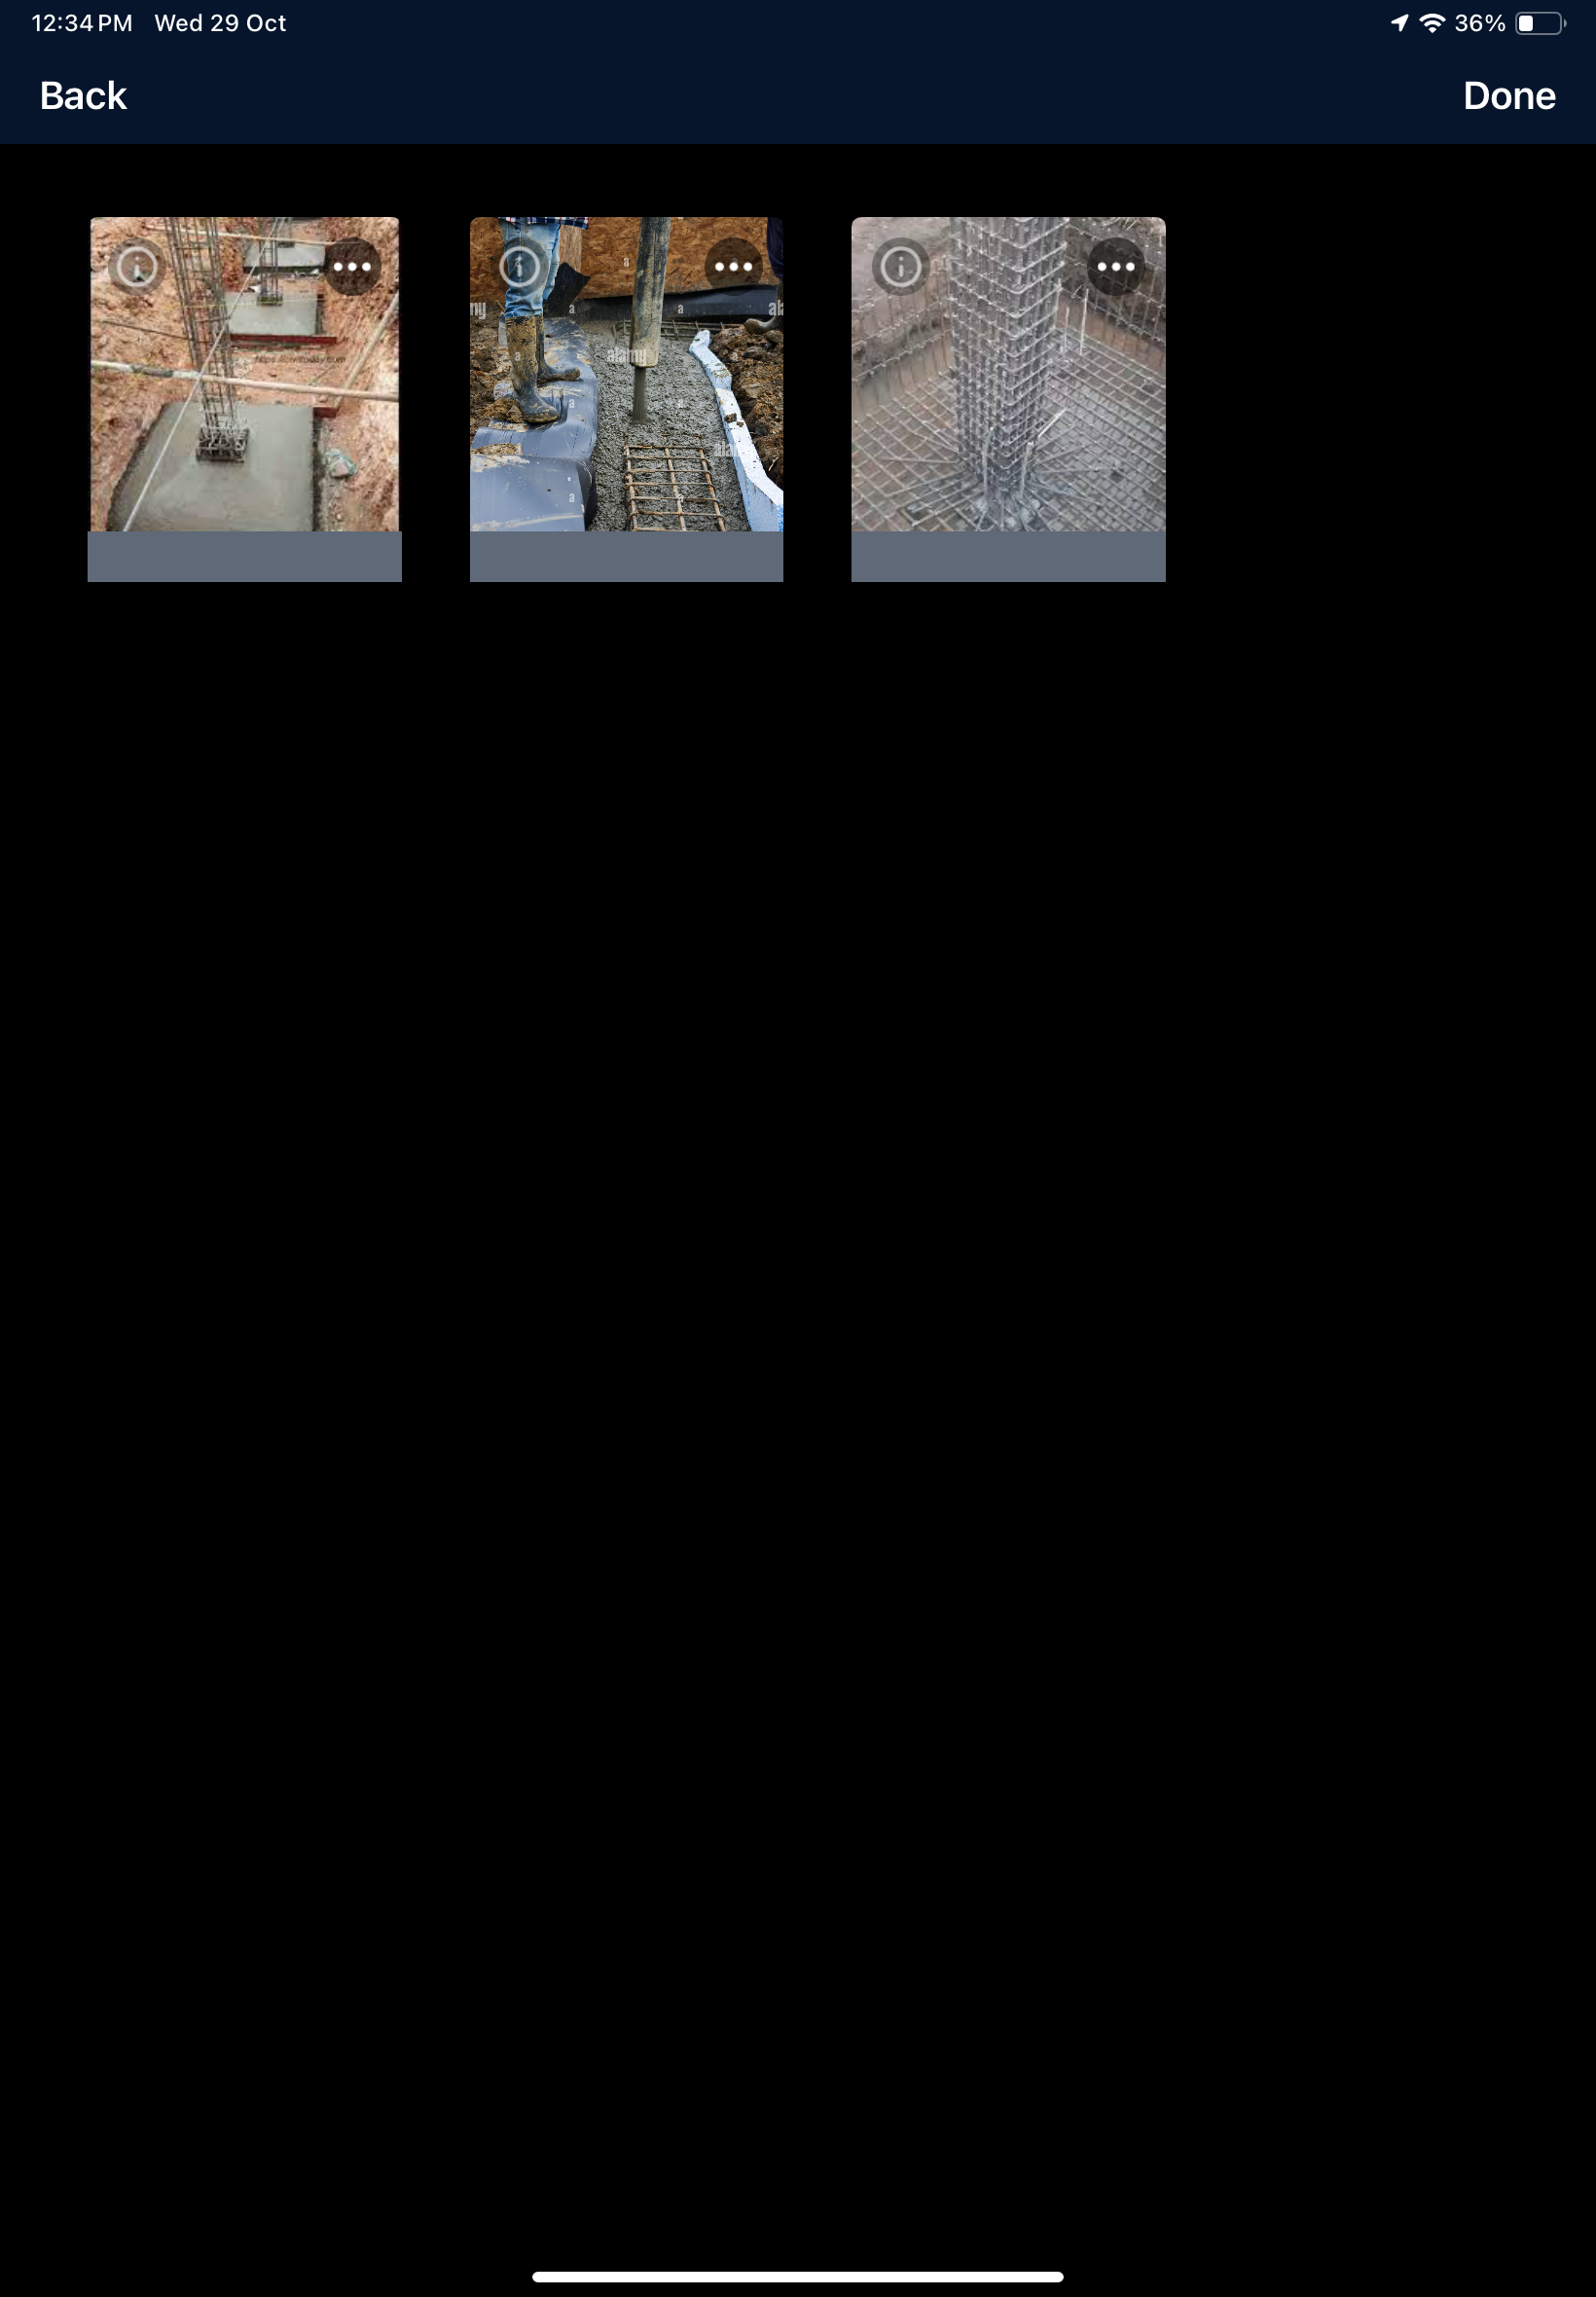
- Tap more options(...) on the top right of the thumbnail of an image
- Tap 'Markup' from the options. See here for more details.
- Repeat the process to add markups to other media if necessary
- Tap 'Done'
- Choose the category:
- Site - Select 'Site' to add a site photo, for example, to show the site condition
- Schedule Item - Select 'Schedule Item' to add a picture depicting task progress, completed deliverables, etc.
If you have chosen 'Schedule Item', you need to select the task or deliverable to which the picture pertains. The list shows the scheduled tasks you are in charge of:

- Choose the task item
The image gets uploaded to the project.
Attach plan sheets with markups
- Tap the plus button at the bottom right
- Tap
 on the right of the capture button to open plans
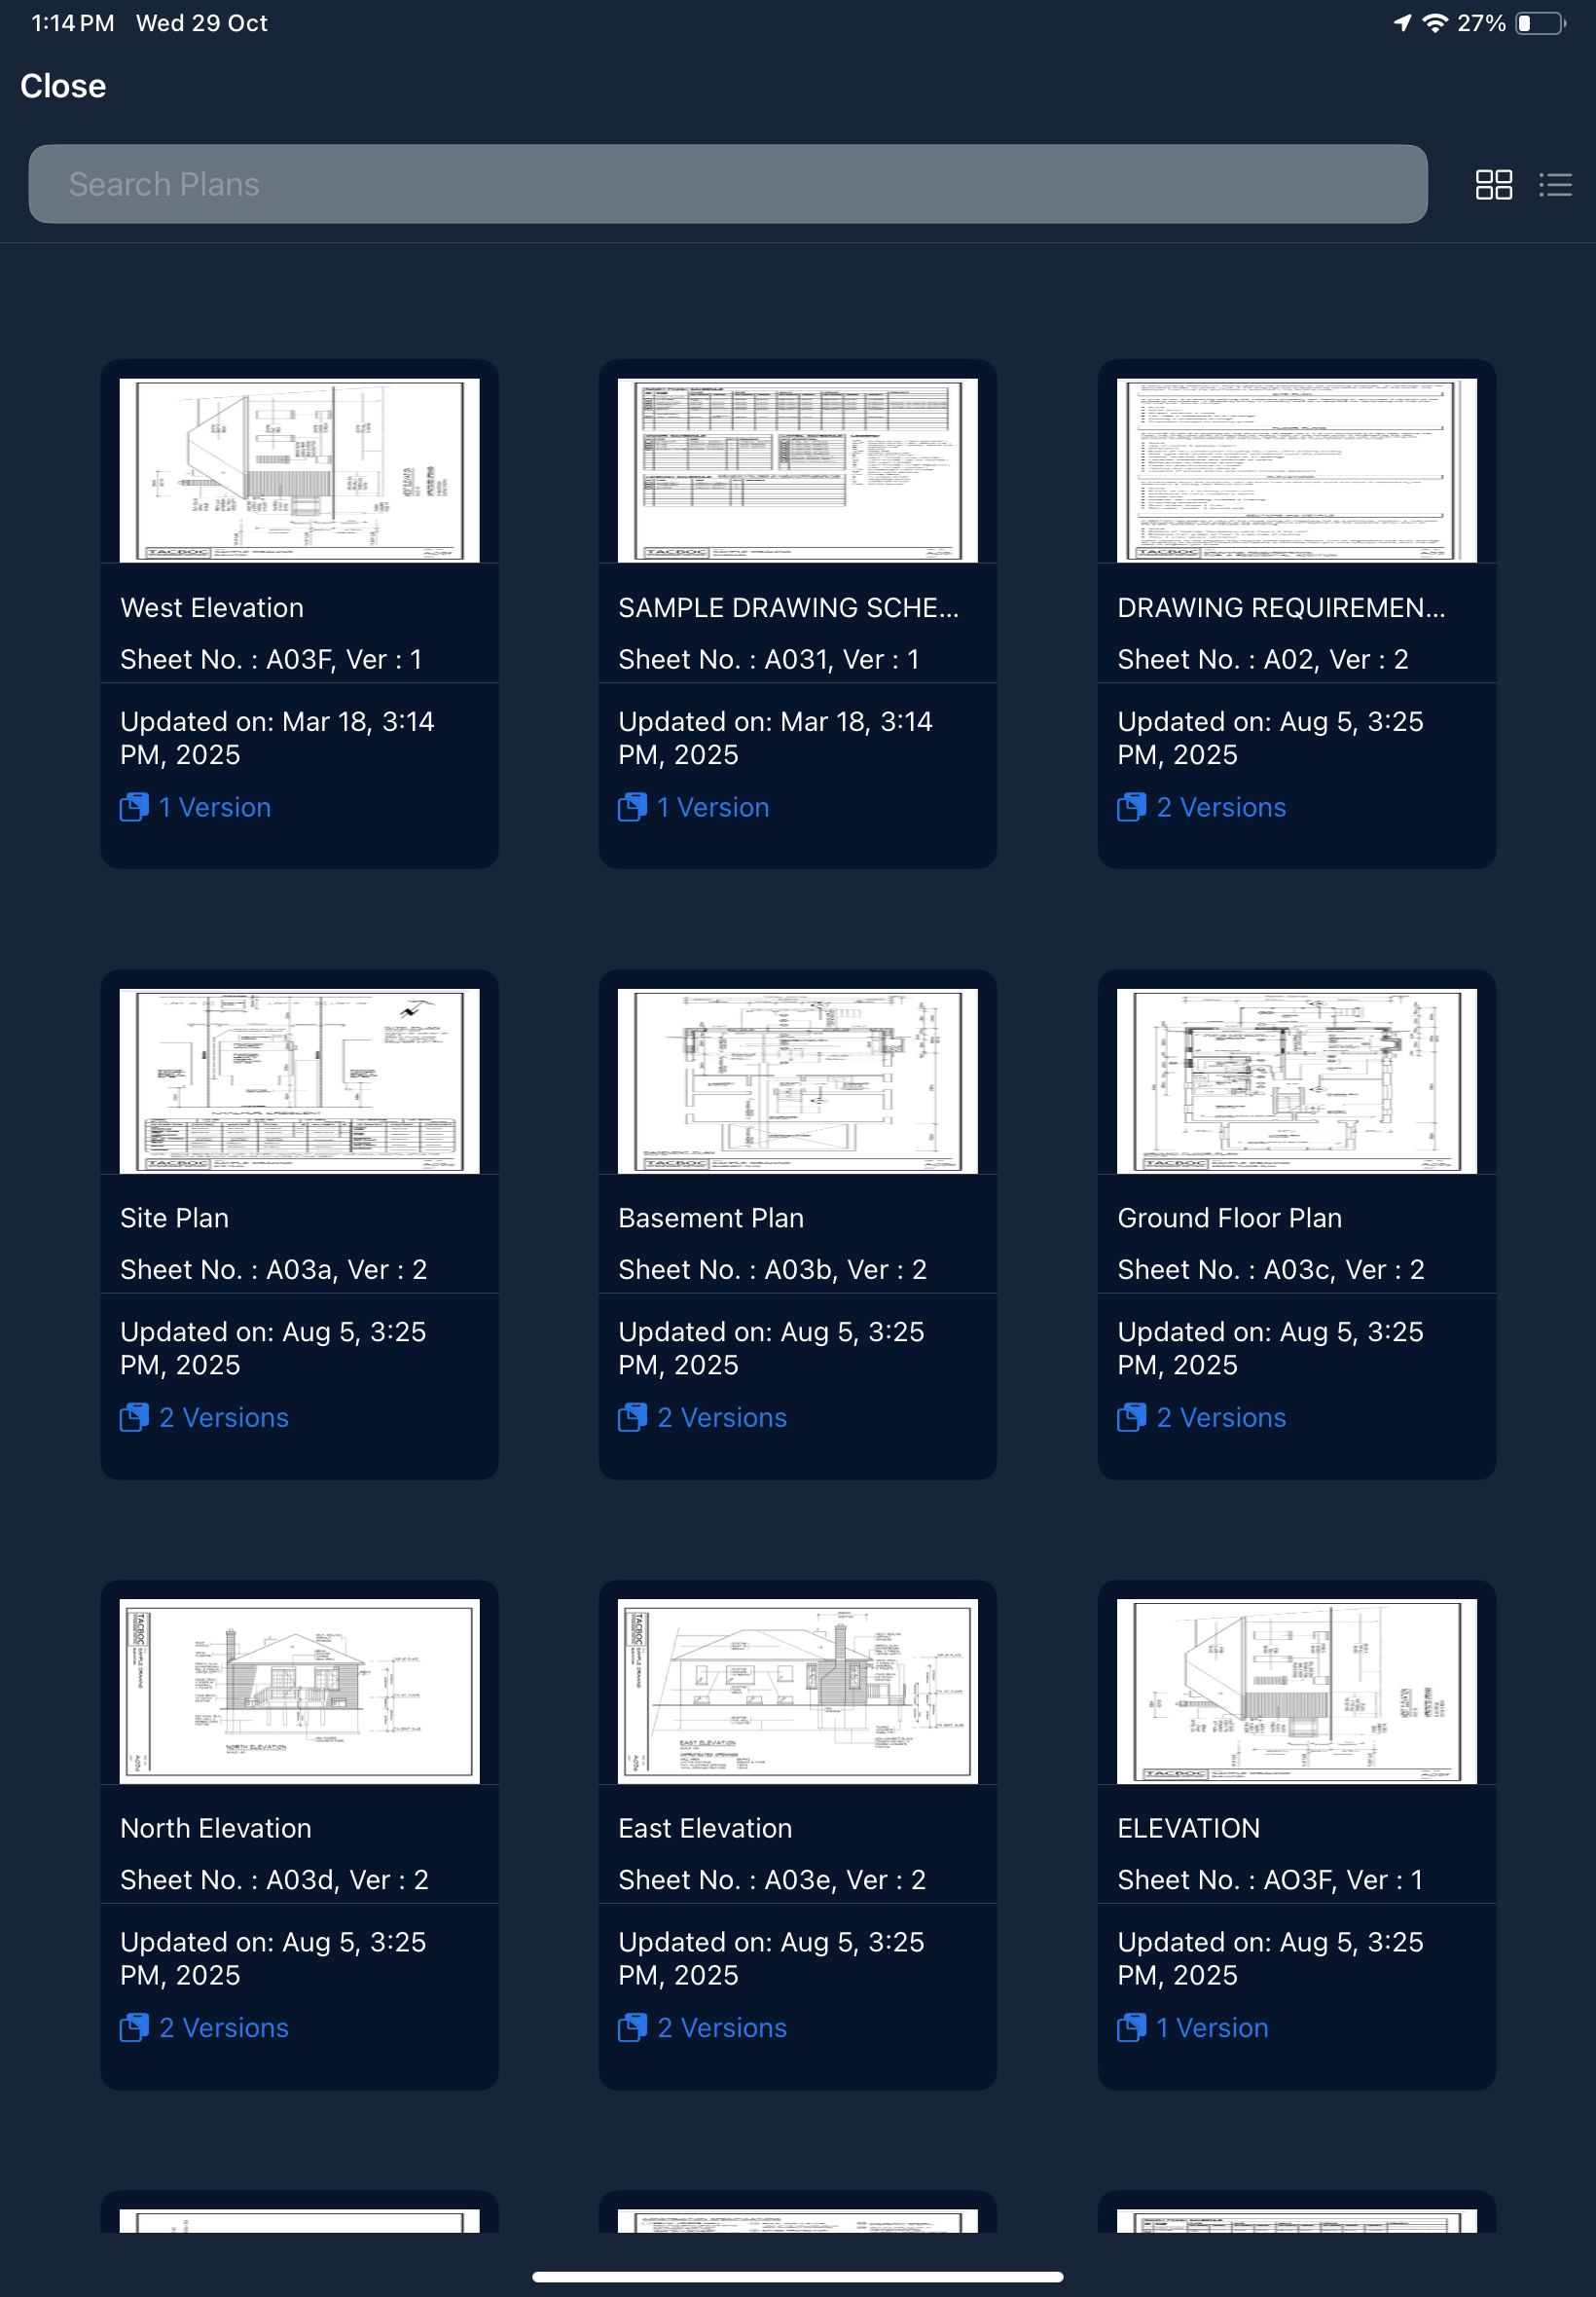
- Select the plan sheet
- Tap the thumbnail to choose the latest version
- Tap 'Version' in the thumbnail to choose a previous version of the plan sheet
- Add markups as required. See Add markups to a plan sheet to learn how to create markups
- Save the markup as an image to automatically add the marked-up plan sheet
- Tap 'Done'
- Choose the category:
- Site - Select 'Site' to add a site photo, for example, to show the site condition
- Schedule Item - Select 'Schedule Item' to add the plan depicting task progress, completed deliverables, etc.
If you have chosen 'Schedule Item', you need to select the task or deliverable to which the plan pertains.
Was this article helpful?
That’s Great!
Thank you for your feedback
Sorry! We couldn't be helpful
Thank you for your feedback
Feedback sent
We appreciate your effort and will try to fix the article