The 'My Team' menu lets you create a key team of persons who mostly work off-site on a project. These include project directors, fellow project managers, designers, in-house architects, engineers, etc., who are involved in the project. Once added, they can access the project on their dedicated web consoles, and manage and share information. For example, architects can upload plans and drawings, estimators can upload budgets, add estimates, create change orders, etc.
- Project managers can add staff belonging only to their companies
- The person you want to add should be an active user in your company's Linarc account
- Contact your company account administrator if the user you want to add is not added to your company's Linarc account.
- The team members can have access to the modules selectively, depending on the permissions in the roles assigned to them.
- If a project team member has 'Manage' permission for RFI and Submittal, they are automatically assigned as a workflow manager for the respective item. Only they can:
- Set up a workflow sequence for the managed item - applies only to GC companies.
- Forward an item to the next step in its workflow after they or any other project team member has responded to it
The 'Team' menu allows you to:
Add Members to the Project Team
- Ensure you are on the 'Members List' screen within the 'Project Information' module of the project. If not:
- Click the main menu at the top-left
- Click 'Information' under 'Project' in the menu drop-down.
- The 'Project Information' screen opens by default.
- Click 'My Team' from the top and then hover 'Members', select 'All' from the options on the left
- Click the main menu at the top-left
The 'Members List' interface shows the project managers and other project team members.
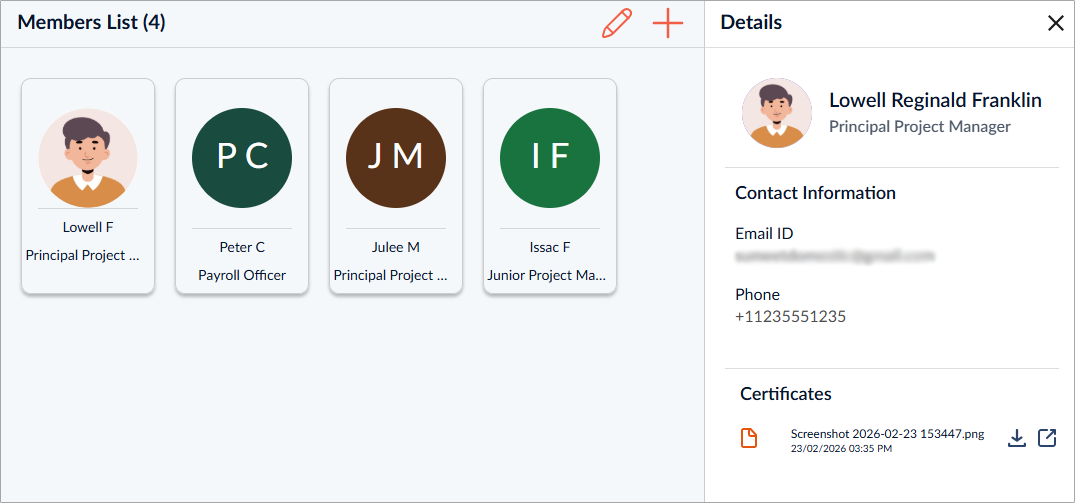
- Click the '+' button at the top right.
The 'Add Members' interface displays the list of employees of your company with applicable roles.
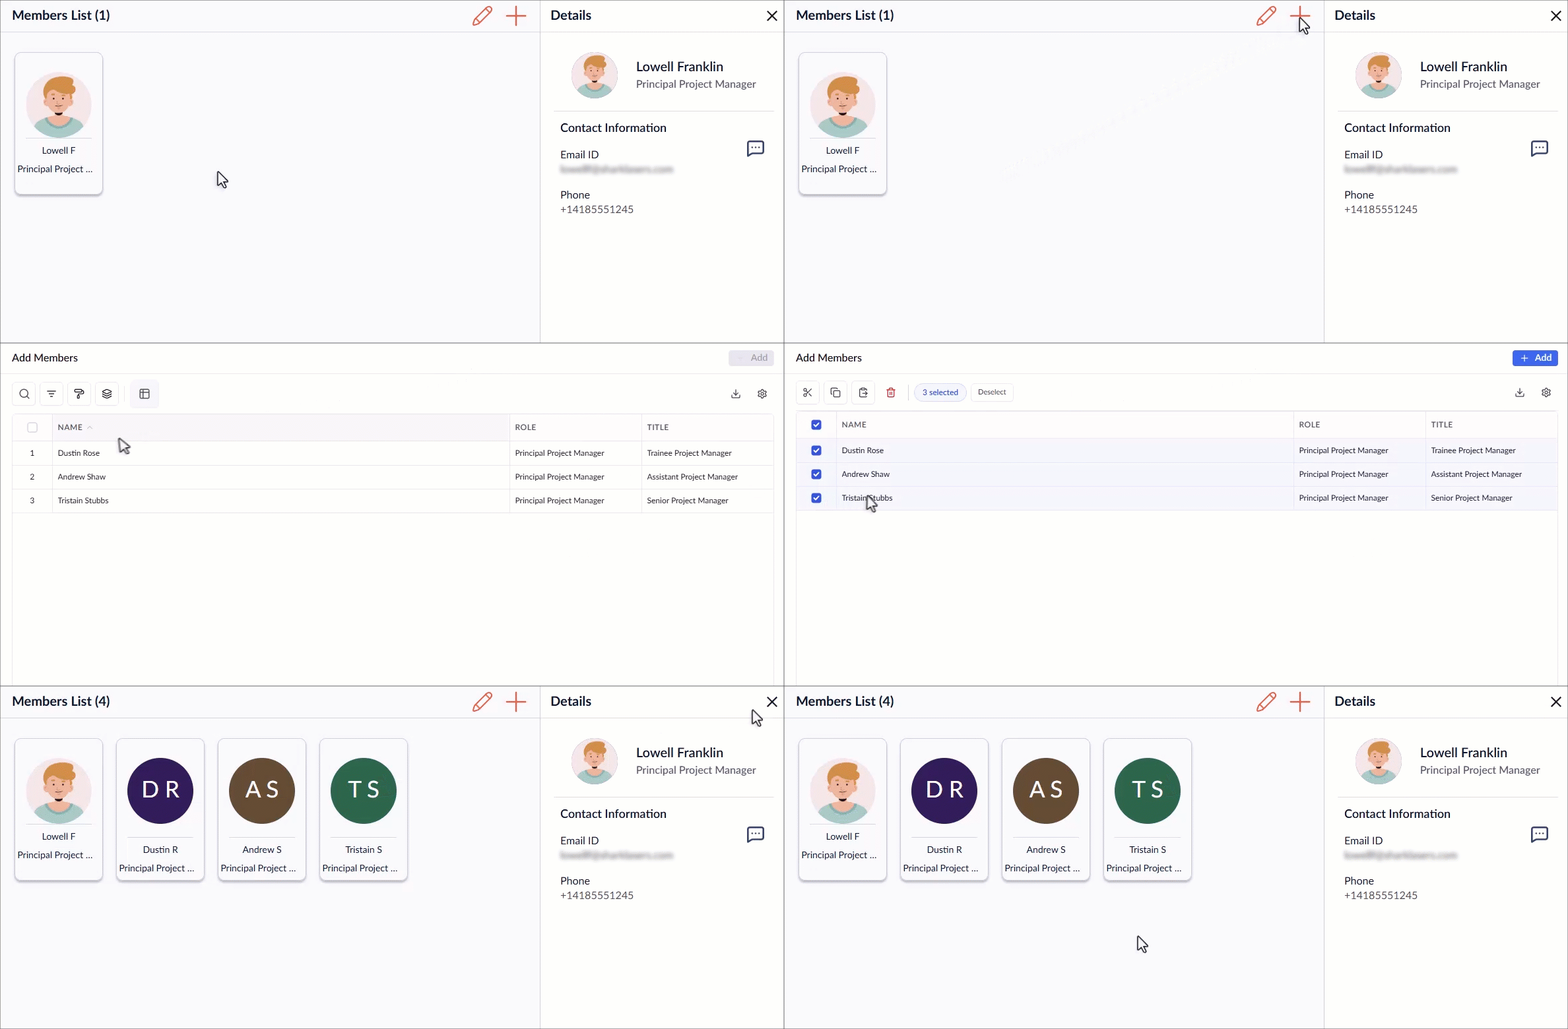
- Select the employees you want to add to the project from the list
- Click 'Add'
The employees are added to the project team:
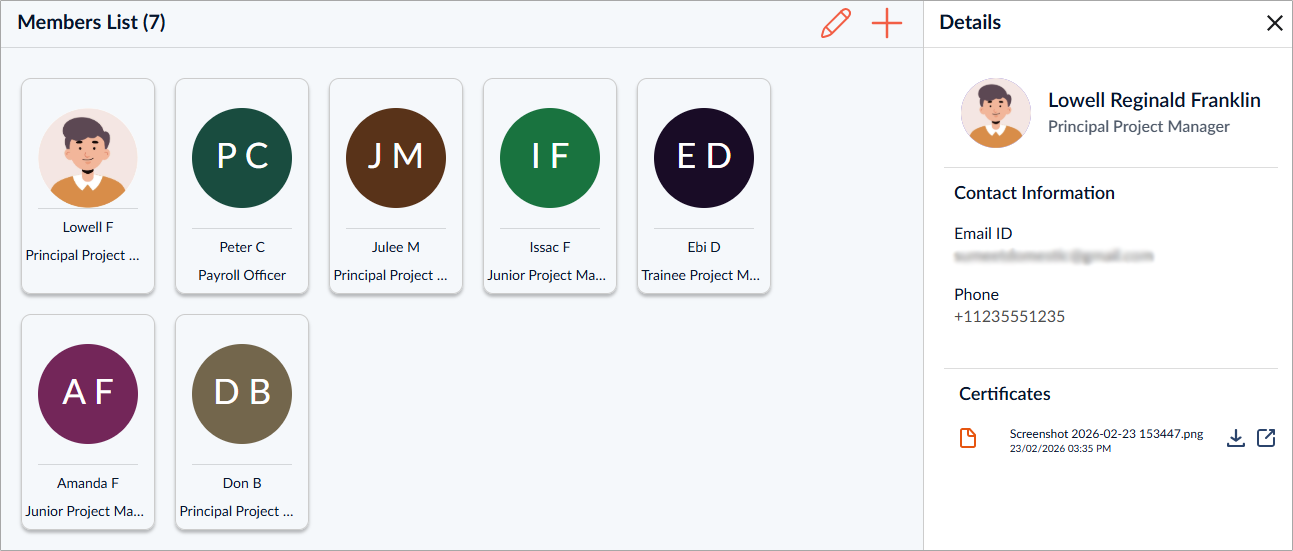
- Select an employee to view their details on the right.
The 'Details' pane also displays any certifications earned by the employee through company-led training programs, workshops, and other professional development initiatives. For more information, refer to 'View Employee Certifications.'
- You can add new members, view details of, or remove members from the project at any time from this interface.
Remove an Employee
- Open the 'Members List' interface
- Select the member to open their details pane at the right
- Click the 'Remove' button
 in the 'Details' pane
 - Select the date from which the member has to be removed
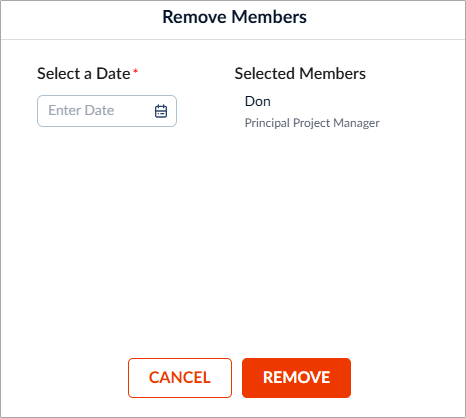
- Click 'Remove'
Note: You cannot remove the default project manager of the project.
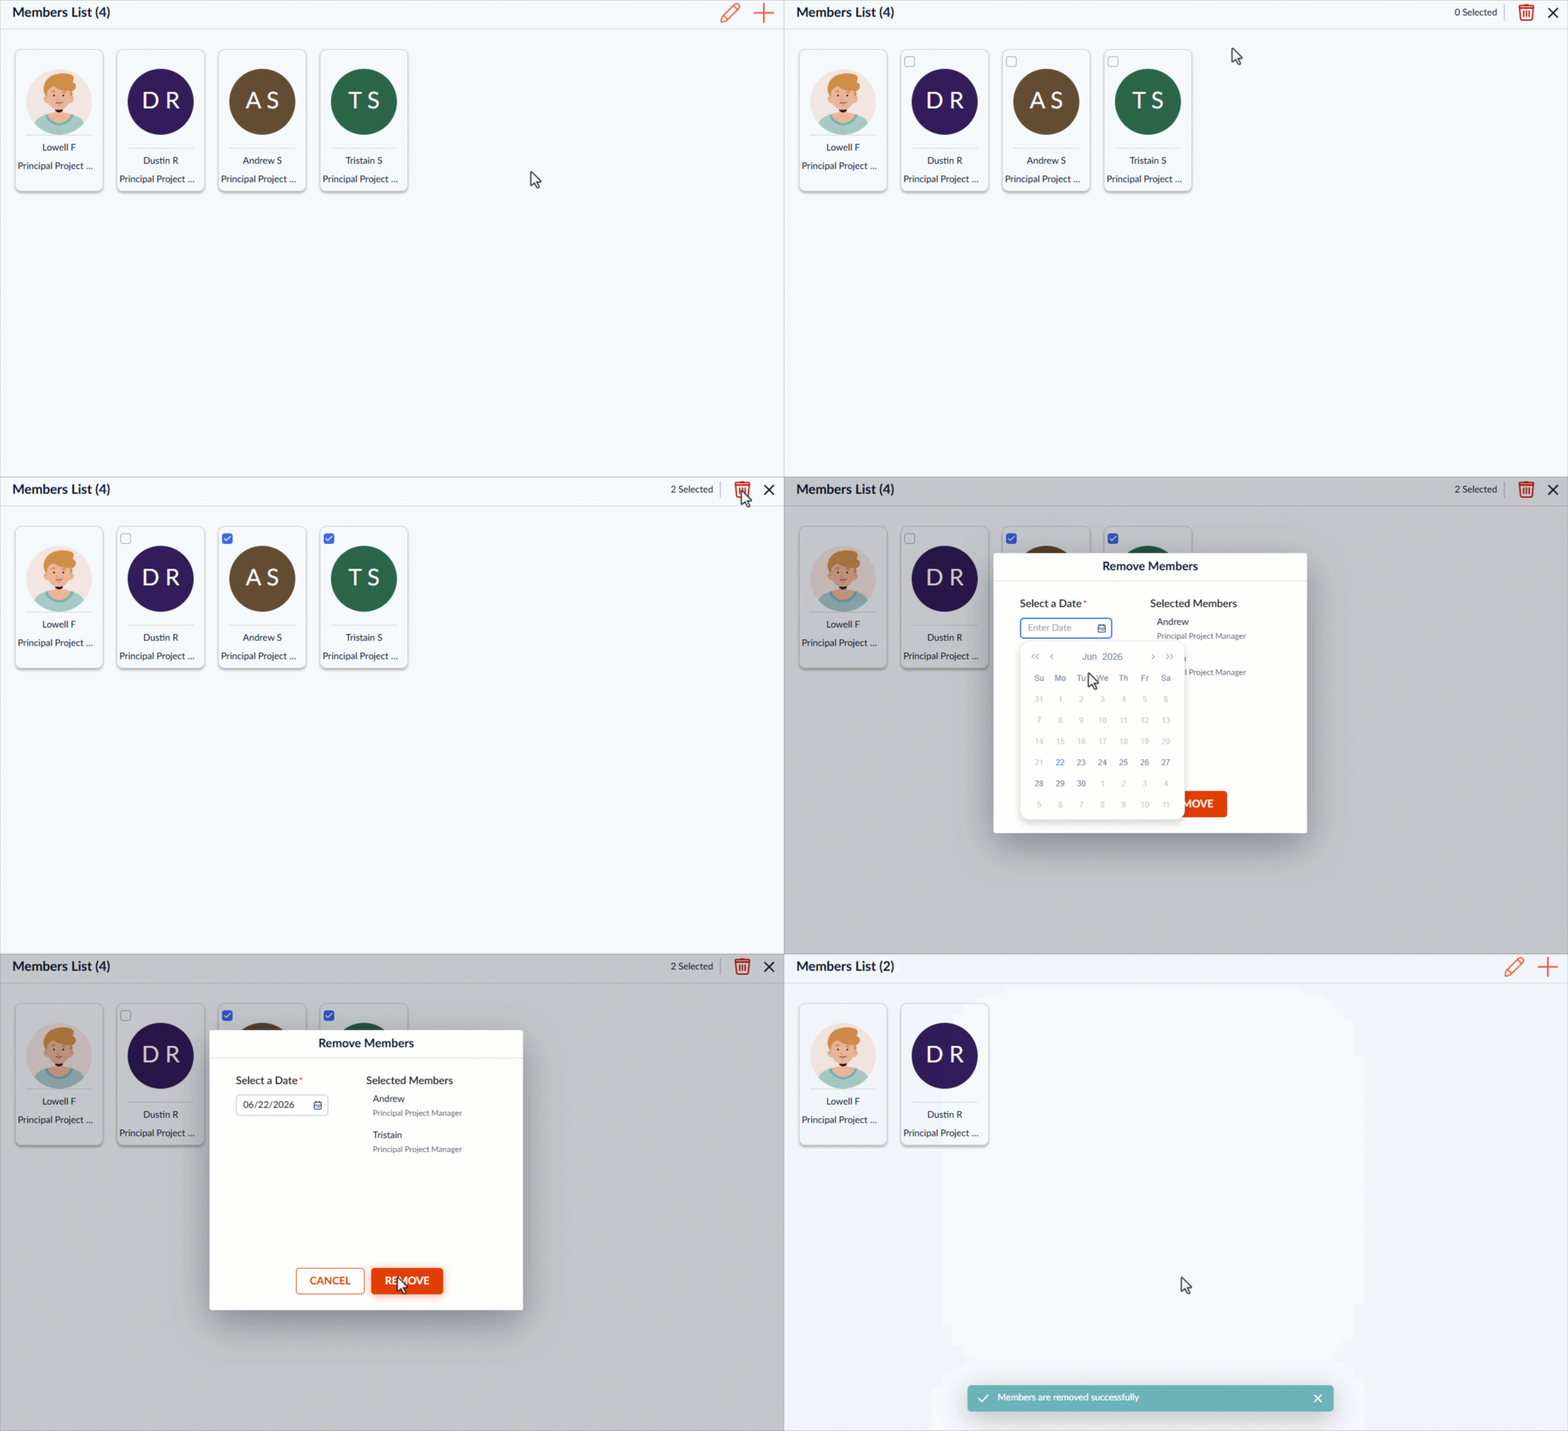
Remove Multiple Members at Once
- Open the 'Members List' interface
- Click the pencil icon at the top right
- Select the members to remove
- Click the 'Remove' button
 at the top right
 - Select the date from which the members are to be removed
- Click 'Remove'
Was this article helpful?
That’s Great!
Thank you for your feedback
Sorry! We couldn't be helpful
Thank you for your feedback
Feedback sent
We appreciate your effort and will try to fix the article