The Prime Contract (also known as the Owner Contract) serves as the top-level financial foundation for your project. The Owner Contract module enables you to establish this primary agreement by clearly defining terms and organizing your overall revenue breakdown. This structured approach allows you to seamlessly transition from an agreed-upon scope of work to an actionable master project budget.
Fast-Track Your Setup with Auto-Extraction
- Simply upload a PDF or DOC version of your contract file, and Linarc will do the rest.
The system automatically extracts the contract terms and high-level cost breakdowns, instantly populating the required details for you to quickly review and confirm.
Key Capabilities
- Define Scope and Revenue: If you prefer not to use the auto-extraction feature or don't yet have the document ready, you can manually enter the overall amounts quoted for high-level categories of work as individual contract line items.
- Build Your Breakdown: Populate your contract line items directly into the system. You can build this incrementally and save your progress over time.
- Draft Your Project Budget: In tandem with your contract, begin drafting your master project budget. Progressively add granular budget line items that map back to the contract scope, and assign specific scopes of work to your subcontractors. Simultaneously, you can configure the project Schedule of Values (SOV) for the line items currently included in the budget.
- Secure Financial Data: Lock the contract once it is finalized. This secures your baseline numbers and prevents any unintended modifications.
- Finalize Your Master Budget: Once the contract is securely locked, finalize your overarching project budget in strict alignment with the locked contract values.
To set up your project's prime contract in Linarc
Ensure you are in the 'Owner Contract' screen within the 'Finance & Controls' module. If you are not already there:
- Click the main menu icon at the top-left of your screen.
- Select 'Owner Contract' under the 'Finance & Controls' section in the drop-down main menu.
Tip: Press and hold the Cmd (Mac) or Ctrl (Windows) key on your keyboard while clicking to open the module in a new browser tab.
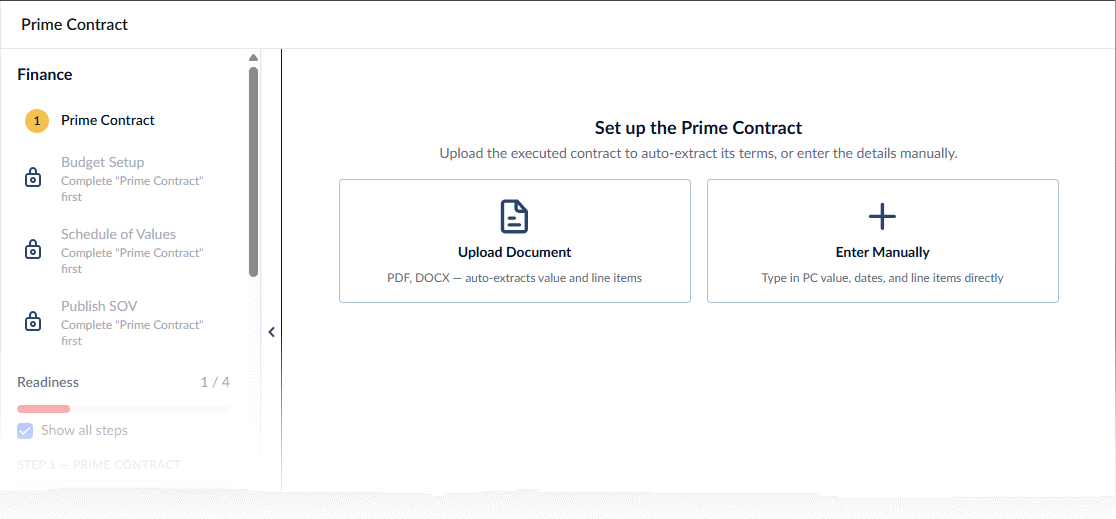
The 'Prime Contract' screen opens, allowing you to begin your setup. The collapsible slider on the left features an auto-updating checklist, tracking your setup progress:
- Step 1 - Prime Contract: Verifies contract value, dates, and contract lock status. (Current Step)
- Step 2 - Budget Setup: Tracks budget line distribution and budget lock status.
- Step 3 - Schedule of Values: Guides SOV creation and finalizing.
- Step 4 - Publish SOV - Guides locking the SOV and setting it up as a standard for billing purposes.
(Green checkmark = Complete | Yellow alert = Action Required)
You can establish your contract with high-level cost breakdowns using one of two methods:
- Method 1 - Upload the Contract Document (Auto-Extraction): Upload a PDF or DOC version of your contract file. Linarc automatically extracts and populates the necessary data—including pulling billing terms directly from the contract to automatically set up your billing configuration. Simply review the data, confirm the details, and finalize the contract.
- Method 2 - Manual Entry: Manually input all the required contract details and cost breakdowns from scratch, then lock the contract. Note that with this method, the General Contractor must also configure the billing settings manually.
The left panel features an auto-updating checklist that tracks your progress through the project's financial setup.
Method 1: Upload Prime Contract Document
- Click 'Upload Document.' Reminder: The accepted file formats are PDF and DOCX
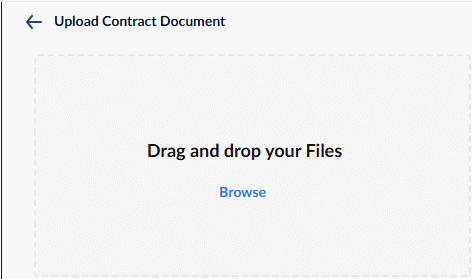
- Click 'Browse' and navigate to the contract file
- Alternatively drag and drop the contract file into the box
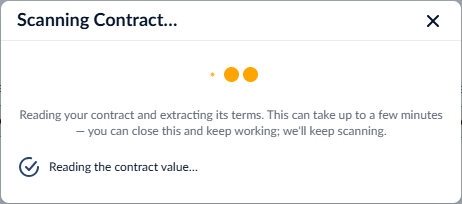
The system scans your uploaded contract and extracts all relevant data in just a few moments:
Once the extraction is complete, you will see a side-by-side view of your original document (PDF or DOC) alongside the extracted details. This intuitive layout allows you to easily cross-reference the information, fill in any missing gaps, and correct any inaccuracies.
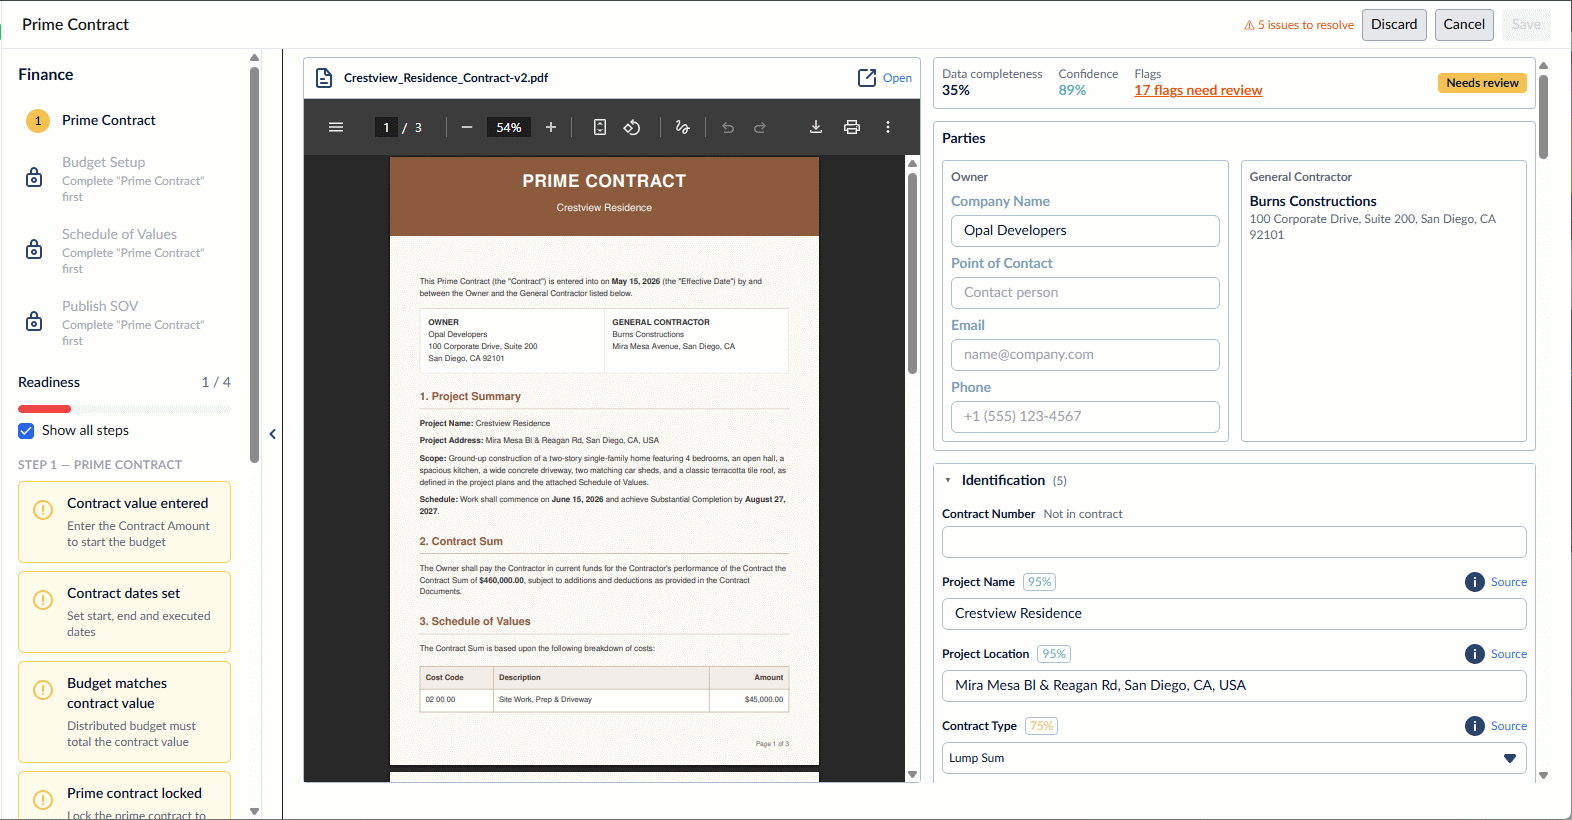
Data Extraction Overview
At the top of the right screen, the system provides a quick summary of the extraction results:
- Data Completeness: Indicates the percentage of required data the system successfully pulled from the document.
- Confidence: Indicates how certain the AI is that it read and categorized the data correctly.
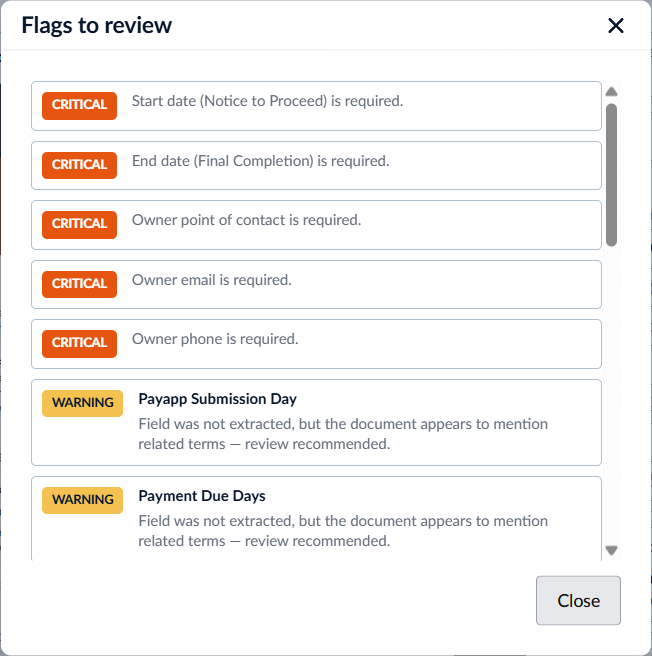
- Flags: Shows the number of mandatory fields that the system could not locate. You will need to enter this data manually.
- Click on the flag number to instantly view a list of the missing or uncertain entries. An example is shown below:
- Click 'Warnings' to view extraction error logs.
Review and Correct the Extracted Details
The data is organized into 12 distinct sections. The header row of each section shows the number of mandatory fields to be compulsorily filled-in to proceed with the contract set up.
As you review the extracted information, keep the following UI features in mind:
- Field Counts: The number of fields within a section is displayed next to its header.
- Confidence Indicators: The confidence level for the data extraction is shown directly beside each individual field.
- Source Referencing: Click the 'i' (information) icon next to any field to highlight the exact section of the original document where the data was found.
- Mandatory Fields: Required fields are marked with a red asterisk (*). If these are blank or incorrect, you must manually input the correct data before proceeding.
The 12 Contract Sections
Review and verify the data across the following categories, manually entering or adjusting details as needed:
1. Parties - Details of the legal entities bound by the agreement, specifically the Owner and the General Contractor.
2. Identification - General contract identifiers, including the contract number, associated project name, and contract type.
3. Dates - Key project timelines, such as the contract execution date, start date, and end date. Use the built-in calendar tool to easily select or adjust these dates.
4. Financial - High-level financial figures, including the total contract amount, general conditions, and contingencies.
5. Payment Terms - Your company's automated billing configuration. This includes billing periodicity, pay application (pay-app) and invoice submission deadlines, approval due dates, and your accepted payment receipt channels.
6. Retainage & Release - The established retainage percentages and the specific parameters for withholding and releasing funds.
7. Insurance & Bonds - Requirements and coverage details for insurance policies, liability limits, worker's compensation, and surety bonds.
8. Lien Waivers - Settings, requirements, and conditions for processing project lien waivers.
9. Change Orders - The agreed-upon conditions, parameters, and default markup percentages for handling project change orders.
10. Scope - A high-level description of the specific work items and deliverables covered by the contract.
11. Narrative Terms - Written terms and conditions governing financial transactions, payments, retainage, and general rules of engagement.
12. Schedule of Values (SOV) - A detailed, line-item cost breakdown of the total contract sum, organized across specific work items, disciplines, divisions, and trades.
Once all mandatory fields are entered with correct data, the next step is to publish the contract.
- Click 'Save' to save your entered data
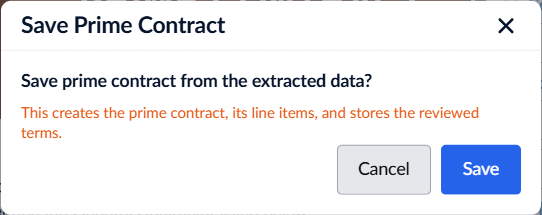
- Click 'Save' to confirm
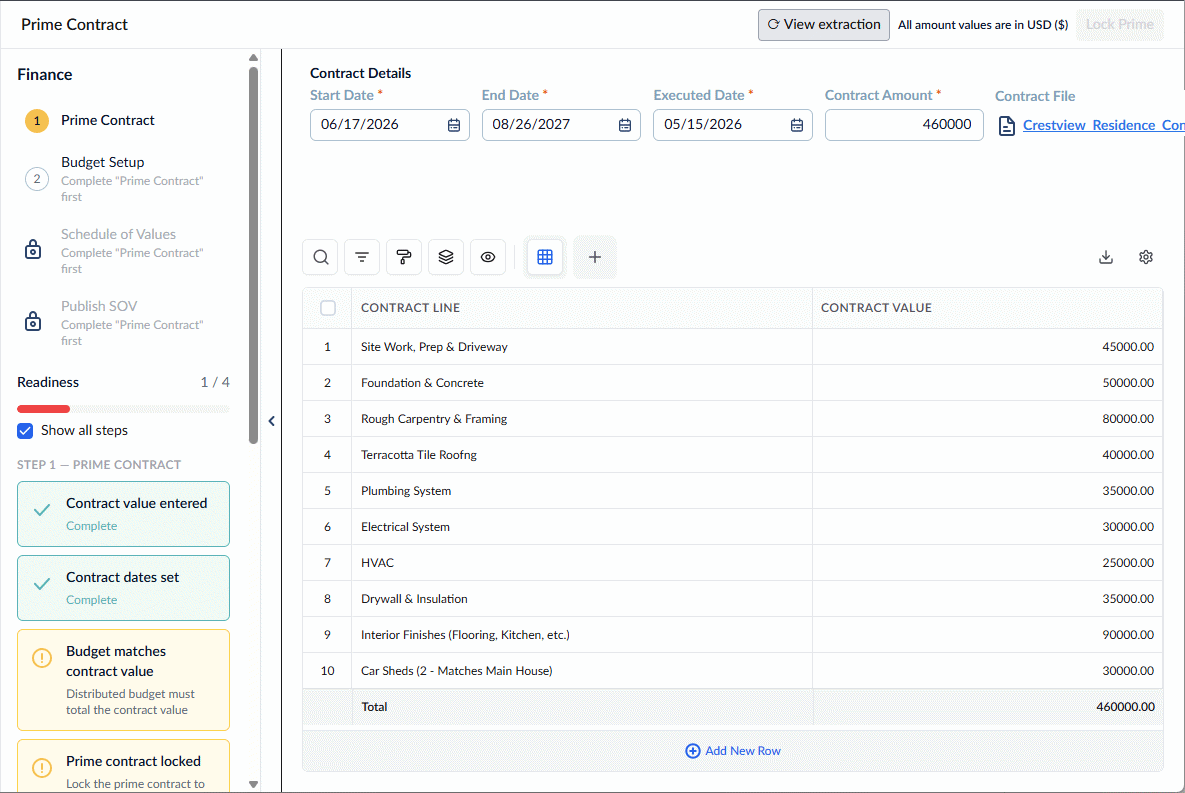
- Click 'View Extraction' to see the uploaded document and the extracted details side-by-side at anytime
Once the contract is uploaded, you can start buildng the budget and assign contract amounts to the subcontractors and more.
Next step - Lock the Contract.
Method 2: Manually Set up the Contract
- Click 'Enter Manually' from the initial set up screen
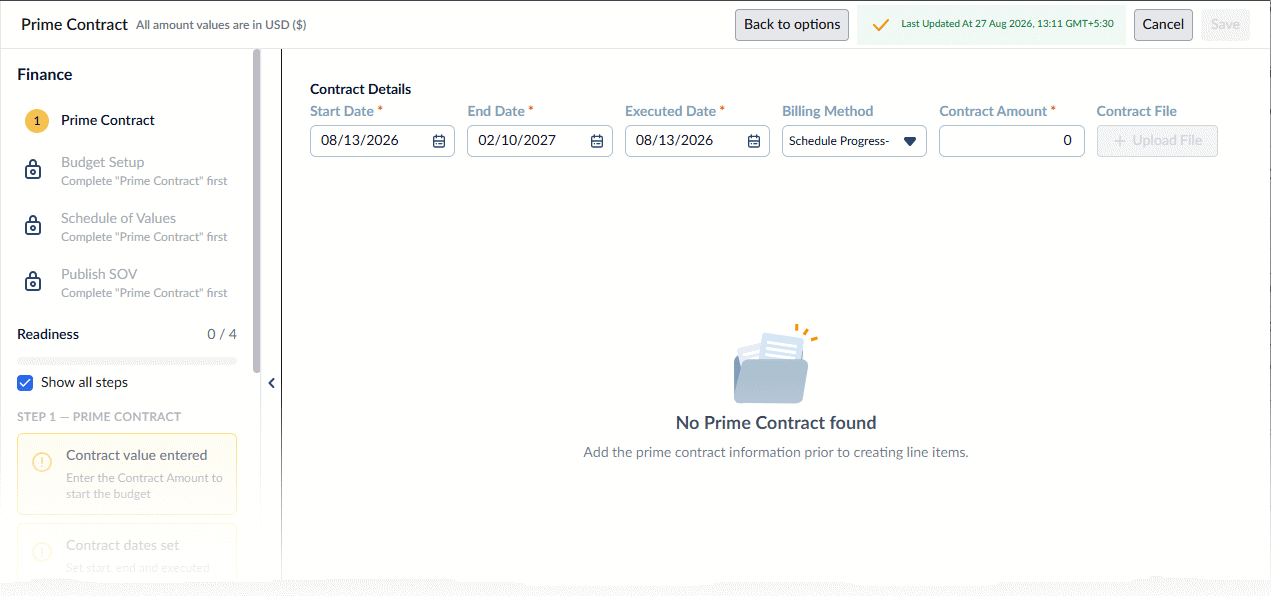
Setting-up the prime contract involves the following steps:
- Step 1 - Enter Contract Details
- Step 2 - Save the Contract File (Optional)
- Step 3 - Set up the Contract Cost Breakdown (Optional)
Step 1 - Enter Contract Details
Start Date: The date contracted work officially begins and legal obligations commence. This defaults to the project's start date but can be adjusted. Note: This date cannot be set earlier than the project start date.
End Date: The contractual deadline for completing all scope items. This defaults to the estimated project completion date but can be adjusted. Note: This date cannot be set later than the project end date.
Executed Date: The date the contract is formally signed and legally binding between parties. This defaults to the project start date but can be modified. Note: This date must fall within the project’s overall timeframe.
Tip: Click inside any date field to select a new date using the interactive calendar, then click 'Save'.
Billing Method: Select your primary progress billing mode to govern how pay applications are generated:
- Schedule - Progress Based: Linarc dynamically calculates earned billable values by tracking task completion percentages on the schedule. Best for projects strictly tied to physical schedule progress.
- SOV-Based: Allows you to claim progress billings by percentage or direct dollar amounts against individual Schedule of Values line items. Best for lump-sum or fixed-price contracts using standard AIA-style pay apps.
- Budget-Based: Allows you to claim progress billings by percentage or direct dollar amounts against itemized budget line items for monthly work completed. Best for Cost-Plus or GMP contracts requiring detailed cost tracking.
Contract Amount: Enter the total contract amount
- Click 'Save.'
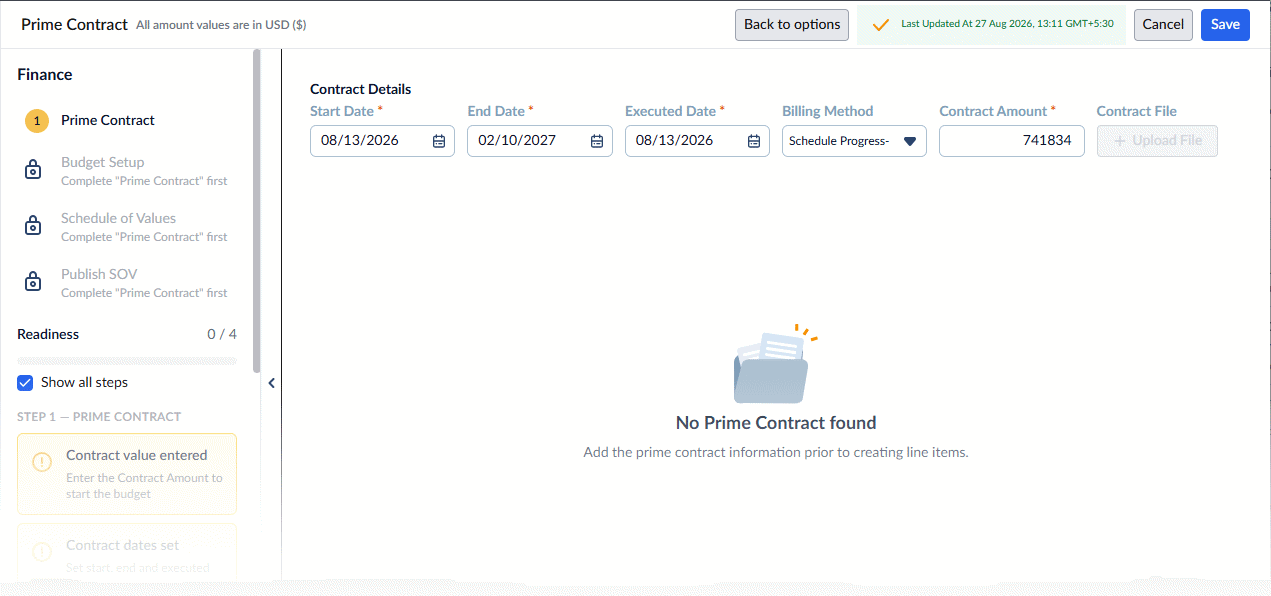
Step 2 - Save the Contract File (Optional)
Contract File: Click the 'Upload File' button to attach a PDF version of your executed contract document.
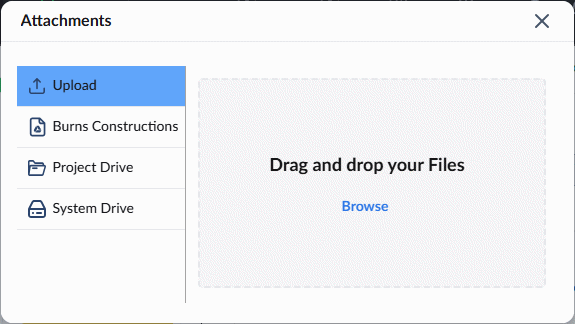
You can upload the file using one of two methods:
- From your device: Drag and drop the PDF into the designated box, or click Browse to locate the file on your computer.
- From the project repository: Select the appropriate drive from the left menu and navigate to the existing file within the system.
Once saved, the document is automatically archived in the project's cloud-based file repository under the following path: System > Finance > [Company Name] > Prime Contract.
For further guidance on accessing archived documents, please refer to the View and Download Files article.
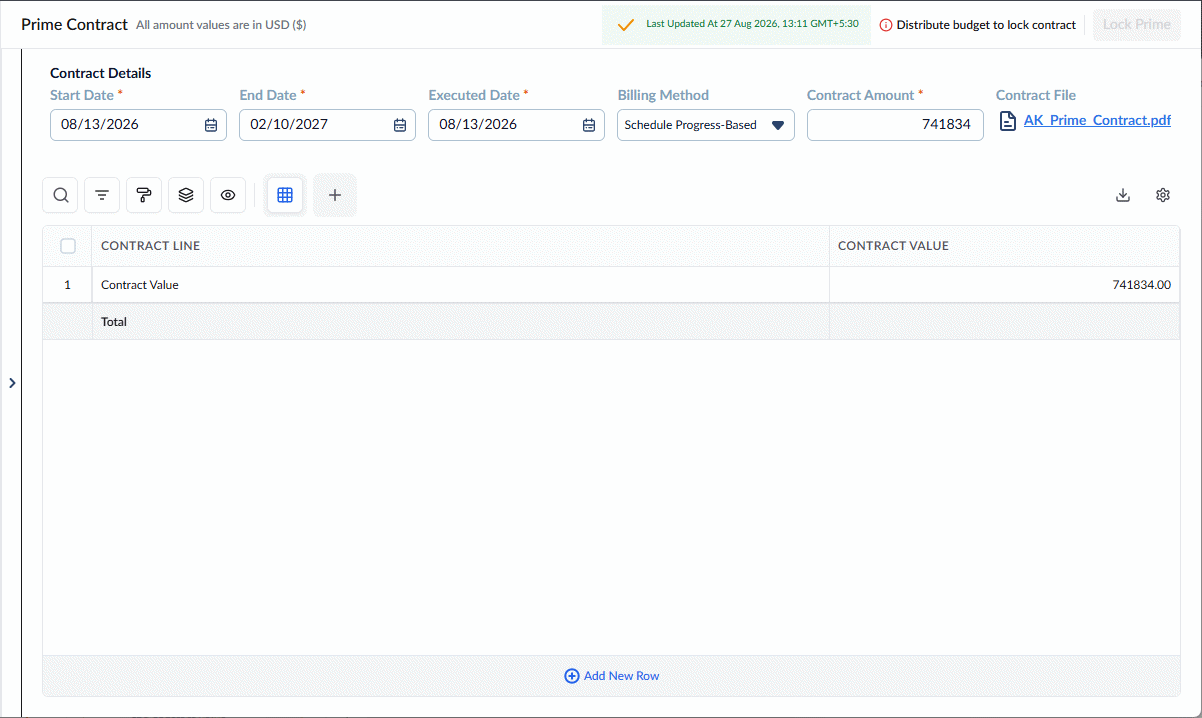
Step 3 - Set up the Contract Cost Breakdown (Optional)
By default, your contract breakdown table displays a single row containing your total Contract Value. You can edit this initial row and continue adding new rows one by one until your total contract amount is fully distributed.
To set up the contract breakdown
1. Edit the first row: Update the existing single line item to reflect your first contract division or scope of work.
- Contract Line: Enter the name of the specific scope or cost item defined within the contract.
- Contract Value: Enter the agreed monetary value for this specific line. (Note: Enter values using the currency specified in your billing setup).
2. Add more rows: Click '+ Add Row' to continue adding line items for the rest of your contract scope.
3. Delete mistakes: To remove a line added by mistake, select it by clicking its serial number on the left, then click the Trashcan icon at the top of the table.
4. Save your progress: Click 'Save' to store your draft.
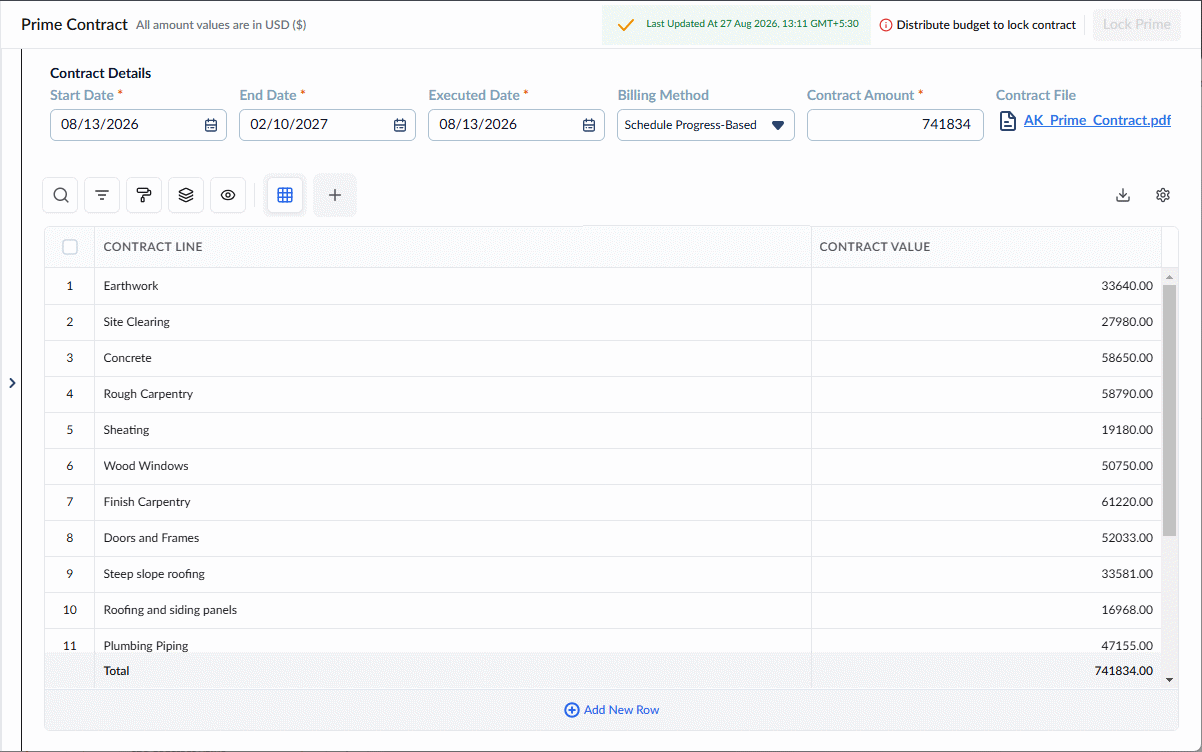
Finalizing the Contract
You do not have to do this all at once. You can build this breakdown incrementally, saving your progress until you have fully exhausted the total amount entered in the overarching 'Contract Amount' field at the top of the screen. Once the full amount is accurately distributed across all rows, you can officially lock the contract.
Lock the Contract
Locking the contract establishes it as a fixed, binding reference point for project execution, financial tracking, and auditing. Once a contract is locked, it becomes read-only and cannot be altered directly. This ensures that the original contract values remain preserved for accountability and compliance.
Please note: A contract can only be locked after the project budget is fully set up and the total contract amount has been completely distributed and exhausted across your budget line items.
When the contract is locked, you cannot:
Modify the original contract values
Add subline items
Delete any contract line items
To lock the contract
- Review the project contract and ensure it exhaustively covers all planned work
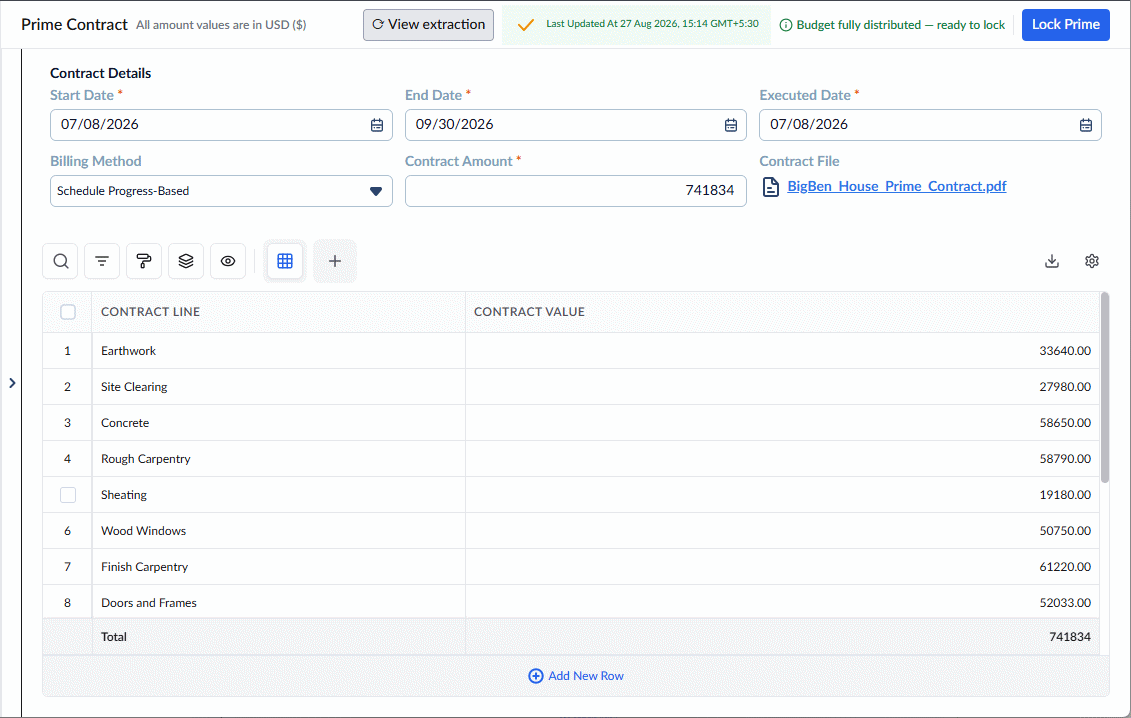
- Click 'Lock Prime' on the top right
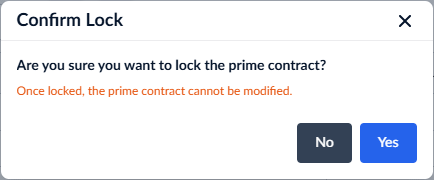
- Click 'Yes' to lock the contract.
Was this article helpful?
That’s Great!
Thank you for your feedback
Sorry! We couldn't be helpful
Thank you for your feedback
Feedback sent
We appreciate your effort and will try to fix the article