Linarc gives you the flexibility to build your project budget from scratch line-by-line or import it from an Excel file directly on the Budget screen. When setting up your financials, keep the following guidelines in mind:
- Your total budget amount must exactly match your overall contract amount.
- Best Practice: After assigning funds to all your primary budget line items, allocate any remaining contract balance to a dedicated reserve funds line item, labeled as 'Unallocated'.
- Creating this reserve ensures your totals match perfectly while giving you a flexible pool of money to distribute to other tasks later as project requirements evolve.
To set up your project budget
- Ensure you are in the 'Budget' screen of the 'Finance' module. If not:
- Open the management console of the project.
- Click the app launcher icon
 in the top-right and select "Finance"
 - Click 'Contract' on top and select 'Budget' on the left
The 'Budget' screen opens:
You can create your budget in two ways
Create Budget
1. Click Create on the 'Budget Upload' screen.
The budget creation screen will open, displaying the total contract amount at the top as your remaining balance.
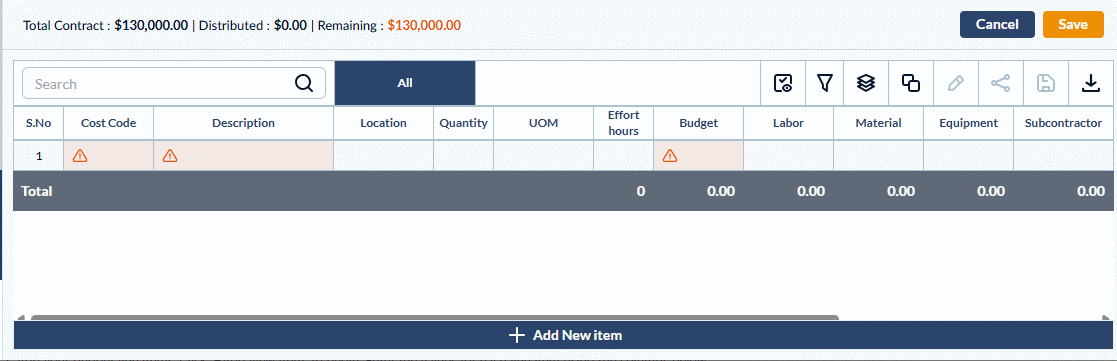
2. Add your budget line items. Click '+Add New Item' to begin. Enter the values for each line item using the columns below. (Note: Mandatory fields are highlighted in red.)
General Item Details
- Cost Code: The standard alphanumeric code for the task or deliverable, pulled directly from your company's master list. Click inside the cell to search by code number or item name. Once selected, the description will auto-populate.
- Description: The name or label of the budget item. This auto-populates based on the selected cost code, but you can edit it as needed.
- Location (Optional): The specific project area, level, or zone associated with this budget line. (Note: Ensure your project’s location hierarchy is already set up. See Manage Locations - Overview for details.)
- Quantity: The total amount of work or deliverables required for this line item.
- Unit of Measurement (UOM): The standard unit used to measure the quantity (e.g., SF, CY, LF).
- Effort Hours: The estimated total time required to complete the task, measured in man-hours.
- Budget: The total financial allocation for this specific budget line.
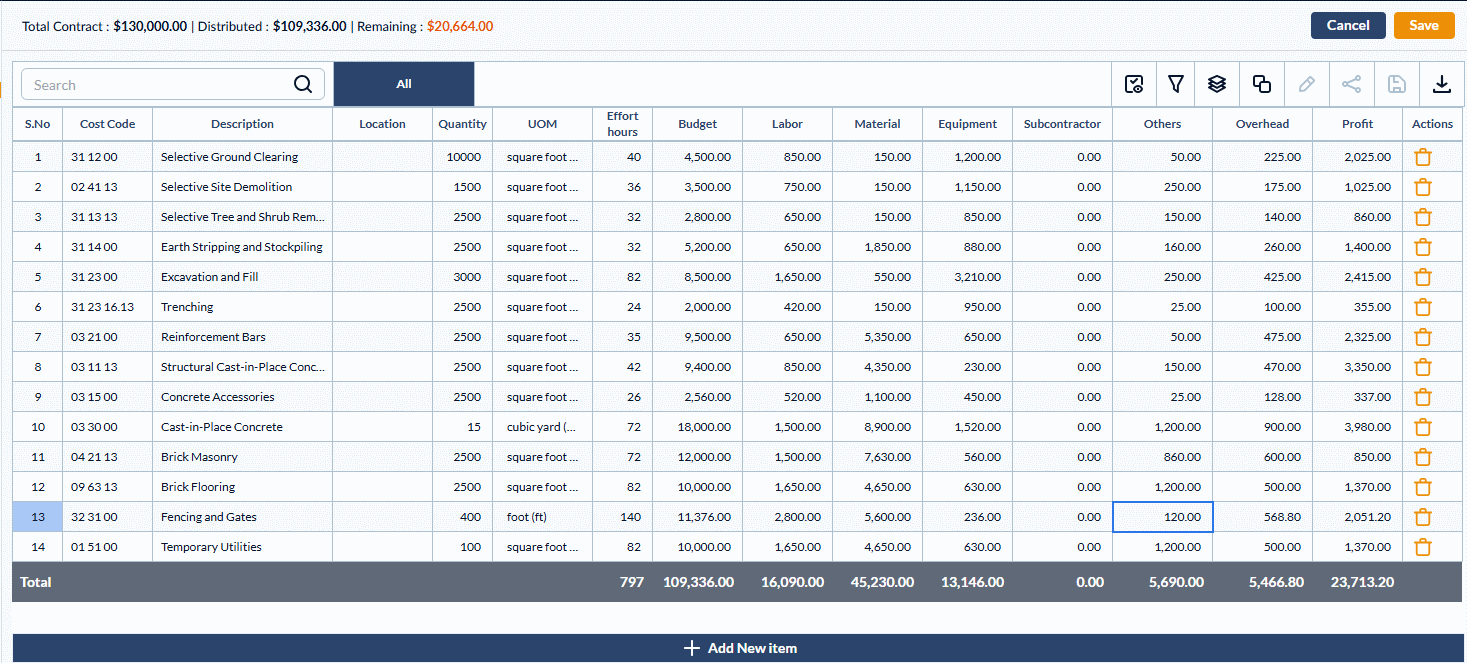
Cost Type Breakdown
- Labor: The estimated cost of your internal workforce required to complete this task.
- Material: The projected cost of all raw materials, supplies, and consumables needed for the work.
- Equipment: The anticipated cost for renting, operating, or utilizing the machinery and tools required for the job.
- Subcontractor: The budgeted cost for any portions of the work outsourced to external specialty contractors or vendors.
- Others: Any miscellaneous project expenses (such as permits or fees) that do not fit into the standard categories above.
- Overhead: The indirect operational costs applied to this task. The system auto-calculates this based on your established payment terms, though you can manually override the field if necessary.
- Profit: The anticipated financial margin for this specific work item. The system automatically calculates this by subtracting the sum of your allocated costs from the total Budget amount.
Management
- Actions: Use this column to delete or remove a budget line if it was added inadvertently. Alternatively, you can select a row and click the Trash Can icon at the top left of the table.
3. Save and update incrementally.
- Click 'Save' to store your progress. You can develop the budget incrementally by adding and editing rows over time until the budget is officially locked. Every time you save, the Distributed amount and the Remaining balance shown at the top of the screen will automatically update.
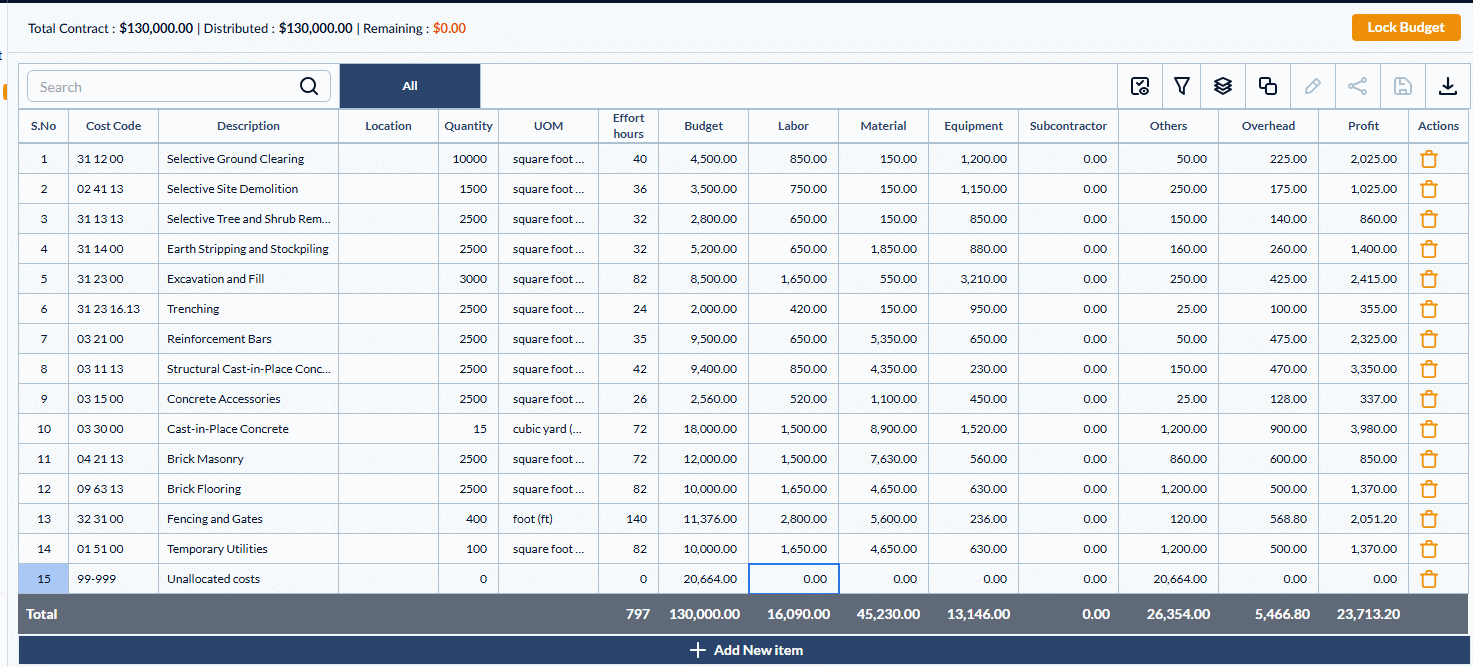
Best Practices for Finalizing Your Budget
- Distribute the Full Amount: Ensure the entire contract amount is fully distributed across your budget line items.
- Create a Reserve: We highly recommend adding a specific line item with the cost code 99-9999 and the label 'Unallocated'. Assign your remaining or reserved funds to this line. Even after the budget is locked, these unallocated funds can be easily shifted to other budget lines to cover evolving project needs. See Budget Adjustments for more details.
Once the budget is fully done, Lock it to take effect and to prevent any unintentended changes.
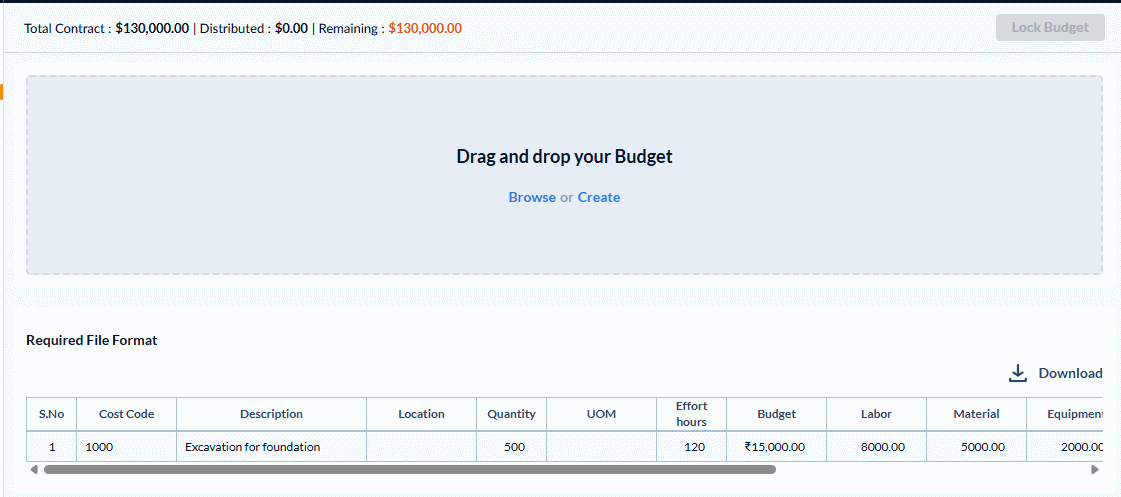
Import Your Budget File
- Open the 'Budget Upload' screen as mentioned above
- Click 'Download' in the 'Budget Upload' screen to obtain the template for the budget in Excel file format. The template file contains the required field headers.
- Enter the values for the line-items as explained below.
Requirements of the budget file
- Each line in the file should contain one budget line item.
- Ensure that each line item contains one task entry with a distinct cost code.
Enter the values for each line-item under the following column headers:
- Cost Code - The code representing the division/category of work as per the cost code list at your company level
- Name - The label of the work/task
- Quantity - The numeric value of the planned amount of work required to be done
- UOM - Units by which the amount of work done is measured
- Effort Hours - The total labor required for completion of the work, in manhours
- Total Cost - Enter the total budget amount for the task item
- Labor - The monetary value of the cost allotted for the wages
- Equipment - The monetary value of the cost allocated for the use of equipment and machinery for the work
- Material - The monetary value of the cost allotted for the materials used for the work
- Others - Miscellaneous expenses like transportation, material handling, fees paid to various vendors, agencies, and more.
- Overhead - Operation costs that the company bears
- Subcontractor - Expenses related to external subcontracts and specialty contractors, skilled artisans, if any.
- Profit - The profit gained by your company from the work item
Save the Excel file with an appropriate name. The next step is to upload the budget file.
Upload the Budget
- Click 'Browse' and navigate to the file you want to upload.
- Alternatively, drag and drop the file into the box
The project budget is added as a draft, with the total contract amount, the total amount included in the budget and the remaining balance at the top.

- Click 'Save' to store your progress. You can develop the budget incrementally by adding and editing rows over time until the budget is officially locked. Every time you save, the Distributed amount and the Remaining balance shown at the top of the screen will automatically update.
- Click 'Add New Item' at the bottom to add more line items manually.
Best Practices for Finalizing Your Budget
- Distribute the Full Amount: Ensure the entire contract amount is fully distributed across your budget line items.
- Create a Reserve: We highly recommend adding a specific line item with the cost code 99-9999 and the label 'Unallocated'. Assign your remaining or reserved funds to this line. Even after the budget is locked, these unallocated funds can be easily shifted to other budget lines to cover evolving project needs. See Budget Adjustments for more details.
Lock the Budget
- Review the project budget and ensure it exhaustively covers all planned work
- Ensure that all line items are assigned to the respective subcontractors
- Click 'Lock Budget' on the top right
Note: The 'Lock' button appears only for saved budget. If you haven't done so, click 'Save' to save the budget.
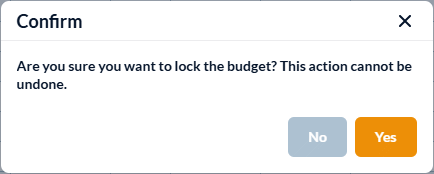
- Click 'Confirm' in the confirmation dialog.

Once your budget is finalized and locked, you can move forward with managing your project's schedule and evolving financials:
- Generate a draft schedule: Automatically transform your budget line items into scheduled tasks. You can use this as a starting point to develop your full Work Breakdown Structure (WBS), complete with individual timelines and task dependencies.
- Secure your baseline: Your baseline budget amount is now officially locked. Any future amendments to your total budget must be made through approved Change Orders.
- Reallocate reserved funds: Use the budget adjustment feature to move money from your reserve funds to other line items as project needs arise, all without changing your overall budget total.
- Adjust cost types: Rebalance the amounts allocated to specific cost types within a single line item, without altering the total value of that specific line.
For detailed instructions on reallocating these funds, please see Budget Adjustments for guidance.
Was this article helpful?
That’s Great!
Thank you for your feedback
Sorry! We couldn't be helpful
Thank you for your feedback
Feedback sent
We appreciate your effort and will try to fix the article