Linarc lets you create a new report from scratch if you do not have an appropriate template to generate the report. You can start with a blank layout and add the necessary sections, data fields, and formatting elements as needed. This gives you complete flexibility to tailor the report to your project's specific requirements. Once created, the custom report can be saved as a template and reused for future reporting needs.
Prerequisite:
Reports pull data directly from the list views of managed aspects such as schedule items, budget line items, RFIs, submittals, and others within their respective modules. To ensure that reports display data relevant to their purpose, it is recommended to create custom views in the module’s list view screens. These custom views can utilize nested filters to refine the selection of items, such as filtering for items with a status of "In Progress" or "Pending" within a specific date range. Once defined, the custom view can be seamlessly imported into the report, ensuring accurate and focused data representation.See the following for help in creating custom views:
- Customize Columns in List Views
- Filter Options in List Views
- Group and Organize Items in a List View
- Manage Custom List Views
To generate on-demand reports
- Ensure that you are in the Reports screen of the Report builder
- Click the app launcher
 and select 'Project' from the drop-down.
 - Click 'Project' on the top and select 'Report Builder' and 'Reports' on the left
- Click the app launcher
- Click the '+Add Report' button at the bottom

- Title - Enter a label for the report. This label will serve as the title of the report (Max100 characters).
- Description - Enter a short description of the report.
- Click OK to save the report draft.
A blank report sheet opens:

- Step 1 - Page Layout– Configure page headers and footers, add a cover page, and customize the overall document structure.
- Step 2 - Report Elements– Build the report by creating sections, adding titles, placing report blocks from the desired modules, inserting pictures, and more.
After adding the necessary elements, you can generate the report from the template immediately
Click the
 at the top-right
The system generates a PDF version of the report, incorporating the most up-to-date data for all included items. The process typically takes around 30 seconds. You can Download the Report directly to your local drive or linarc's cloud-based project file repository.
Click
 button to save the elements as a template for future use.
Step 1 - Set up Page Layout
The 'Template Editor' gives you full control to customize the appearance of the content with a variety of formatting tools. You can insert images, links, tables, and horizontal lines, as well as adjust visual styles to match your organization’s branding. The Format menu provides options ranging from text colors to background customization for your template. You can also use the formatting tools at the top of the editor to format the added text.
- Click 'Insert' to embed images, add tables, hyperlinks, line breaks, etc
- Click 'Format' menus at the top of the editor to explore available options, or quickly apply changes to the inserted text using the formatting tools in the toolbar.
Set up Page Margins
You can customize the margins of the pages to align with your organization’s formatting preferences.
Even Margins – Enter the margin space (in pixels) that applies to all four sides of the pages equally.

Custom Margins – Enter specific margin spaces (in pixels) for the top, bottom, left, and right sides.

Insert Dynamic Fields
The 'Dynamic Selections' pane on the right lets you add generic content blocks to your template. Linarc provides the following elements to be added to your template.
- Click the right arrow beside a category to expand the items under that category
- Click on the location inside the selected section in the middle pane, and click the '+' icon on the right of the element to add it to your template.
- Company Details: These fields automatically pull information about the contractor company associated with the document.
- Company Name – The registered legal name of the company.
- Address – The official business address.
- Created On – The date the company profile was registered on Linarc.
- Contact Number – The primary company phone number.
- Project Details: Fields that reference the information about the project.
- Job ID – The unique identifier assigned to the project by your company.
- Project Name – The name of the project.
- Site Location – The address or location of the construction site.
- Created By – The name of the user who created the project on Linarc. Typically, the general contractor.
- Role Type – The role of the creator in the company they are an employee of.
- Project Status – The current state of the project
- Project Type – The category or type of project, such as Commercial, Residential, or Infrastructure.
- Employee Details: These fields automatically pull information about the member associated with the document.
- Employee Name – The team member who generates the report
- Employee Email – The member's official email address.
- Employee Phone – The member's contact phone number.
- Full Name – The first name, middle name, and last name of the member.
- Role Name – The designation or role assigned to the member (e.g., Project Manager).
- Default Details: General fields available across all templates, such as creation date, page number, document title, and other commonly used placeholders.
- Date – The creation date of the report.
- Current Page Number – Displays the number of the current page in the report.
- Total Page Number – Displays the total number of pages in the report.
Add Header and Footer
Placed only on the first page of the document, typically used for details like company name, logo, or project title.
- Click the '+' icon of the required elements on the right pane to add them in your template. You can also do the following directly on the template editor:
- Text – Insert a single line of text, such as the report title, labels, or notes.
- Image – Add images, such as your organization's logo.
- Date – Displays the date the report was generated.
- Table- Insert a table ( a row/ a column) to place text or images at a required position. You can also use tables without borders to place logo images and details like company name, address, etc., at desired positions by using dynamic fields.
Add Subheader and SubFooter
Applied to all subsequent pages of the document, ensuring consistent information such as page numbers, dates, or project details throughout the document.
- Click the '+' icon of the required elements on the right pane to add them in your template. You can also do the following directly on the template editor:
- Text – Insert a single line of text, such as the report title, labels, or notes.
- Image – Add images, such as your organization's logo.
- Page Number – Automatically displays the current page number.
- Date – Displays the date the report was generated.
- Table- Insert table (a row/column) to place text or images at a required position
- Dynamic Fields
Add a Cover Page
Note on Cover Page:
The system supports adding a custom splash page to the Report PDF file generated from the template. You can create a personalized cover page as a PDF file and name it as 'cover_page.pdf.' As a prerequisite, ensure you already have a cover page image with the name 'cover_page.pdf.'
- Click '+' button next to the 'Upload Cover Page' in the left pane
- Select whether you are inserting the cover page PDF file from your device or from the project's file storage.
Step 2 - Report Elements
- Select 'Body Section' on the left
- Add elements to the template by dragging and dropping them from the right to the main screen to complete your preferred layout, as explained below.
Use the links below to jump to the section you need help with:
- Add Headings and Text blocks
- Add Image and File Attachments
- Add Report Tables
- Add Element Groups
- Add Page Breaks
Add Headings and Text blocks
- Click and drag the 'Text box' element into the report area.

- Enter your heading or text
- Use the format options at the top to apply a text style, font color, background, etc. You can also insert tables and hyperlinks.
Add Image and File Attachments
- Click and drag the 'Attachment' element into the report area.

- Select whether you are inserting an image or PDF file from your device or from the project's file storage, or inserting a photo from the project image feeds. or from the project's cloud storage.
Note: The image file is embedded at the designated location within the report, as per your insertion. The PDF files are appended at the end of the report for easy reference.
To upload a local file
- Select 'Upload' on the left
- Click Browse and navigate to the file
- Alternatively, drag and drop the file into the box
To upload a file from the project's file storage
- Select the drive type, whether the company drive, project drive or the system drive from which you want to upload the file
- Navigate to the folder in the folder tree shown on the right
- Select the file
- Use the 'Ctrl' or 'Shift' keys on your keyboard to select multiple files at once
- Click 'OK'
An element group block gets added with the following elements:
- The heading "Attachment"
- The attached image or the file
The illustration below shows an image uploaded from the device's local storage:

Add Report Tables
Reminder: Before proceeding, ensure that a custom view with the appropriate filters applied to the module's list view is already available. This helps focus on the specific data to be reflected from the module in the report. You can select from the custom views you have created or those shared with you.
- Open the category of the module from which you want to include the report table, from the 'Report Elements.'
- Click and drag the module into the report area.
- Select the list type, then the custom view of the list to include in the report
An element group block is inserted at the designated location, containing two key elements:
- Section Title: Displays the module name from which the data is sourced.
- Report Table: Provides a list view presented as a table, displaying the current data from the module.

You can rearrange or remove elements within the block as needed to suit your layout preferences.
- Repeat the process to more report blocks as required.
Add Element Groups
The template offers the flexibility to insert custom element group blocks as needed. These blocks can contain elements of any type, arranged in any order, and positioned anywhere within the report. The block keeps all its elements intact, enabling efficient batch actions. For instance, you can move the entire block to a new location without the hassle of relocating each element individually.
To insert an element group block
- Drag the 'Group' option and drop it at the desired location in the template.
A blank group block will be added, visually indicated by a dotted-line border.
- Insert individual elements into the group one by one, following the instructions provided earlier.
- To rearrange elements within the block, hover your mouse over the element and drag the ellipses at the top-left corner of each element to the desired position.
Add Page Breaks
You can insert page breaks where needed, to maintain an organized and well-structured report. This ensures that tables remain clear and easy to read.
- Drag and drop the 'Page Break' element to the desired location within the report area.
Change Page Orientation
You can apply page orientation as needed by simply dragging and dropping the 'Landscape' or 'Portrait' element from the right pane.You can adjust the orientation at any point while designing your template. This is useful when switching between wide tables, charts, or standard text-based pages.
- Drag the required orientation element into the editor to apply it.
Download On-Demand Report
- Click theat the top-right if you haven't already. The system generates a PDF version of the report, incorporating the most up-to-date data for all included items.
The confirmation dialog appears with your signature. If you haven't registered your signature to your user profile yet, you will be prompted to do so.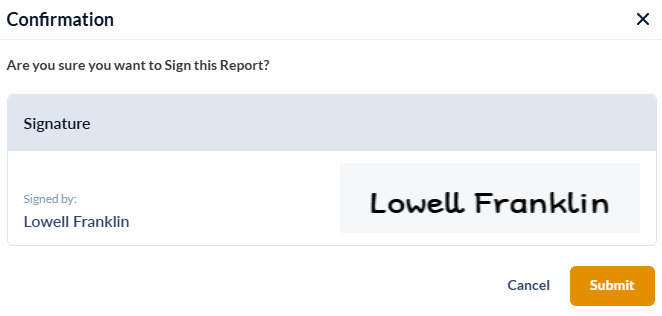
- Click 'Submit' to proceed
- Click
 to download after around 30 secs to open the 'Downloads' pane.

The newly created PDF will appear at the top of the list, ensuring easy access even if multiple reports have been generated previously.
- Click
 to open the file in a new browser tab.
 - Click to download it.
The 'Download Options' pop-up allows you to:
- Download and save a copy of the report on your device
- Save the report in the project's file repository for sharing with other team members

Download the report on your device
- Click the 'Direct Download' button to save the file directly to your device.
Save on the project's file storage
You can also save the file on Linarc's cloud-based project file repository. This allows you to share it with other team members. The folder's access permissions determine which team members can view or edit the file.
- Company Drive - Share with the project team members from your organization:
- Select the folder that corresponds to your company name
- Navigate to the desired folder and click 'Save.'
- Project Drive - Share with the construction team members from any stakeholder organization:
- Select 'Project Drive'.
- Navigate to the appropriate folder and click 'Save.'
The report is auto-shared with the team members who have access to the folder.
Was this article helpful?
That’s Great!
Thank you for your feedback
Sorry! We couldn't be helpful
Thank you for your feedback
Feedback sent
We appreciate your effort and will try to fix the article