Depending on the creator and the workflow applied, an RFI can be routed to you for review before forwarding to the next step, typically getting the answer.
An RFI can be forwarded to you for review in the following scenarios:
- The RFI is created by your field staff, like foremen, from their mobile application or those created/forwarded by other stakeholders for initial review and setting up a workflow. See Setup a workflow for an RFI to learn more.
- You have been assigned as the reviewer in the workflow of the RFI.
This article explains how to review an RFI if your company is assigned as the reviewer for it in the workflow. All project team members with access to the RFI module can review the RFI and add their response.
Review an RFI
You will receive a notification whenever an RFI is forwarded to you for review.
- Click the notification to open the RFI
- Alternatively:
- Click the main menu at the top-left
- Click 'RFI' under 'Documents' and click 'Boards' on the left
- The screen shows the project RFIs under different stages. The items that are awaiting your action are indicated with the tag 'You' in blue.
- Click on the RFI card
The example below shows an RFI assigned to the GC for review.
- Click the Q&A tab. From this screen, you can:
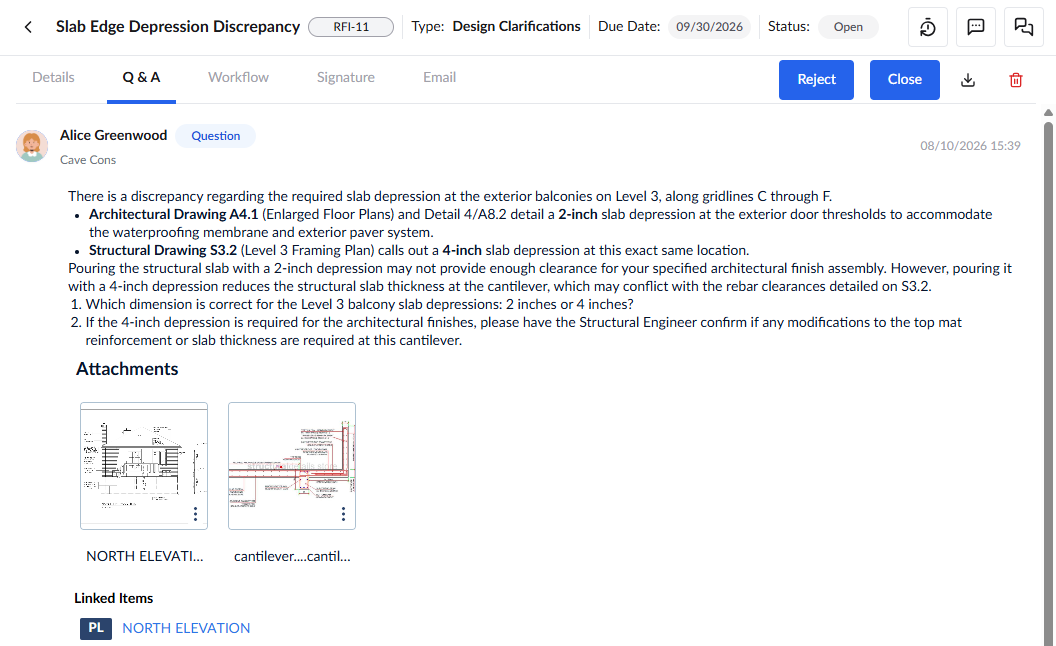
Note: If the RFI requires contribution from a stakeholder not included in the Linarc's project directory, you can email the PDF version of the RFI to get their response. Once the response is received, you can incorporate it into the RFI and proceed with your acton. See Email an RFI to External Stakeholders to learn more.
- You can check the current status of the RFI by clicking the 'Workflow' tab.
- Once you are done with the review, click
 to forward the RFI to the next party in the workflow for their action
Review the questions and responses
The 'Q&A' tab shows the question and the answers provided by the responders (if already answered).
The question and its responses are shown in chronological order.
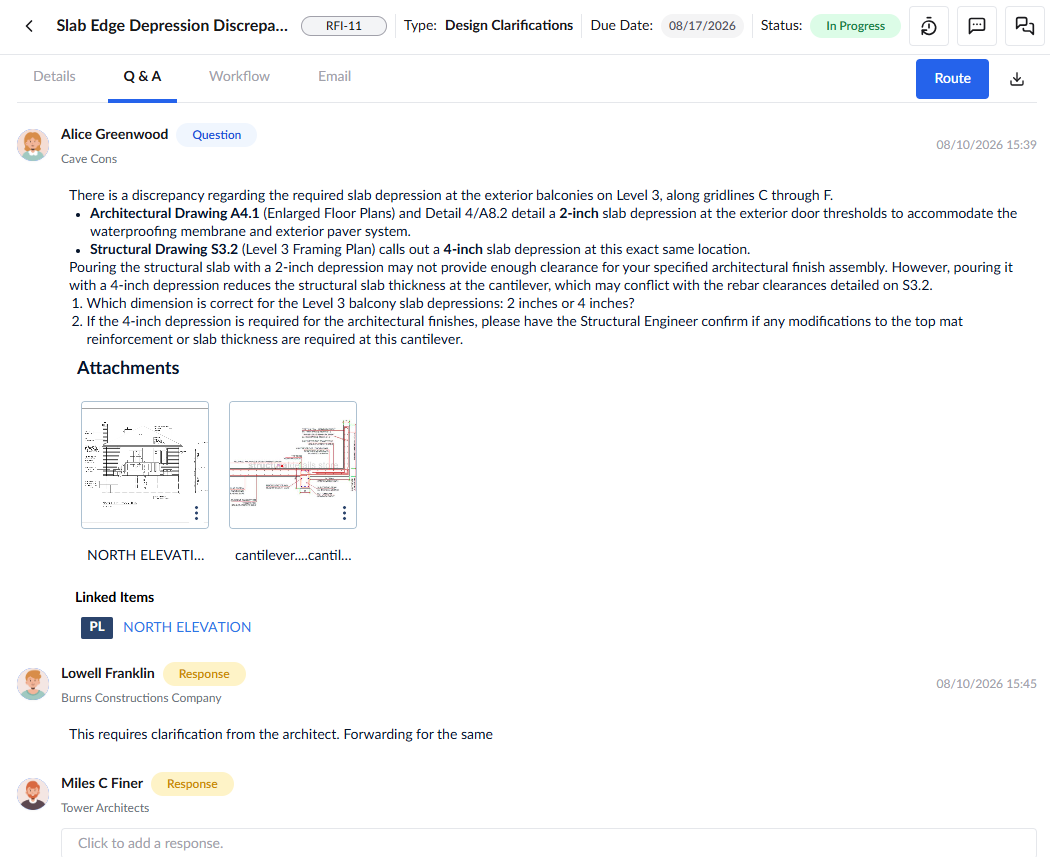
Under each step, all the responses made by the members of the responsible company are shown as separate boxes.
Attachments:
- Click on the thumbnail to open it
- Hover your mouse over an attachment for the following options:
- Click
 to open it on a new browser tab.
 - Click
 to download it to your device.
 - Click
 to remove it from the question.
- Click
Add your response
- Click inside the answer text box to enter your review notes or remarks as your response
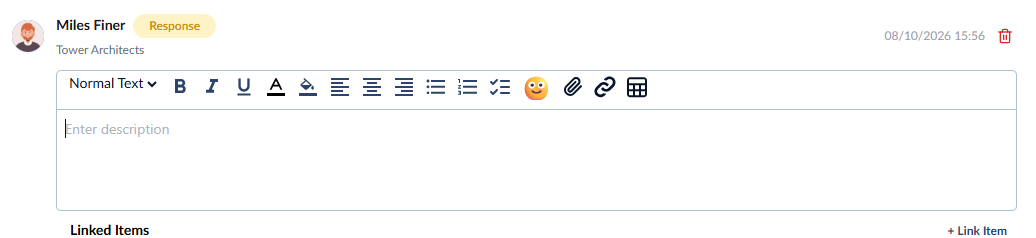
- Enter your response in the text box.
- Use the tools at the top to format your text and add emojis, insert hyperlinks, tables, etc.
- You can add:
Add Links to other project documents (Optional)
- Click '+Link Item' to attach links to items like Submittals, RFIs, plan sheets, plan markups, scheduled tasks, punchlist items, etc.,
- Choose the type of item from the drop-down at the top.
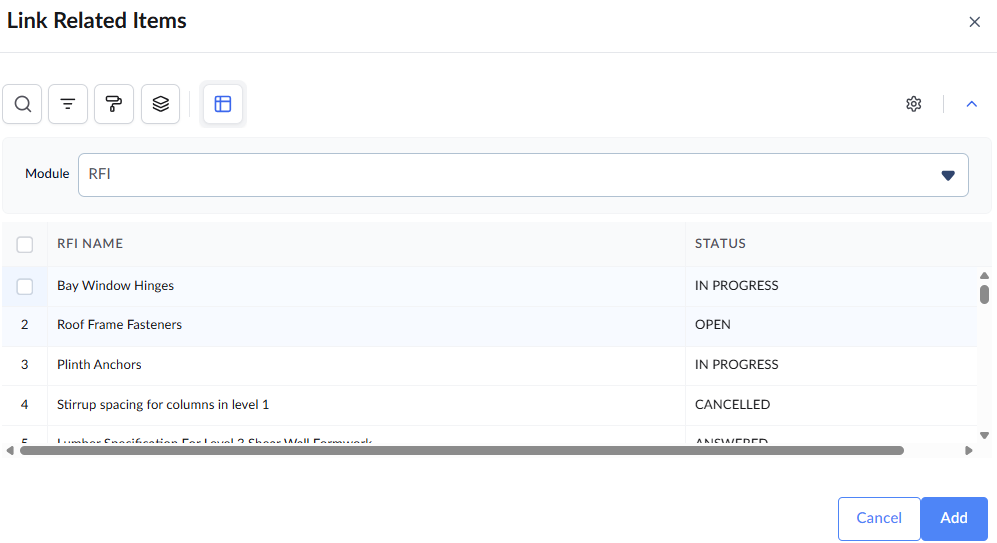
- Select the item to link.
- Click 'Add'.
- Repeat the process to link more items as required.
Notes on Plan drawings and plan markups:
You can link plan drawings with or without markups or already existing markups to your response. The linked plan drawings are also added as image attachments automatically.
Plan drawings with or without markups:
- Choose 'Plans' in the link items drop-down menu.
- The plan drawings added for the project are shown:
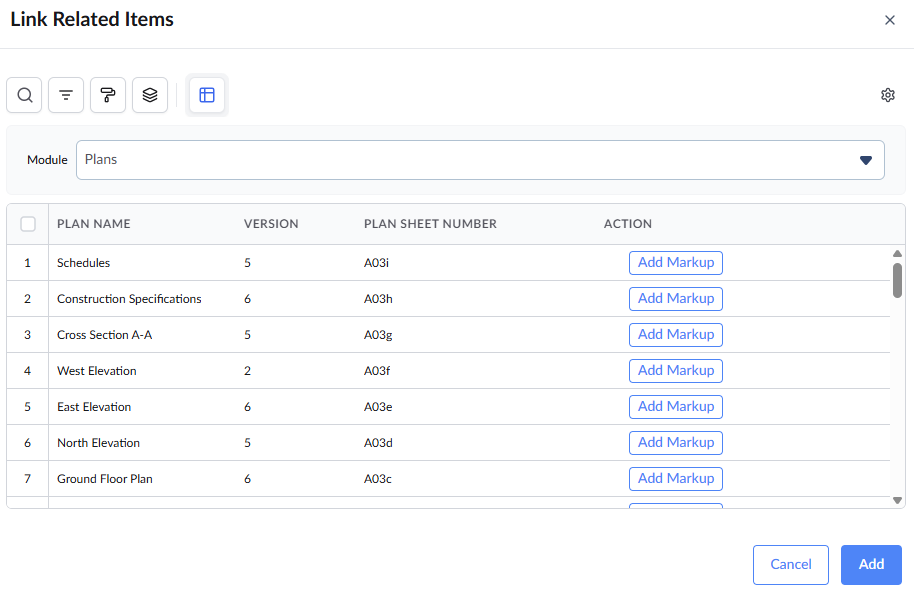
- To add a plan sheet, select the plan you want to use by clicking the check box on its left and clicking the 'Add' button.
- To create a new markup to illustrate your change order, click 'Add markup' on the left. See Markups for guidance on creating different types of markups on the plan drawing.
- Enter a name for the markup and click 'Ok' to add the newly created markup to the change order.
- Repeat the process to add more plan drawings.
Plan markups
- Choose 'Plan Markups' in the link items drop-down menu.
- The list of plan markups added to various plan drawings for the project is shown.
- Select the markup and click the 'Add button'.
- Repeat the process to add more markups.
Add Supporting Attachments
- Click
 on the top right to add attachments like photos, images, and/or other document files to your RFI:

- To attach an item from your device, select 'Upload' and drag and drop the file to the right pane
- Alternatively, click 'Browse' and navigate to the required file
- To attach an item from the project's file repository, choose an option on the left from Company Drive, Project Drive, or System Drive
- Navigate to the item you want to upload
- Repeat the process to add more images or documents.
- Once you are done with the attachments and links, your response is saved automatically.
- Click inside the text box to edit your response at any time. Once you have routed an RFI, you cannot edit it.
- Click the 'Delete' icon at the right end to remove the response and add a new one.
Note:
You cannot edit or remove your response once the RFI is routed to the next step.
- Click 'Route' at the top to forward the RFI to the next step as per the designated workflow if you are happy with the flow. To route the RFI to a different party, add ad-hoc steps to do so.
Add your comments
The comments pane on the right of the 'Q&A' tab opens by default. It allows you to add your comments on the RFI
- Click the
 icon on the top right if the comments pane is closed
 - Enter your comment in the comment box and click
 icon
icon
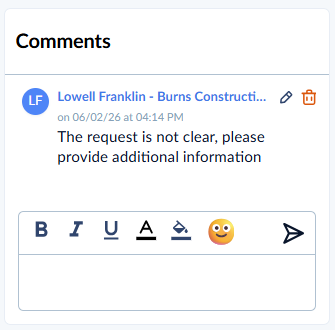
Your comment has been added.
- Click the 'Pencil' icon at the right to edit the comment
- Click the 'Delete' icon to delete the comment at any time during the life cycle of the RFI
Dynamically assign the RFI (Optional)
The ad-hoc workflow feature allows you to dynamically assign the RFI to stakeholders on the go, deviating from the primary workflow. This is useful if you need clarification or a review of your responses from them. Once the parties in the ad-hoc workflow complete their activities, the RFI returns to you and proceeds further as per the primary workflow.
- Only the assignee of the current workflow step (the ball-in-court person) can add ad-hoc workflow steps
- If the user wants to add more steps but has clicked the 'Route' button in the current step, the item moves to the next step per the primary workflow. Hence, they cannot add more workflow steps
- You can add ad-hoc workflow steps before or after you add your response for the current step
To add ad-hoc workflow steps
- Click the 'Add Steps' button
- Select 'Sequential' or 'Parallel' from the options to add sequential or consecutive steps respectively
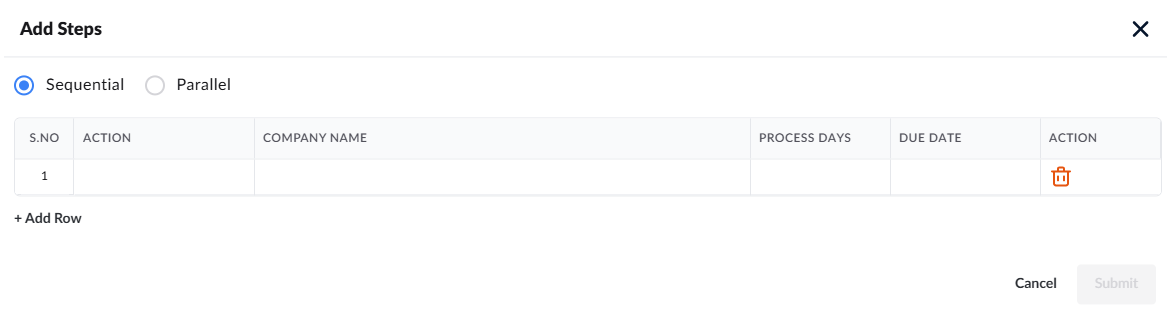
- Specify the next action, the company name, and the allowed days for the step
- Click 'Add Row' and repeat the process to add more steps
- Click 'Submit'
The RFI automatically moves to the first step in the ad-hoc workflow. The members from the respective company are notified about the assignment. The workflow of the RFI is also auto-updated with the new steps. You can view the new one under the 'Workflow' tab.
See Assign RFI manually to learn more.
Add Watchers (optional)
You can add people from your company as watchers of the RFI and keep them updated on every progress state of the RFI. The watchers can see the activity log and workflow of the RFI.
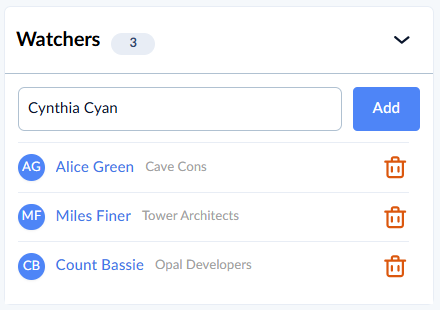 Ensure you are in the details/workflow tab. You can find the 'Watchers' pane on the bottom right. If not,
 - Click the
 icon to open the Activity Log/ Watchers pane
 - Start typing the name of the person in the text field under 'Watchers' and choose from the options
- Click 'Add'
- Repeat the process to add more watchers
- Once you are done with the review, click
 to forward the RFI to the next party in the workflow for their action
Was this article helpful?
That’s Great!
Thank you for your feedback
Sorry! We couldn't be helpful
Thank you for your feedback
Feedback sent
We appreciate your effort and will try to fix the article