QuickBooks Desktop runs locally on your Windows machine and cannot be accessed directly over the internet. To establish communication, QuickBooks Web Connector (QBWC) acts as an intermediary messenger between Linarc and QuickBooks Desktop. It ensures that your accounting data remains safe on your computer while allowing Linarc to send and receive updates securely.
After installing the QuickBooks Web Connector, you need to establish a secure connection between Linarc and QuickBooks Desktop.
The connection chain works in a few simple steps:
- Credentials- The Linarc Admin Portal generates a
.qwcconfiguration file and a unique password. - Polling- QBWC uses these credentials to regularly contact (poll) the Linarc backend on a set schedule.
- Execution- QBWC receives pending requests from Linarc, opens QuickBooks Desktop locally to execute the changes, and sends the results back.
Purpose of the .qwc File
The .qwc (QuickBooks Web Connector) file is a configuration file generated specifically for your Linarc account. It contains:
- Company Identifier (<UserName>) - Your unique Linarc company ID (cmp_id) embedded inside the file.
- System Identifiers (<OwnerID> and <FileID>) - Unique security codes derived from your company ID.
Downloading and importing this file into QBWC registers Linarc as an authorized web service and permanently pairs your QuickBooks Desktop company file with your specific Linarc account.
Follow these steps to establish the connection:
- Step 1 – Download Connection File and Password
- Step 2 – Add Application to QuickBooks Web Connector
- Step 3 – Authorize Application Permissions
- Step 4 – Run Initial Connection Test
Step 1 – Download Connection File and Password
Log in to the Linarc Admin Portal to retrieve your connection credentials
- Click 'Integrations' at the top and select 'ERP' from the left menu
- Go to the 'QuickBooks integration' setup page and click 'Download the connection file' to save the linarc.qwc file to your local drive.
- Click 'Generate new password' and copy the generated password to your clipboard.
Step 2 – Add Application to QuickBooks Web Connector
- Ensure QuickBooks Desktop is open with your company file loaded.
- Open the 'QuickBooks Web Connector'
- Click 'File' from the top menu bar and select 'Add Application'
Alternatively,
- Click the 'Add Application' button at the bottom
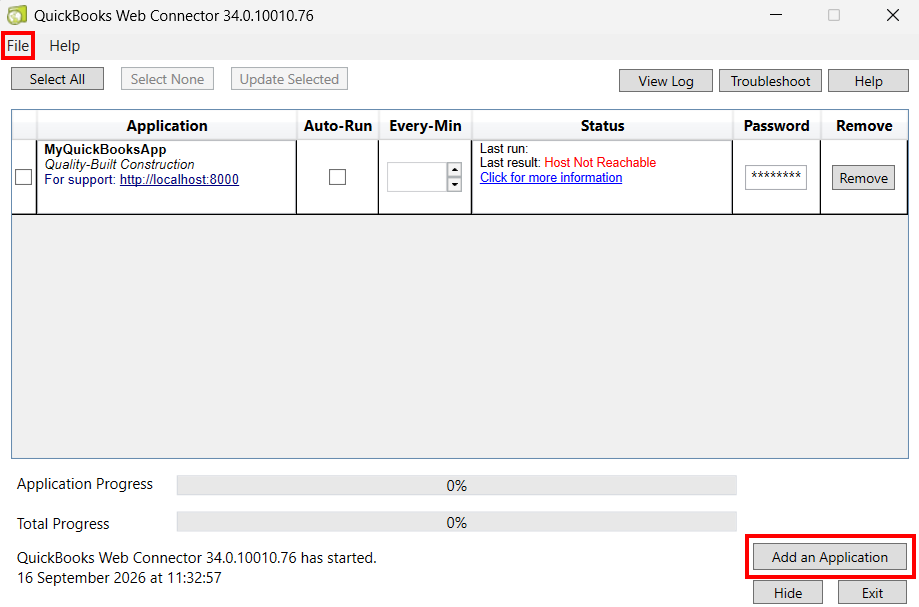
- Browse your local storage, select the linarc.qwc file you downloaded in Step 1, and click 'Open.'
Once you select the .qwc file, QuickBooks Desktop will display a series of security dialog boxes to confirm access permissions.
Step 3 – Authorize Application Permissions
The Application permission window will open, stating that Linarc is requesting access to your QuickBooks company file.
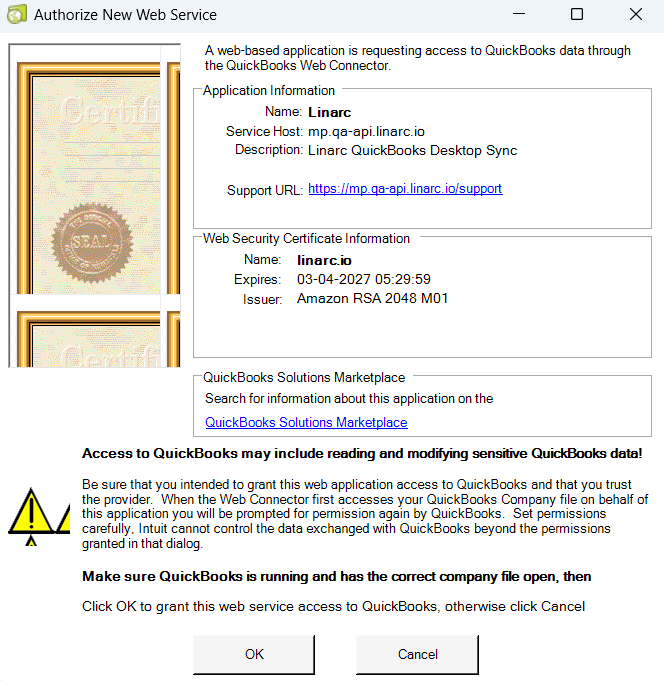
- Click 'OK' to grant access.
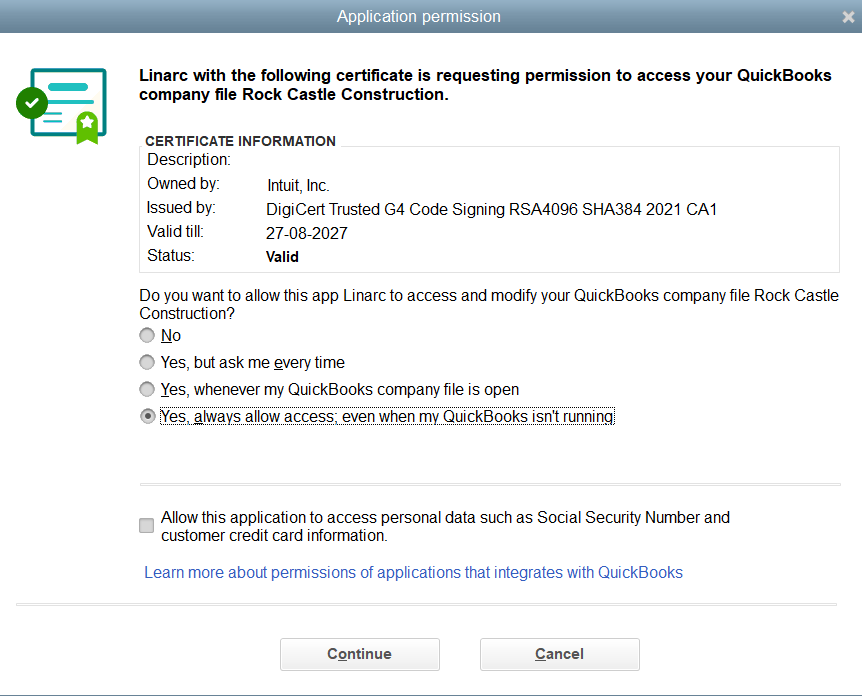
- Select the option "Yes, always allow access; even when my QuickBooks isn't running". The Application permission confirmation screen will display a summary of the permissions given.
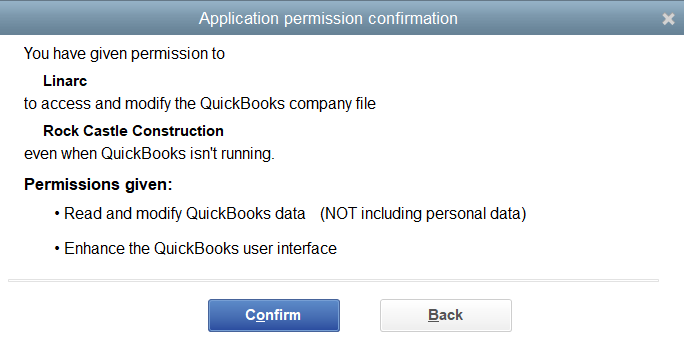
- Click 'Confirm' to confirm your selection and click 'Continue' to proceed. The Linarc application will now appear in your list of connected applications with an empty 'Password' field
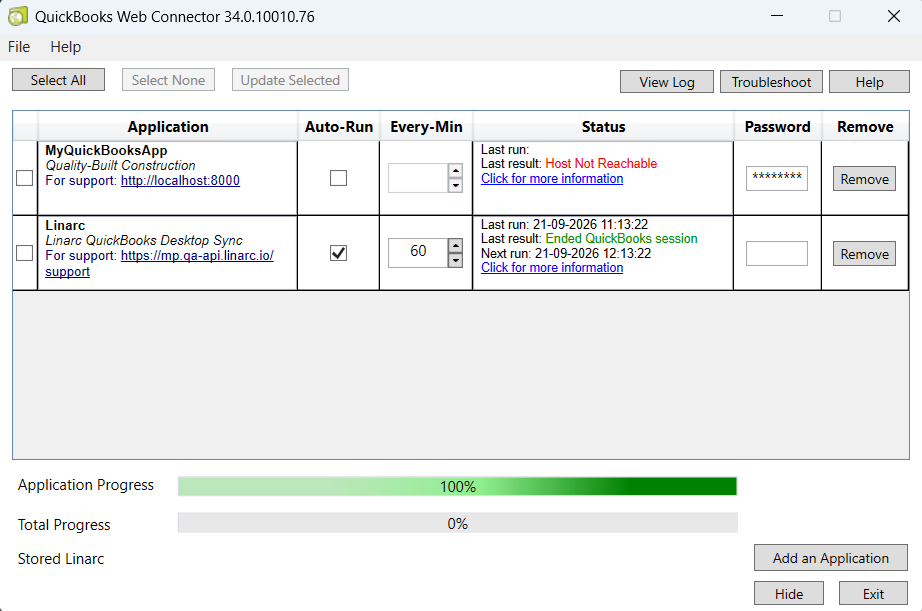
- Adjust the value in the 'Every-Min' column within QuickBooks Web Connector to set how frequently QuickBooks Desktop automatically polls Linarc for updates. This interval defaults to 60 minutes, but you can change it to suit your operational needs
- Paste the password you generated from the Linarc Admin Portal into the 'Password' field on the Linarc row. Press Enter or click outside the box. A prompt will appear to confirm your action.
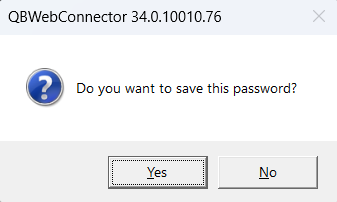
- Click 'Yes' to proceed.
Step 4 – Run Initial Connection Test
- Select the checkbox on the far-left side of the Linarc row.
- Click the 'Update Selected' button at the top.
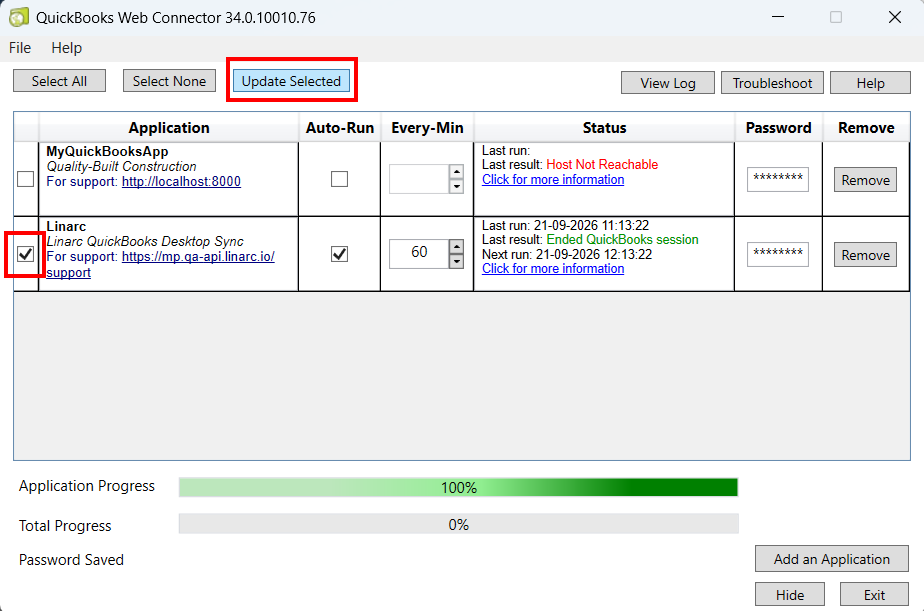
- The Web Connector will communicate with Linarc. You will see status updates such as "Received request from application" while the progress bar advances.
- Upon completion, the status will show Last result: OK
Your Linarc account is now successfully integrated with QuickBooks Desktop!
Next Steps:
- Chart of Accounts: Specify the income, expense, and liability accounts in your QuickBooks Chart of Accounts that Linarc should use for journal entries.
- Data Mapping: Specify the objects and entities you want to synchronize between Linarc and QuickBooks.
- For detailed guidance, see QBD - Configure Account & Map Fields.
Was this article helpful?
That’s Great!
Thank you for your feedback
Sorry! We couldn't be helpful
Thank you for your feedback
Feedback sent
We appreciate your effort and will try to fix the article